EasyManua.ls Logo

JVC XM-EX90 User Manual

JVC XM-EX90
60 pages
To Next Page IconTo Next Page
Page #1 background imageLoading...
Page #1 background image
English
1 XM-EX90
MINIDISC RECORDER
For Customer Use:
Enter below the Model No. and Serial
No. which are located either on the rear,
bottom or side of the cabinet. Retain this
information for future reference.
Model No.
Serial No.
LVT0097-001A
[J]
1
2
3
4
5
67
89
10
+10
CLOCK
/ TIMER
FM MODE
/ MUTING
SLEEP
SET CANCEL
REPEAT CD 1 CD 2 CD 3
DOWN
PLAY MODE
REPEAT
S.A.BASS
FADE
MUTING
TREBLEBASS BALANCE – / L + / R
DISPLAY
TRACK
MARKING
PLAY MODE
UP
CD CONTROL
MD CONTROL
TAPE CONTROL
VOLUME
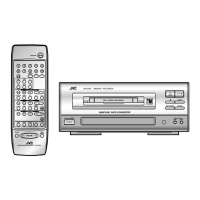
RM-SEEX90MU REMOTE CONTROL
TUNER AUX
POWER
XM-EX90 MINIDISC RECORDER
INPUT
CD RECREC PAUSE
/CANCEL
SAMPLING RATE CONVERTER
STANDBY
REC LEVEL
DISC LOADING MECHANISM
POWER
INSTRUCTIONS
XM-EX90
Other manuals for JVC XM-EX90

Questions and Answers:

JVC XM-EX90 Specifications

General IconGeneral
LaserSemiconductor laser
Sampling Frequency44.1 kHz
DisplayLCD
Recording FormatMiniDisc
Playback FormatMiniDisc
CodingATRAC
Digital InputOptical
Digital OutputOptical
Analog InputLine-in
Analog OutputLine-out
Headphone OutputYes
Wow and FlutterBelow measurable limit

Summary

Safety Warnings and Cautions

Electrical Shock and Laser Safety

Warnings about not opening the unit and laser product safety precautions.

Welcome and Important Cautions

Installation and Placement Cautions

Guidance on unit installation location, ventilation, and environmental conditions.

Safe Use and Handling Guidelines

Precautions for moisture, dust, temperature, foreign matter, and cabinet care.

Remote Control Unit Overview

Control Panel Layouts

Shows the layout of the remote control's standard and editing button panels.

Remote Control Button Functions

Detailed Button Operations

Explains functions of POWER, numeric keys, MD CONTROL, editing, and character input buttons.

System Setup

System Connections

Component Connectivity

Details connections to amplifier/tuner, CD player, and Compu Link.

Remote Control Operation Basics

Advanced Remote Control Usage

MD Playback Operations

Basic MD Playback Procedure

Step-by-step guide for loading an MD and starting playback.

MD Playback Controls

Repeat Playback Modes

Program Playback

Random Playback

Recording Operations

Basic MD Recording

Step-by-step guide for recording audio onto an MD from various sources.

Recording Control and Level Adjustment

Analog Input Level Adjustment

Procedure for setting the optimal analog input level for recording.

Track Marking for Recording

Automatic and Manual Track Marking

Methods for marking track beginnings automatically or manually during recording.

CD Recording Methods

Digital CD Recording

Simple one-touch digital recording from a CD player.

Radio and Tape Recording

MD Editing Functions Overview

Core Editing Operations

Introduction to track division, joining, moving, and erasing functions.

Advanced Editing and Title Assignment

Detailed Track Division (DIVIDE)

Track Division Refinement and Confirmation

Detailed Track Joining (JOIN)

Track Joining Refinement and Confirmation

Detailed Track Moving (MOVE)

Track Moving Refinement and Confirmation

Detailed Track Erasing (ERASE)

Track Erasing Refinement and Confirmation

Erasing All Tracks (ALL ERASE)

All Tracks Erasing Confirmation

Assigning Titles to MD and Tracks

Title Input and Confirmation

Inputting Title Characters

Detailed steps for selecting character case and inputting title text.

Assigning Titles During Playback or Recording

Remote Control of Other Components

Detailed Amplifier/Tuner Remote Control

Amplifier/Tuner Remote Control Functions

CD Player and Cassette Deck Remote Control

Digital Copying Rules

MD Error Messages and Treatments

Handling and Caring for MDs

MD Handling Precautions and Maintenance

Guidelines for maintaining MD quality, installation, and periodic cleaning.

Troubleshooting Guide