7
OPERATION
1. After the detector has been assembled, for underwater or land use,
take it outside to familiarize yourself with its operation. Position it so
the coil is up off the ground, and away from all metals.
2. Turn the detector on by turning the Selection Switch to BATT CHECK
position. The meter should read .8 to 1. The LEAK LED should be lit
indicating the leak detection circuitry is working.
3. Turn the Selection Switch to LOW position. Use the Zero Adjust
knob to tune the needle below .2 (audio stops) on the meter scale. You
are ready to start detection. CAUTION - Do Not Overturn Control
Knobs.
4. Locate a “clean area” of ground (no readings) and place different sizes
of metal objects on the ground and practice detecting and pinpointing
them.
NOTE:
If you get too close to a metal object, it causes the meter to peg full
scale. The meter may remain pegged for a few seconds even after you
move away from the target.
When this happens, lift the coil away from the ground (increase the
distance to the target) and make another pass to pinpoint the target.
The maximum meter reading will occur when the target is directly
below the center of coil.
5. To get even greater sensitivity with your PULSE 8X, select MED sen-
sitivity. Use the zero adjust knob to tune the needle between .1 and .2
on the meter scale.
6. To get maximum sensitivity, select HI. Use the Zero Adjust knob to
adjust the needle between .1 and .2.
7. Due to the high sensitivity of the PULSE 8X, pinpointing the target
when it is close to the surface can sometimes be difficult. When this
occurs, reduce the sensitivity, using the Selection Switch, to the low-
est position possible while still allowing detection of the target. Next,
OPTIONAL UNDERWATER SETUP
Remove the Electronics Housing from the Arm Rest Handle by removing
the (2) 10-32 x 1 1/4" thumb screws.
The Electronics Housing can now be worn on the waist by sliding the
belt through the (2) belt holders on the underside of the housing.
ASSEMBLY FOR LAND USE
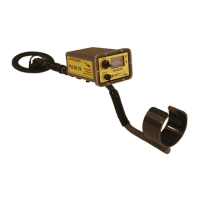
Your detector comes with an aluminum land handle that was designed as
a result of extensive customer feedback. The land handle is constructed
of heavy-gauge aluminum with adjustable coil shaft and arm support.
Both shafts adjust quickly with a small thumb screw. O-rings added to
the arm support shaft eliminate play giving the handle a solid feel. The
electronics housing can be worn around the waist/chest or it can be
mounted on the handle shaft.
- Attach the coil to the forked end of the aluminum land handle with
the 3/8 x 1 1/2" black nylon bolt and wing nut.
For belt mount:
- Slide the yellow belt through the belt holders on the underside of
the electronics housing. Wear the belt around the waist or chest.
For pole mount:
- Attach electronic housing to pole handle using
10-32 x 1 1/2" thumb screws.
4
LAND HANDLE
Thumbscrews

 Loading...