10
2
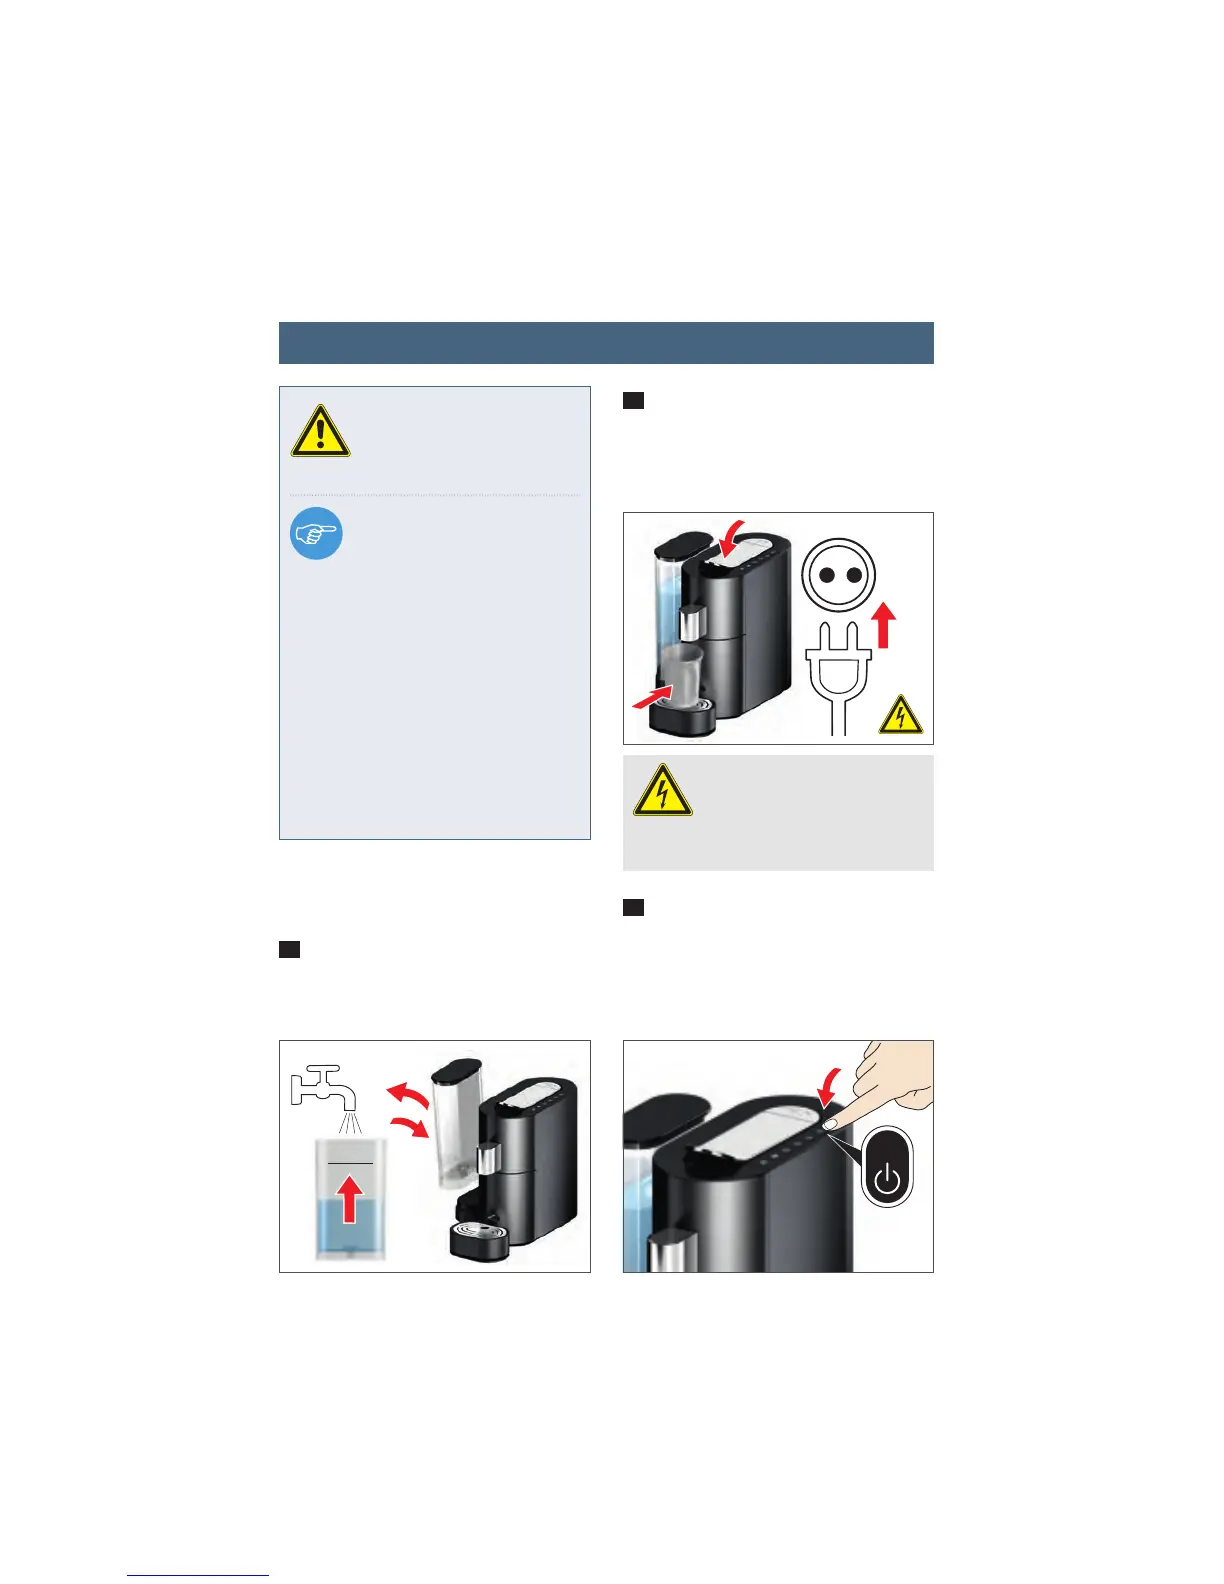
Connect the appliance to the power
supply, press the lever right down to the
bottom and place a collecting container
under the spout.
3
Switch the appliance on by pressing
the ON/OFF button. The appliance will
heat up, all button symbols will blink
(see Figure 3b). Once the appliance has
heated up, only the rinsing button will be
illuminated.
1
Remove the water tank, fill it up with
fresh drinking water and replace it in the
appliance.
SAFETY INFORMATION
Before initial start-up, it is
imperative that you read the
safety information on pages 5-7.
NOTE
1. If the appliance has been
subjected to very cold tem-
peratures or frost, please wait at least
three hours before switching it on. Al-
low the appliance to warm up to room
temperature first - malfunction hazard.
2. We recommend the use of a water
filter for long and optimum coffee en-
joyment. Please insert this only after
the initial start-up. Please read the
instructions on pages 12/13 for this
purpose.
WARNING
Before initial start-up, please
ensure that the mains voltage
complies with that stated on the
nameplate (underside of appliance).
1
On
3a
2
Initial start-up