05
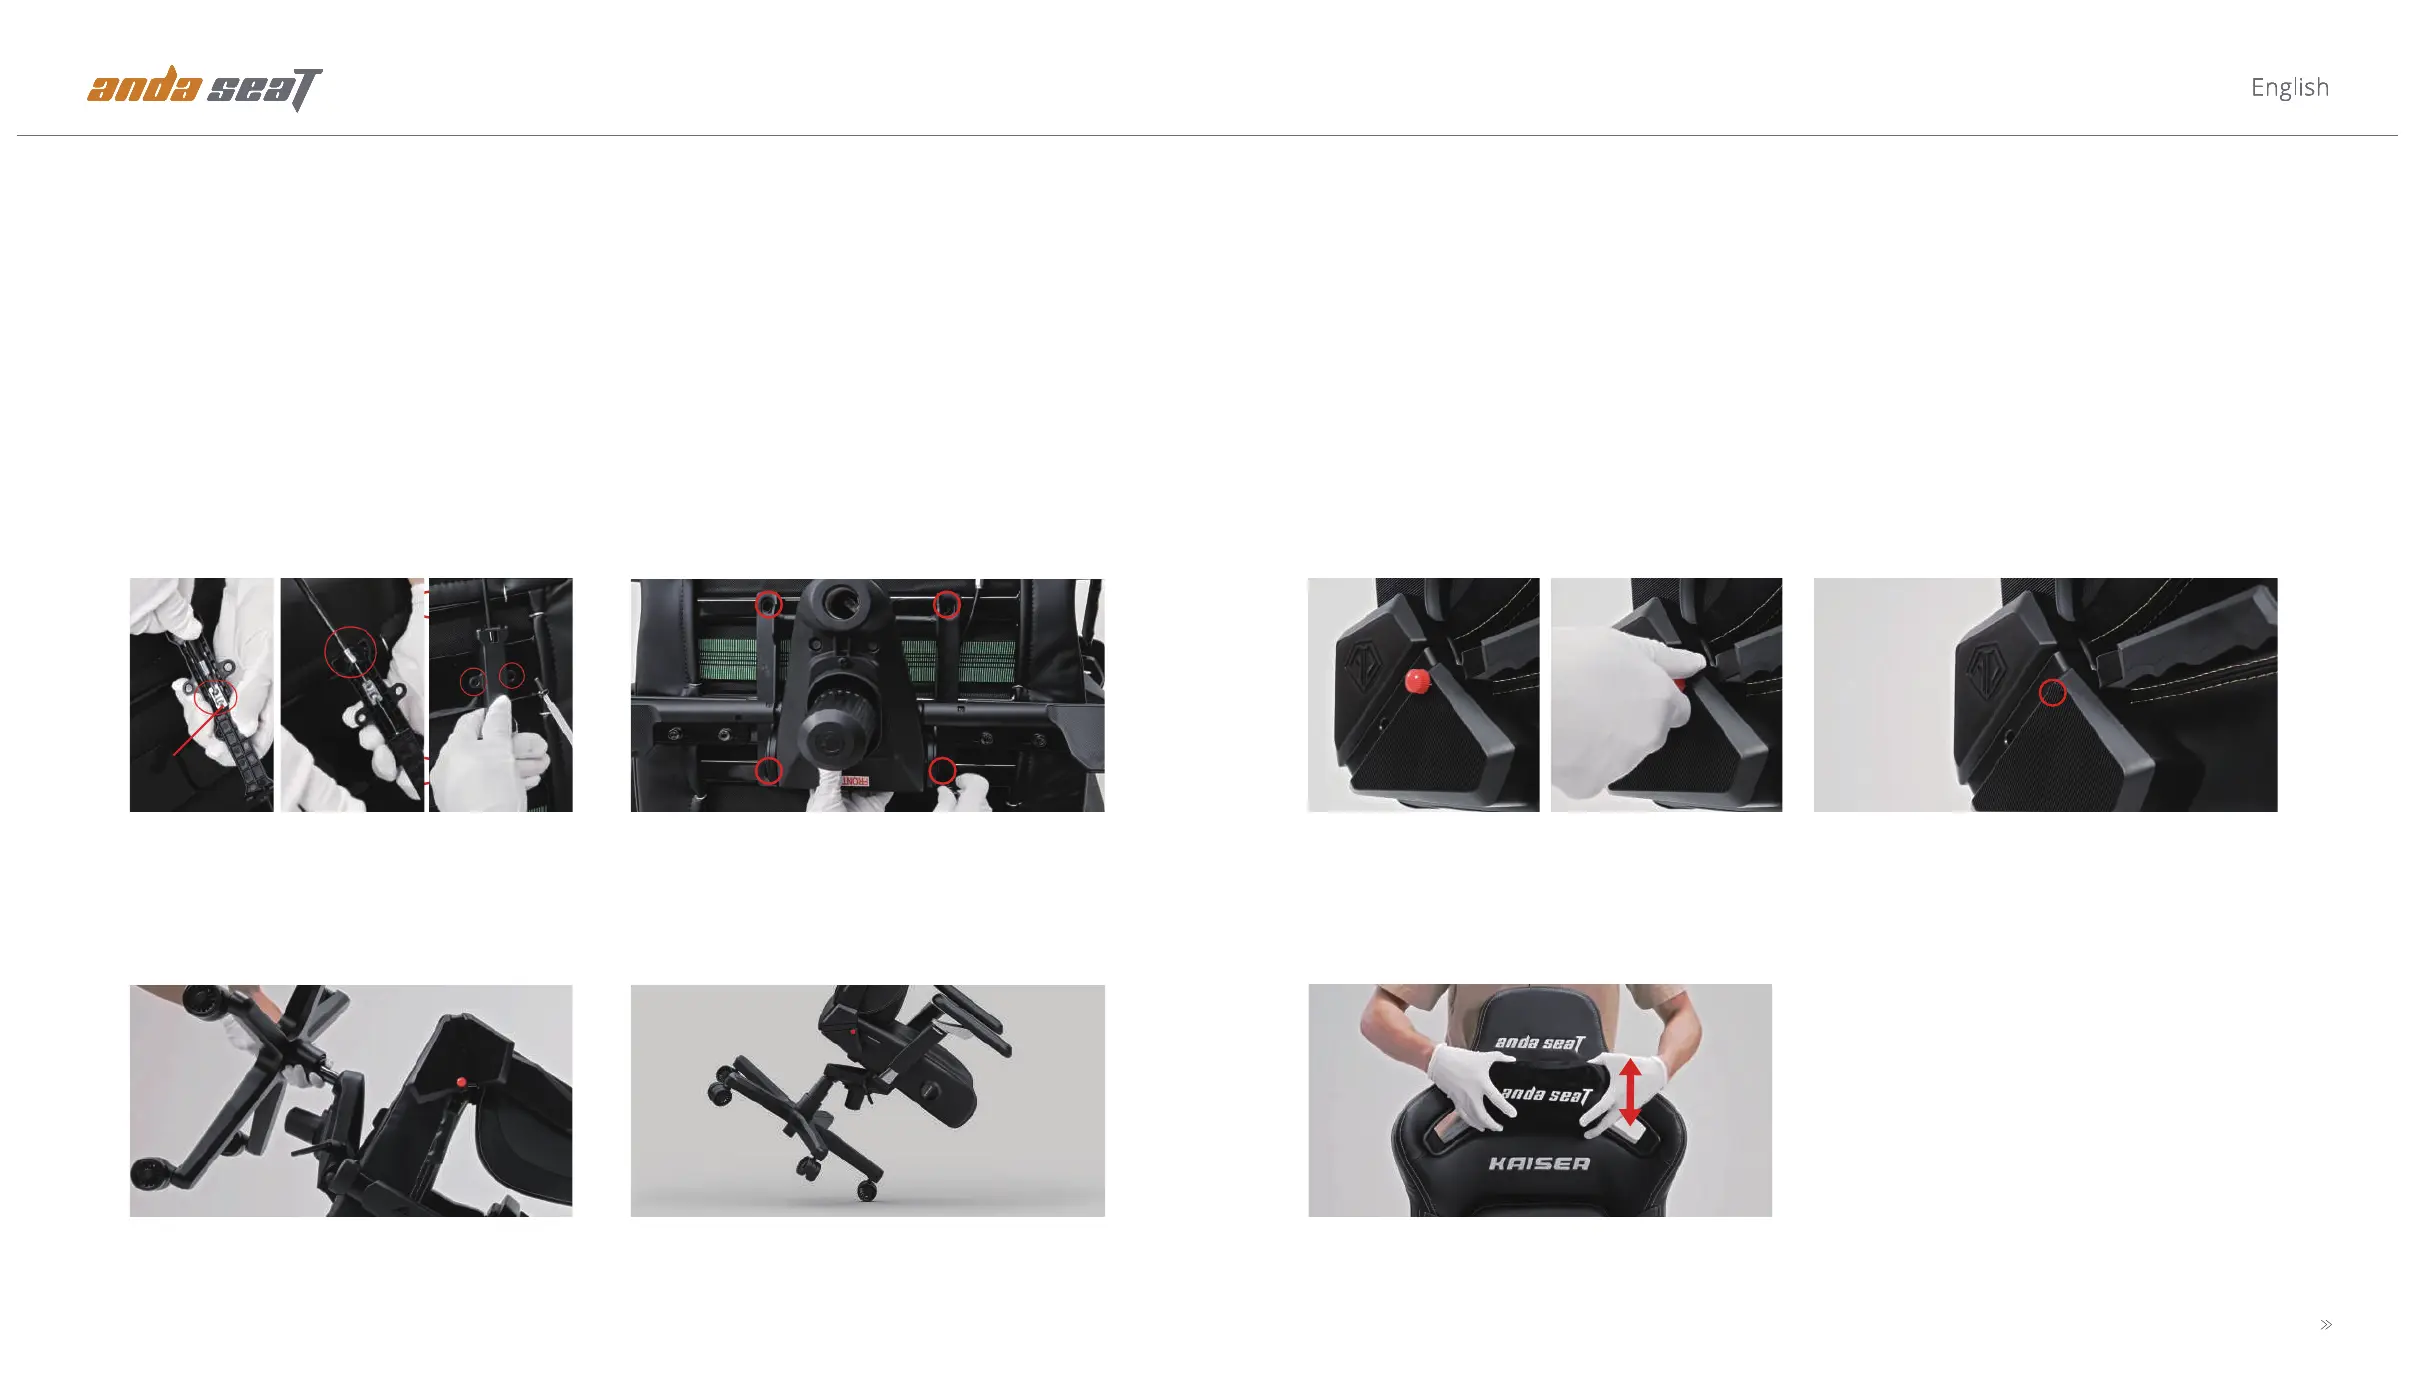
13. Remove the Safety Screw
Take off the red screw on the right recline side by hand.
This allows the recline mechanism to be used.
14. Insert the Safety Cap
Insert the safety cap into the hole.
11. Attach the Wheelbase to the Chair
Lift the assembled wheelbase and correctly insert the
gas piston into the tilt mechanism's mounting hole.
12. Put the Chair Up
Carefully tilt the chair into an upright position.
Congratulations, the assembly is complete!
Reminder: Properly keep the red screw as it can be re-installed
for child safety.
15. Assemble Magnetic Head Pillow
Assemble the magnetic head pillow and move it up and
down to your preferred position.
Reminder: Make sure the FRONT sign is aligned with the
seat front.
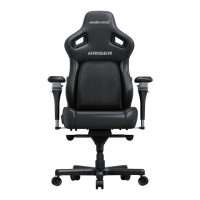
9. Secure the Connector to the Seat Base
Connect the cable on the backrest to the pop-out
lumbar lever.To do this, open the black box,put the
cable's ball ends into the connector,and close the box.
Then secure it to the seat base with machine screws
(2pcs).
Reminder: The connector is hidden underneath the seat base.
Attach the multi-functional tilt mechanism to the bottom of
the seat base. Insert the 4 M8 screws in only halfway,
once the screws are correctly placed, tighten them with the
Allen key.
10. Attach Tilt Mechanism
Connector
 Loading...