INSTALLATION INSTRUCTIONS
Exposed Drain Shroud
1506283-2-A
2 of 5
Questions? Problems? For additional assistance, please contact KALLISTA’s Customer
Service Department at 1-888-4-KALLISTA (1-888-452-5547) or kallista.com.
We appreciate your commitment to KALLISTA quality products. Please take a moment to review this manual
before you install your KALLISTA product. If you encounter any installation or performance problems, please do
not hesitate to contact us at the phone number listed at the bottom of the page.
Observe all local plumbing and building codes.
Shut off the main water supply.
The basin and drain shown in this guide may differ from your actual product. The installation steps still apply.
Kallista reserves the right to make revisions in the design of products without notice, as specied in the Price
Book.
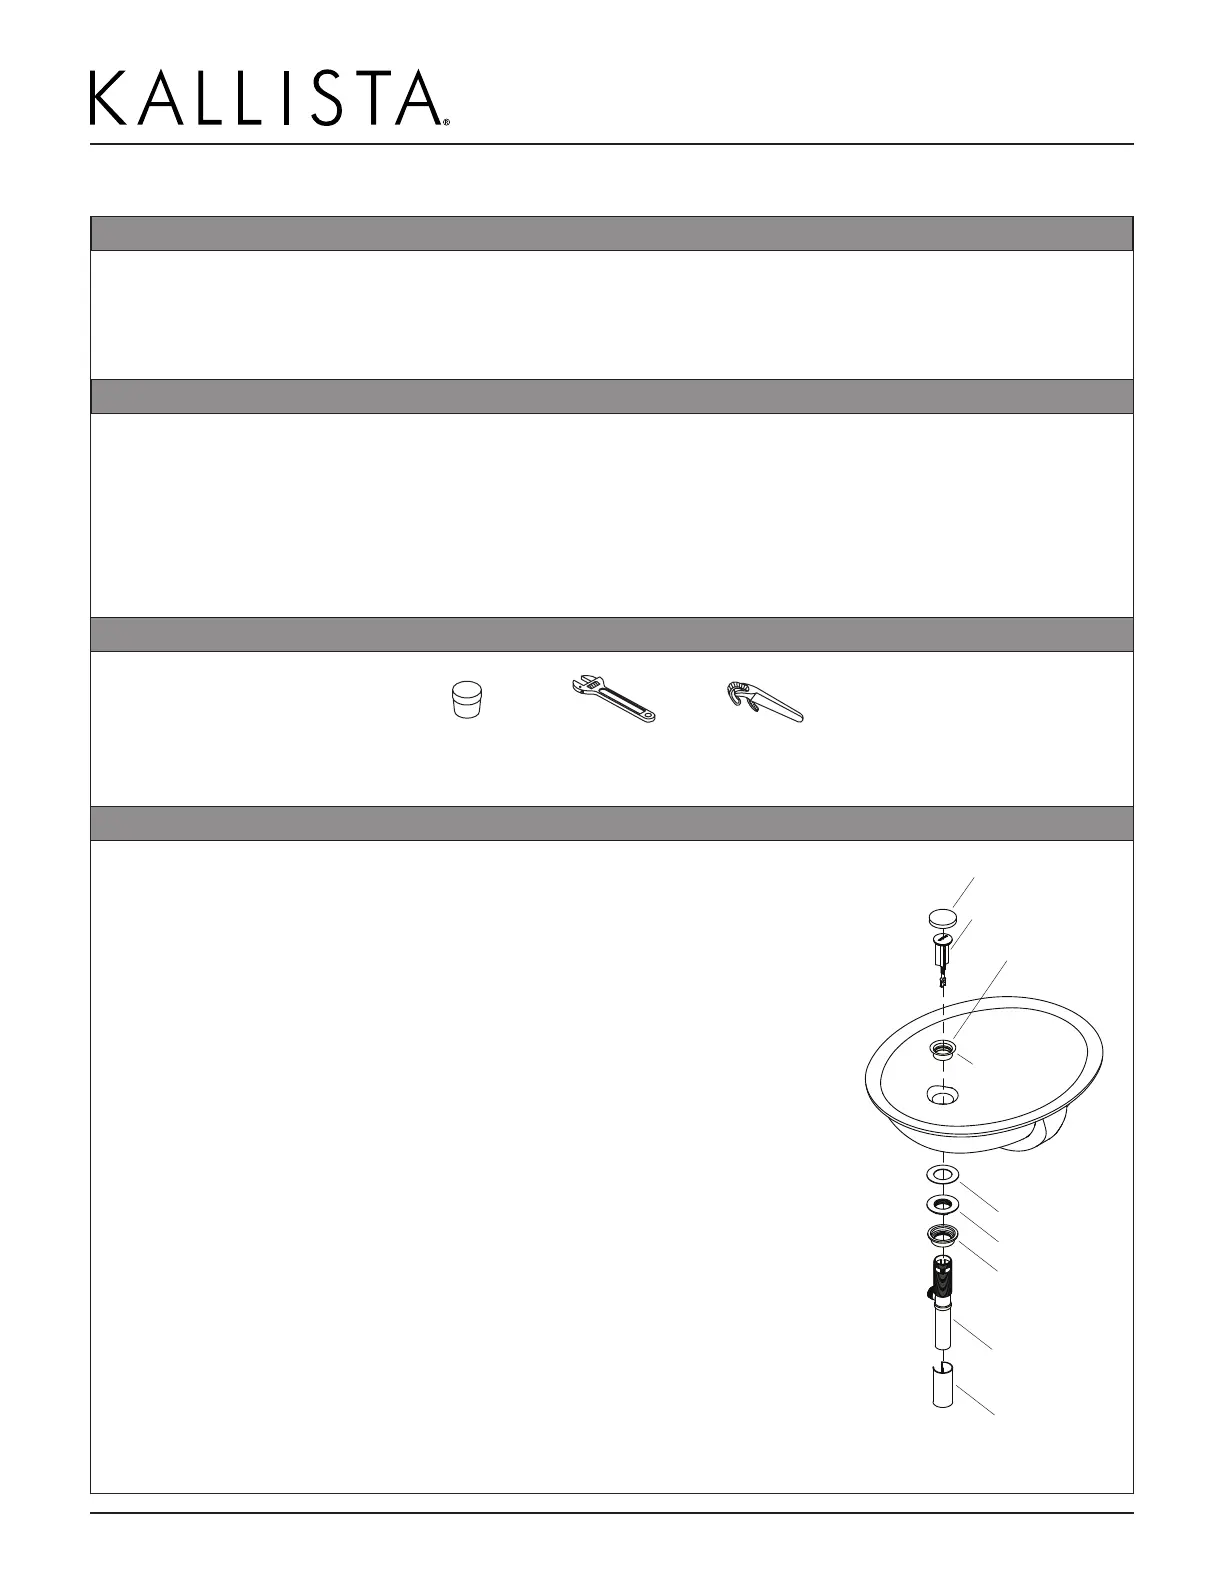
Remove the cover, stopper and ange from the drain body.
Install the decorative nut onto the drain body, and thread to the bottom of the
threads.
Install the nut and washer onto the drain body.
Apply plumbers putty to the underside of the ange.
Assemble the drain onto the basin, completing the drain installation according
to the drain manufacturer’s instructions.
Slide the shroud over the drain tailpiece and into the bottom of the decorative
nut. Ensure that the O-ring in the decorative nut is engaged in the grove in the
shroud.
Orient the slot in the shroud toward the wall.
THANK YOU FOR CHOOSING KALLISTA
BEFORE YOU BEGIN
INSTALL THE DRAIN AND SHROUD
TOOLS AND MATERIALS
Cap
Stopper
Flange
Washer
Nut
Decorative Nut
Drain Body
Apply plumbers
putty.
Adjustable
Strap
Putty