Youconnecteachofthewirestoeitherofthescrewsintheback.The
orderdoesnotmatter.
Ifyourwiresaretooshortandyouhavetroubleconnectingthewires
comingoutofthewalltothe
backofthedoorbell,please
usetheincludedExtension
Wiresandwirenuts.
(SeePicture).
g. ConnectingtheDoorbellwiresand(2)ExtensionWires
(optional)
1413
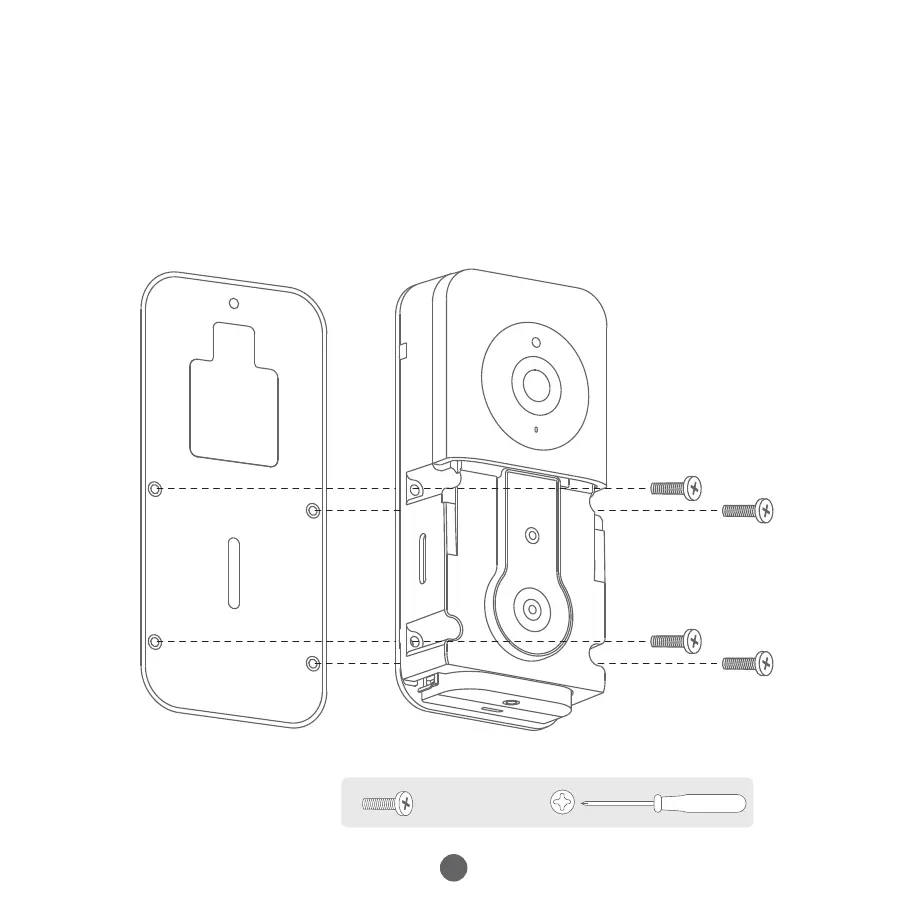
Feedallwires(andwirenuts,ifyouusethem)intothewallanduse
fourscrews(screwC)tosecureyourdoorbelltoFlatBackplate#1.
h.MounttheDoorbelltotheFlatBackplate
FlatBackplate#1
ScrewC
Pleasemakesurethe
powerforthedoorbell
isshutdownwhileyou
completethewiring.
MounttheDoorbelltotheFlatBackplate:
(FineThreads)
 Loading...