Do you have a question about the Kanto P101 and is the answer not in the manual?
Select appropriate bolts for projector mounting holes and test fit.
Choose correct size spacers for mounting surface leveling.
Configure extension arms for optimal projector balance and fit.
Check projector balance by lifting the adapter assembly.
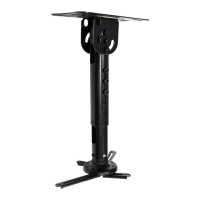
Connect outer and inner extension tubes using bolt and nut.
Use set screws to firmly hold extension tubes together.
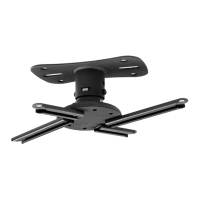
Attach assembled extension tubes to the ceiling plate.
Use set screws to firmly secure the extension to the plate.
Use wrench to loosen the locking nut on the tensioning ring.
Rotate the plastic tension ring to achieve desired tension.
Secure the tension ring by tightening the locking nut.
| Telescopic | Yes |
|---|---|
| Swivel angle | 360 ° |
| Certification | CE |
| Mounting type | Ceiling |
| Product color | Black |
| Housing material | Metal |
| Tilt angle range | -20 - 20 ° |
| Height adjustment type | Manual |
| Height adjustment range | 75 - 300 mm |
| Maximum weight capacity | 10 kg |
| Quantity per pack | 1 pc(s) |
| Depth | 300 mm |
|---|---|
| Width | 158 mm |
| Height | 86.2 mm |
| Weight | 1800 g |
| Package depth | 178 mm |
| Package width | 280 mm |
| Package height | 88 mm |
| Package weight | 2000 g |