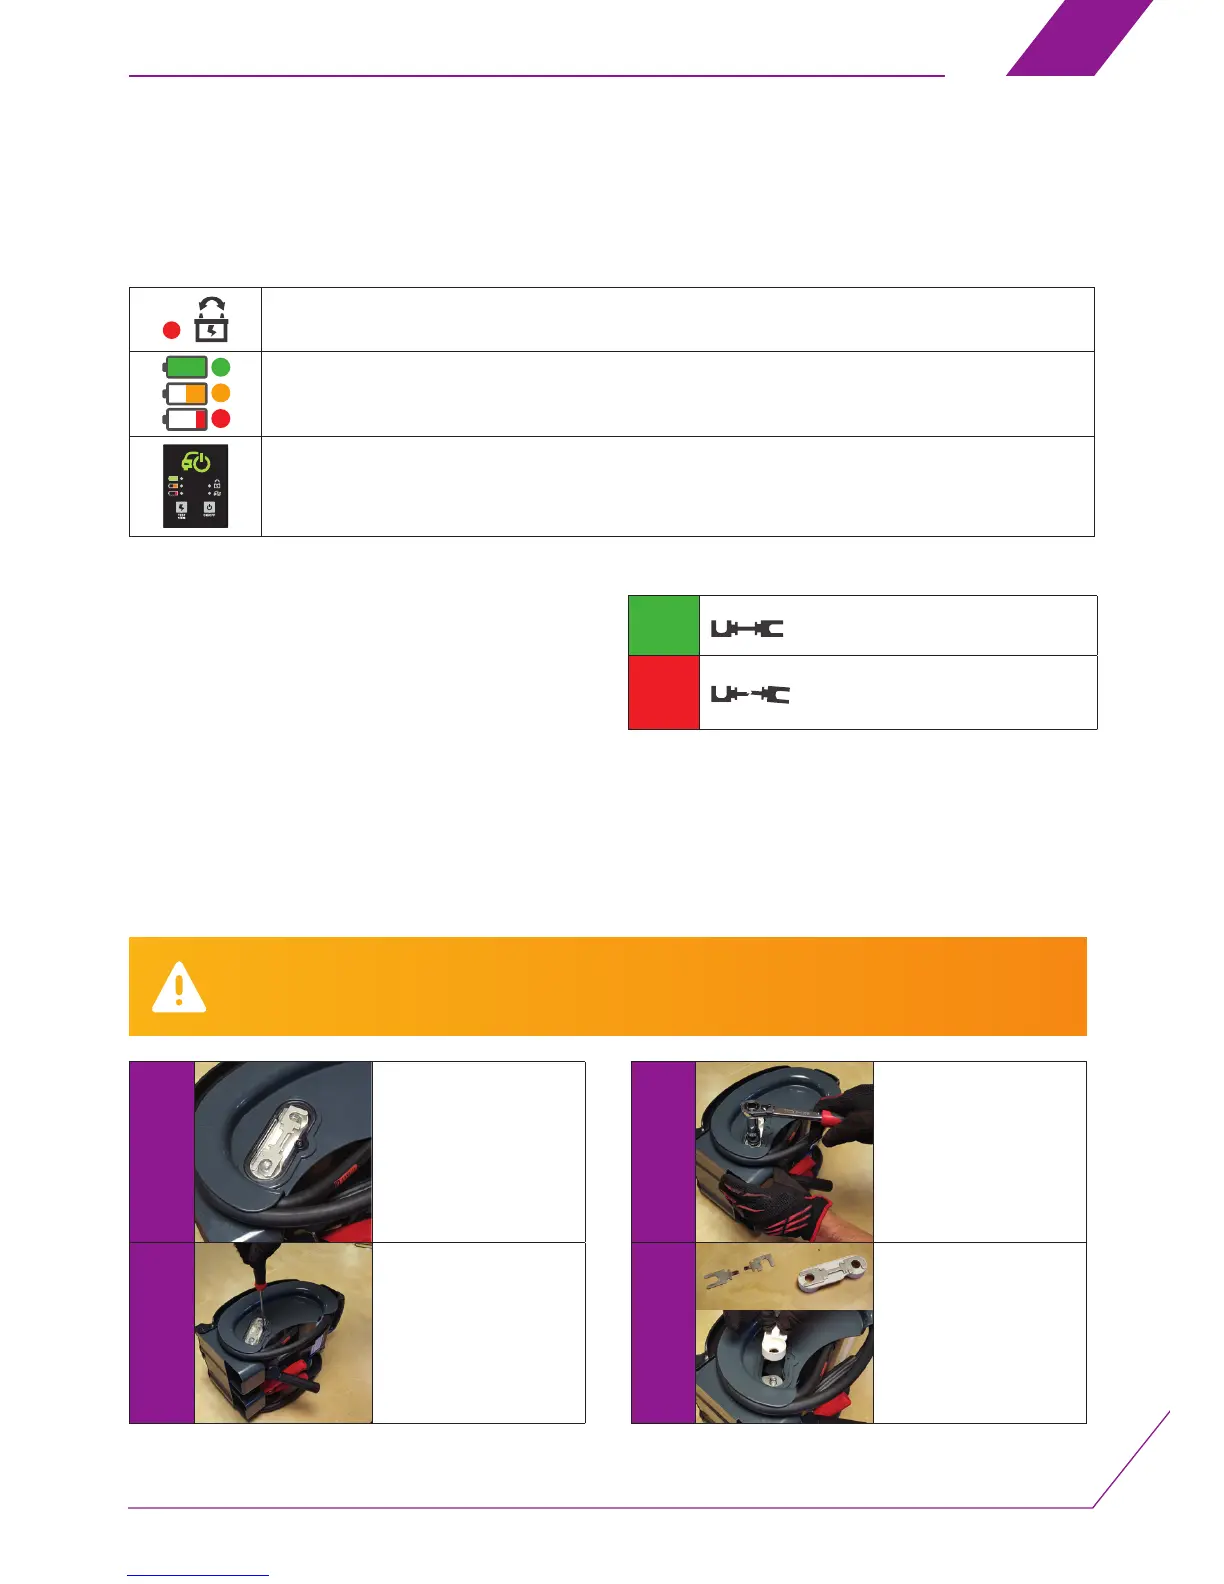
During this operation, the Kap’SAM® must not be connected a vehicle or to any voltage source.
The cables and clips must be stowed in the compartment provided. During this operation you must wear safety glasses.
1
Position your Kap’SAM®
with the side facing you
as shown in the photo
opposite.
2
Unscrew the screw in the
fuse compartment cover
using a suitable Phillips®
screwdriver.
3
Unscrew the nuts fastening
the fuse holder with a 17
mm socket, starting with
the lower one on the left.
4
Replace the fuse
(reference: XCAP-FUSE)
and position it as shown
opposite using protective
gloves.
5. Diagnosis and explanation of alerts displayed
by the Kap’SAM®
6. Replacing the fuse
Indicators
Polarities reversed. Connect the Kap’SAM®’s clips to the right polarities and begin the starting procedure again.
The three state of charge indicators ash. Your Kap’SAM® is connected to a source
with too high a voltage (e.g. 24 Volts). Disconnect the Kap’SAM® to avoid damaging it.
No indicator lights up when you connect the Kap’SAM®.
The battery is deeply discharged (cf. paragraph on Forced Start Mode)
Your Kap’SAM® is connected to the broken down vehicle, the start
indicator is on following the vehicle start procedure (see paragraph
on Starting a vehicle).
• Check the Kap’SAM®’s state of charge (see paragraph Testing the
Kap’SAM®’s state of charge)
• If the state of charge is not satisfactory, recharge the Kap’SAM®
(see paragraph on Recharging the Kap’SAM®).
• If the state of charge is satisfactory, check the state of the general
fuse.
If these checks do not result in your in your Kap’SAM® restarting,
please contact our technical assistance department without delay.
(See Warranty paragraph).
OK
BLOWN
Replace with the second fuse supplied
with the device
Functions: Quick check procedure
EN
1110-