– 9
몇 CAUTION
Always work with an inserted
cartridge filter during wet as well
as dry vacuum cleaning!
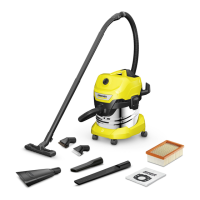
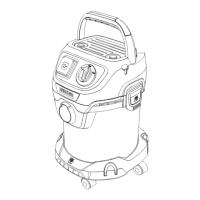
Illustration
Mount loose parts delivered with appli-
ance prior to start-up.
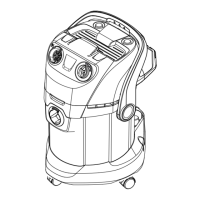
Illustration
Connect accessories.
Illustration
Plug in the mains plug.
Illustration
Turn on the machine.
몇 CAUTION
Check the filter for damage prior
to installation and replace as
necessary.
Work with a dry cartridge filter
only!
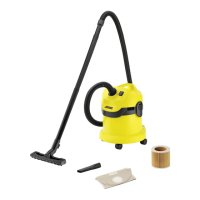
Illustration
Recommendation: To vacuum fine
dust, use the filter bag.
– The filling level of the filter bag depends
on the dirt that is sucked in.
– The filter bag needs to be replaced
more frequently while sucking in fine
dust, sand, etc.
– Clogged filter bags can burst - therefore
make sure to replace the filter bag in a
timely manner!
몇 CAUTION
Vacuum cold ashes only when
using a pre-filter.
Order no. basic design: 2.863-139.0, pre-
mium design: 2.863-161.0.
For vacuuming up moisture or wetness
pay attention to the correct floor nozzle
insert and connect the corresponding
accessories.
몇 WARNING
Immediately switch the appli-
ance off or pull the power plug if
foam forms or liquids escape!
Do not use a filter bag!
Note: If the container is full, a float closes
the suction opening, and the appliance
works at a higher speed. Switch off the ap-
pliance immediately, and empty the con-
tainer.
Cleaning hard to reach locations or, where
vacuuming is not possible, like leaves from
a gravel bed.
Illustration
Connect the suction hose to the blower
connection, this will activate the blower
function.
Turn off the appliance.
Illustration
Hook the floor nozzle into the parking
position.
Turn off the appliance and disconnect
the mains plug.
Illustration
Remove the appliance head and empty
the reservoir.
Illustration
Stow away the mains cable and acces-
sory at the machine. Store the appli-
ance in a dry room.
Operation
Before Startup
Start up
Dry vacuum cleaning
Information filter bag
Wet vacuum cleaning
Blowing function
Interrupting operation
Finish operation
Empty the container
Storing the appliance
9EN