Do you have a question about the Karel MINNEAPOLIS WP 1000 and is the answer not in the manual?
This document is a user's manual for the MINNEAPOLIS WP 1000 microwave oven. It provides essential information regarding safety, installation, operation, and maintenance of the appliance.
The MINNEAPOLIS WP 1000 is a microwave oven designed for heating, cooking, and drying food. It operates by generating radio-frequency energy in the microwave spectrum, which is absorbed by food molecules, causing them to heat up. The oven features a control panel with a power/action selector and a time knob, allowing users to choose from various power levels and set cooking durations.
The manual emphasizes several precautions to avoid possible exposure to excessive microwave energy and other hazards. Users are warned not to operate the oven with the door open, as this can result in harmful exposure. It is crucial not to tamper with safety interlocks or place objects between the oven's front face and the door. The oven should not be operated if damaged, especially if the door, hinges, latches, or door seals are compromised. Repairs should only be carried out by qualified service personnel.
The manual also highlights general electrical safety, advising users to read all instructions before use and to use the appliance only for its intended purpose. It is not designed for industrial or laboratory use. The oven should not be operated when empty or if it has a damaged cord or plug. Children should only use the oven under supervision and after receiving adequate instructions on safe use.
To reduce the risk of fire in the oven cavity, users are advised to monitor food in plastic or paper containers, remove wire twist-ties from bags, and switch off/unplug the appliance and keep the door closed if smoke is observed. The cavity should not be used for storage. Sealed containers should not be heated, as they are liable to explode. Microwave heating of beverages can result in delayed eruptive boiling, requiring care when handling containers. Frying food in the oven is discouraged due to the risk of damage and burns. Eggs in their shell and whole hard-boiled eggs should not be heated in microwave ovens. Foods with heavy skins, such as potatoes and apples, should be pierced before cooking. The contents of feeding bottles and baby jars should be stirred or shaken and checked for temperature before serving. Potholders may be needed to handle hot utensils.
Utensils must be checked for suitability for microwave use. A utensil test involves microwaving an empty utensil at high power for 60 seconds; if it becomes very hot, it should not be used. Only suitable utensils should be used. Regular cleaning and removal of food deposits are essential to prevent deterioration of the oven's surface, which could lead to hazardous situations.
The appliance is classified as Group 2 Class B ISM equipment, suitable for use in domestic establishments. It is not intended for use by persons with reduced physical, sensory, or mental capabilities, or lack of experience and knowledge, unless supervised. Children should be supervised to ensure they do not play with the appliance.
Proper installation is crucial for safe and efficient operation. All packing materials must be removed from inside the door. The oven should be inspected for any damage (misaligned/bent door, damaged seals, loose hinges/latches, dents) before operation. It must be placed on a flat, stable surface capable of supporting its weight and the heaviest food cooked. The oven should not be placed near heat, moisture, high humidity, or combustible materials. Sufficient airflow is required, with 20cm space above, 10cm at the back, and 5cm on both sides. Openings should not be covered or blocked, and feet should not be removed. The power supply cord must be undamaged and not run under the oven or over hot/sharp surfaces. The socket must be readily accessible for emergency unplugging. The oven is not designed for outdoor use.
The appliance must be grounded with a cord having a grounding wire and plug. It should be plugged into a properly installed and grounded wall receptacle. Grounding reduces the risk of electric shock in case of a short circuit. A separate circuit for the oven is recommended. Improper use of the grounding plug can result in electric shock. Users with questions about grounding should consult a qualified electrician. The manufacturer and dealer are not liable for damage or injury due to failure to observe electrical connection procedures. The cable wires are color-coded: Green and Yellow = EARTH, Blue = NEUTRAL, Brown = LIVE.
Microwave oven operation can cause interference with radio, TV, or similar equipment. To reduce interference, users can clean the door and sealing surface, reorient the receiving antenna, relocate the microwave oven, move the oven away from the receiver, or plug the oven into a different outlet on a separate branch circuit.
For optimal cooking, food should be arranged carefully, with thicker areas towards the outside of the dish. Cooking times should be monitored, starting with the shortest recommended time and adding more as needed to prevent overcooking, which can lead to smoking or ignition. Covering foods during cooking prevents spattering and promotes even cooking. Foods like chicken and hamburgers should be turned over once during microwaving. Large items like roasts must be turned over at least once. Foods such as meatballs should be rearranged halfway through cooking, moving them from top to bottom and from the center to the outside.
If the oven fails to operate, users should first check if it is securely plugged in. If not, unplug, wait 10 seconds, and plug it back in. Check for a blown circuit fuse or a tripped main circuit breaker; if they seem fine, test the outlet with another appliance. Ensure the control panel is programmed correctly and the timer is set. Verify that the door is securely closed, engaging the safety lock. If these steps do not resolve the issue, a qualified technician should be contacted. Users are advised not to attempt to adjust or repair the oven themselves.
The ideal microwave utensil is transparent to microwave energy, allowing it to pass through and heat the food. Metal utensils or dishes with metallic trim should not be used as microwave energy cannot penetrate metal. Recycled paper products should be avoided due to potential metal fragments that can cause sparks or fires. Round or oval dishes are recommended over square/oblong ones, as food in corners tends to overcook. Narrow strips of aluminum foil can be used to prevent overcooking of exposed areas, but care must be taken not to use too much and to maintain a 1-inch (2.54cm) distance between the foil and the cavity.
A general guide for utensil selection:
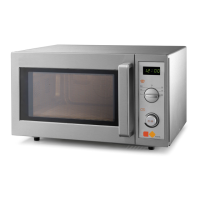
The manual includes a diagram pointing to the following parts:
The control panel consists of two function operators: a timer knob and a power knob.
For pure microwave cooking, there are 6 power levels available, which increase as the knob is turned clockwise:
This feature allows the oven to start at full power immediately. Pressing the TIME knob multiple times sets the cooking time:
The microwave oven's electronic control system includes a cooling feature. For any cooking mode with a cooking time exceeding 2 minutes, the oven fan will automatically operate for approximately 3 minutes after cooking is finished. This helps cool the oven and prolong its life.
For defrosting, frozen food should be removed from its packaging and placed on a plate.
The manual provides a detailed table for various types of meat and poultry, including beef (roast, steak, minced), pork (roast, chop, minced), lamb (roast, shoulder meat), mutton, and poultry (whole turkey, brisket, meat slices, whole chicken, meat slices, duck). For each, it lists recommended defrost times per 500g and standing times.
A table is provided for seafood, including whole fish, scallops, and prawns, with microwave times per 500g, standing times, and specific operations like separating and rearranging halfway through defrosting or as soon as possible.
The times listed are for reference only and may vary based on freezing temperature, consistency, and weight of the food.
Regular cleaning and care are essential for the oven's longevity and safe operation.
| Brand | Karel |
|---|---|
| Model | MINNEAPOLIS WP 1000 |
| Category | Microwave Oven |
| Language | English |