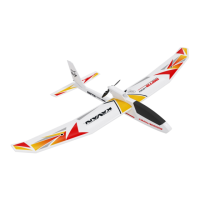
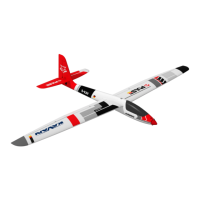
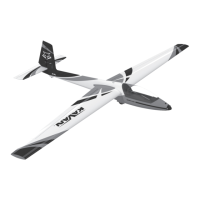
5
FLYING
CHOOSING THE FLYING FIELD. WEATHER
Flying Field
The ying eld should be a at grassy area. There should be no cars, persons,
animals, buildings, power lines, trees or large stones or any other obstacles
that BETA 1400 might collide with within the range of ca 150 m. We highly
recommend you to join a local model ying club – you will get access to their
ying eld along with advice and help to make your rst steps into model
ying much easier and safer.
Weather
Calm summer evenings are perfect for the maiden ight. Your BETA 1400 is
a light thermal glider that is the happiest with wind under 5 m/s. DO NOT y
when it is raining or snowing, on foggy days. Thunderstorms are clearly not
the right time to y either.
RANGE CHECK
Perform the range check as described in the instruction manual of your
radio. Ask a friend to hold the transmitter, and walk away holding the
model in a regular ight position in the height of your shoulders. The servos
have to respond to control inputs (control stick movements) without any
glitching or jitter, with the motor o and at full throttle within the range
stated by the radio manufacturer. Only prepare to y if the range check is
100% successful.
CAUTION: Never try to y with your transmitter in the range check (re-
duced output power) mode!
Now the most important advice in this entire manual:
During the rst ight we recommend that you have the support of an
experienced RC pilot.
There is no shame in asking for help – new full size aircraft are test own by
skilled factory test pilots – and only then are regular pilots allowed to take
control. RC model control requires some skills and reexes people are not
born with. It is not complicated to gain these skills – it just takes some time;
this will vary with your natural talent. Full size pilots start under the supervi-
sion of a skilled instructor; they learn to y at a safe altitude at rst, learn
landing and take-o techniques, and only then are they allowed to y solo.
The same principles apply with RC models too. Please do not expect that
you will be able to put your model in the air and y it without any previous
RC experience.
Many will have gained skills in controlling their favourite computer game
character by hammering the control buttons or sticks. For model ying this
skill will have to be unlearnt!
The sticks movements required to control your model are small & gentle. Many
models including BETA 1400 are happier if you let them “y by themselves” for
most of the time, with small and gentle stick movements to simply guide the
model in the required direction. RC ying is not about stick hammering, it is all
about small stick movements, and observing the eect of that stick movement.
Only later is it possible to anticipate the eect of larger stick movements that can
be dangerous to your model in the earlier stages of model ying.
Step 1: Hand launch and initial trimming
The model must be launched into wind every time. Throw grass into the air
to observe the wind direction.
Turn on your transmitter.
Connect and put the ight pack into the battery compartment and secure
the canopy.
Hold your model with the wings and fuselage level (refer to the drawing) – it
is better to ask a friend to launch your model than to do everything by your-
self – you can then concentrate on the controls.
Give the model full throttle and launch your model with a gentle push
straight and level. You will feel the point at which the model is trying to y
naturally. Do not give it too strong a push. Do not throw your model with
nose up, or greater than 10 degrees down. The model must have a certain
minimum speed from the very start to stay airborne. It is not enough to just
“put” your model in the air.
If everything is OK BETA 1400 will climb gently. If your BETA 1400 loses alti-
tude, pull the elevator stick very slightly towards you (just a little!) to achieve
a steady climb.
Step 2: Flying
Keep your BETA 1400 climbing until she reaches at least 50 m in height, then
throttle back the motor just to maintain the level ight. The real ying fun
begins now.
Please note:
BETA 1400 is not a large model, so do not let her y too far away. Please re-
member you can control your model only so long as you are able to see the
model’s orientation in the air. The safe range of your radio is much further
than the range of your eyes!
How to control your model?
In contrast to cars or boats, aircraft y in three dimensional space which
makes full control more complex. Turning the steering wheel left or right
Wind
Launch the model against the wind,
fuselage and wing level
THE FIRST FLIGHT
70-75 mm
OFF” mode - if your ESC features this option). If the prop rotated slowly,
please check the position of the throttle stick and throttle trim.
B) Slowly move the throttle stick up, the prop should start to rotate clockwise
(looking from behind). If it spins in the opposite direction, pull the throttle
stick back, disconnect the ight battery and swap any two of the three
cables between the motor and the ESC. The re-check again. Repeat the
ESC throttle range calibration. Then re-check again.
Note: If the motor does not respond to the throttle stick advance, check the
model power cable connection and the state of charge of your battery.
CAUTION: Keep away from the propeller once the battery will be connected
to the model. Do not try to stop the propeller with your hands or anything else.
8. The Centre of Gravity
A) The CG has to be located 70-75 mm behind the leading edge of the wing.
Balance your BETA 1400 supporting the wing with your ngertips 70 mm be-
hind the leading edge for the rst ight.
B) You can ne tune the CG position later to suit your requirements. Moving
the CG forward the model ight will be more stable, moving backward the
controls will be become more sensitive, also the thermalling performance
might improve slightly. Note: Moving back the CG too much could cause
your model would be hard to control or even so unstable that you would not
able to control it at all.
Now you are ready to y!
 Loading...