EasyManua.ls Logo

Kenmore 385.16774 - User Manual

Kenmore 385.16774
111 pages
Print Icon
To Next Page IconTo Next Page
Loading...
ypoc
SEWING MACHINE
Owner’s Manual
Model, Modelo, Modèle 385.16774
MAQUINA DE COSER
Manual de Instrucciones
MACHINE À COUDRE
Manuel d’instructions
®
www.sears.ca505-800-101
Sears Canada Inc., Toronto, Ont., M5B 2B8 CANADA

Table of Contents

Questions and Answers

  • P
    pcrossAug 12, 2025
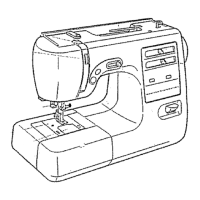
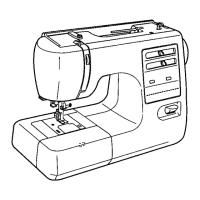
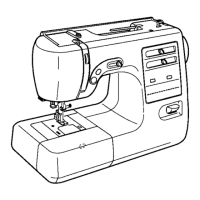
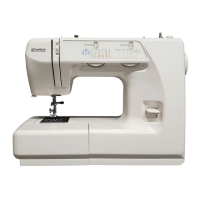
    Why does my Kenmore Sewing Machine skip stitches?
    • B
      belltoddAug 13, 2025
      Skipped stitches can occur if the needle is incorrectly inserted, bent, or blunt. Also, the needle and/or threads may not be suitable for the fabric, or a blue needle is not being used for sewing stretch, very fine fabrics and synthetics. The needle thread may not be threaded properly, or the wrong needle is used.
  • N
    Nicole HoustonAug 16, 2025
    What to do if the cloth is not feeding smoothly in my Kenmore 385.16774 Sewing Machine?
    • B
      Bruce LoganAug 16, 2025
      If the cloth isn't feeding smoothly, the stitches might be too fine, the feed dog isn't raised after “drop feed” sewing, or the feed dog is packed with lint.
  • B
    Brian HudsonAug 20, 2025
    Why does the needle thread break on my Kenmore Sewing Machine?
    • S
      Stephen EdwardsAug 20, 2025
      The needle thread may break due to several reasons: the needle thread is not threaded properly; the needle thread tension is too tight; the needle is bent or blunt; the needle is incorrectly inserted; the needle thread and the bobbin thread are not set properly under the presser foot at the start of sewing; the threads were not drawn to the rear after the previous use; or the thread is too heavy or too fine for the needle.
  • L
    Linda CombsAug 25, 2025
    What to do if the needle breaks on my Kenmore 385.16774?
    • J
      Jason PattersonAug 25, 2025
      A needle can break for a number of reasons. It may be incorrectly inserted, bent, or blunt. The needle clamp screw could be loose, or the needle thread tension might be too tight. Ensure the threads were drawn to the rear after previous use. Finally, the needle may be too fine for the fabric being sewn.
  • C
    christineloganAug 27, 2025
    Why does the bobbin thread break on my Kenmore Sewing Machine?
    • L
      Leslie BoydAug 27, 2025
      The bobbin thread may break because it is not threaded properly in the bobbin holder, or lint has collected in the bobbin holder. If the bobbin is damaged and doesn't turn smoothly, change the bobbin.
  • M
    Matthew ReevesAug 31, 2025
    Why is my Kenmore 385.16774 Sewing Machine seam puckering?
    • V
      Victoria FosterAug 31, 2025
      Seam puckering can occur if the needle thread tension is too tight, the needle thread is not threaded properly, the needle is too heavy for the fabric being sewn, or the stitch length is too long for the fabric.
  • J
    Jeremy FordSep 4, 2025
    What to do if my Kenmore 385.16774 Sewing Machine doesn't work?
    • T
      Todd NixonSep 4, 2025
      If the machine doesn't work, check if it is plugged in. Also, a thread might be caught in the shuttle race, or the push-clutch is disengaged.
  • G
    Gary OsborneSep 7, 2025
    Why is my Kenmore 385.16774 Sewing Machine operation noisy?
    • J
      jennifer13Sep 7, 2025
      Noisy operation may occur if there is thread caught in the hook race, or lint has built up in the shuttle or the shuttle race.

Summary

IMPORTANT SAFETY INSTRUCTIONS

DANGER - To reduce the risk of electric shock

Warnings about electric shock hazards.

WARNING - To reduce the risk of burns, fire, electric shock or injury to persons

Warnings about fire, burns, electric shock, and injury.

Kenmore Sewing Machine Warranty

Warranty Details

Covers limited warranties for internal, external, electrical components, and parts.

Warranty Service

Information on how and where to obtain warranty service.

Machine Specifications

PROTECTION AGREEMENTS

Maintenance Agreements

Details on Sears Maintenance Agreements for product service.

SECTION I. PARTS IDENTIFICATION

Names of Parts

Identification of the various parts of the sewing machine.

Available Accessories and Attachments

SECTION II. GETTING READY TO SEW

Connecting Machine to Power Supply

Instructions for connecting the sewing machine to the power source.

Before Using Your Sewing Machine

Initial setup and test run procedures before first use.

For Your Safety

Essential safety precautions to follow while operating the machine.

Polarized plug

Explanation of the polarized plug and electrical safety.

Controlling Sewing Speed

How to adjust sewing speed using the foot control.

Changing Machine Parts

Needle and Foot Holder

Steps for changing the needle, foot holder, and presser foot.

Presser Foot Types

Standard and Specialty Feet

Details on zigzag, straight stitch, zipper, blind hem, and automatic buttonhole feet.

Additional Presser Foot Types

Further Specialty Feet

Details on satin stitch, overedge, buttonhole, quilter, 1/4" seam, and walking feet.

Selecting Needle and Fabric

Bobbin Winding Procedures

Spool Pin Usage

Instructions for using horizontal and additional spool pins for bobbin winding.

Hook Cover Plate Removal

Bobbin Insertion

Threading the Machine

Machine Threading

Step-by-step guide for threading the sewing machine.

Needle Threader

How to use the built-in needle threader.

Tension Adjustment for Straight Stitch

Straight Stitch Tension Settings

Adjusting needle thread tension for straight stitches: correct, too tight, too loose, drawing bobbin thread.

Tension Adjustment for Zigzag Stitch

Zigzag Stitch Tension Settings

Adjusting needle thread tension for zigzag stitches: correct, too tight, too loose.

Stitch Selector Operation

Stitch Width Control

Stitch Length Control

Stitch Balance and Reverse Control

Adjusting Stretch Stitch Balance

How to adjust the stretch stitch balance for even patterns.

Reverse Stitch Control

How to use the reverse stitch control for securing stitches.

SECTION III. STRAIGHT STITCH SEWING

Basic Straight Stitching

Instructions for starting, finishing, using seam guides, and turning corners.

Specialty Sewing Techniques

Topstitching and Quilting

Techniques for topstitching and using the quilter accessory.

Specialty Foot Usage

Walking Foot and 1;4˝ Seam Foot Operation

How to use walking and 1/4 inch seam feet for various sewing tasks.

Zipper Sewing Guide

Zipper Foot Attachment and Use

Steps for attaching the zipper foot, preparing fabric, and sewing zippers.

SECTION IV. ZIGZAG STITCH SEWING

Basic Zigzag Stitch

Instructions for performing a basic zigzag stitch.

Satin Stitching

How to sew a satin stitch for decorative purposes.

SECTION V. UTILITY AND DECORATIVE STITCHES

Blind Hem Stitch

How to sew a blind hem stitch for invisible hems.

Decorative Stitching Techniques

Monogramming and Applique

Techniques for creating monograms and appliqués.

Reinforcement and Embroidery Stitches

Bar Tacking and Embroidery

Instructions for bar tacking and performing embroidery.

Edge Finishing and Button Sewing

Button Sewing and Overcasting

How to sew buttons and overcast seams.

Specialty Decorative Stitches

Shell Stitch and Box Stitch

Instructions for sewing shell stitches and box stitches.

Specialty Decorative and Joining Stitches

Fagoting, Two-point Box, and Decorative Patterns

How to sew fagoting, two-point box, and decorative stitch patterns.

SECTION VI. STRETCH STITCHES

Straight Stretch Stitch

How to sew a straight stretch stitch for durable seams.

Rick-rack Stretch Stitch

Instructions for sewing a rick-rack stretch stitch.

Stretch Stitch Applications

Serging and Elastic Stretch Stitch

How to sew serging and elastic stretch stitches.

Stretch Patching

Instructions for using stretch patching for garment repair.

SECTION VII. BUTTONHOLE

Automatic Buttonhole Operation

Guide to sewing automatic buttonholes using the attachment.

Manual Buttonhole Creation

Manual Buttonhole (Option)

How to sew manual buttonholes when automatic is not suitable.

SECTION VIII. CARE OF YOUR MACHINE

Light Bulb and Bobbin Holder Care

Instructions for replacing the light bulb and cleaning the bobbin holder.

Machine Cleaning and Oiling

Shuttle Race, Feed Dogs, and Oiling

Procedures for cleaning the shuttle race, feed dogs, and oiling the machine.

Troubleshooting Common Issues

Kenmore 385.16774 Specifications

General IconGeneral
BrandKenmore
Model385.16774
TypeSewing Machine
Speed ControlYes
Automatic Needle ThreaderNo
Drop-in BobbinYes
Free ArmYes
Needle Type15x1
Foot ControlYes
Bobbin TypeClass 15
Stitch WidthUp to 5 mm
Machine TypeMechanical

Related product manuals