Do you have a question about the Kenmore Elite HE5 110.8708 Series and is the answer not in the manual?
| Fuel Type | Electric |
|---|---|
| Color | White |
| Wrinkle Guard Option | Yes |
| Moisture Sensor | Yes |
| Width | 27 inches |
| Brand | Kenmore |
| Model | 110.8708 Series |
| Type | Dryer |
| Dryer Venting | Vented |
| Drying Programs | Normal, Delicates, Heavy Duty, Air Fluff |
| Control Type | Electronic |
Details the benefits and coverage of Kenmore's Master Protection Agreement.
Covers defects in material or workmanship for one year from purchase date.
Covers replacement of the electronic control board for two years.
Lists items and conditions not covered by the appliance warranty.
Details limitations on implied warranties and remedies for the appliance.
Section to record model number, serial number, and purchase date for service.
Provides critical safety alerts, including DANGER and WARNING statements.
Essential precautions for operating the dryer to prevent fire, shock, or injury.
Lists required tools and parts for proper dryer installation.
Identifies parts supplied with the dryer for installation.
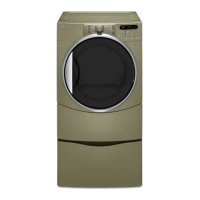
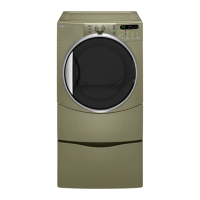
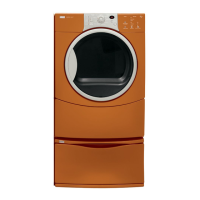
Information on selecting, ordering, and installing optional dryer pedestals.
Lists parts that may be needed based on local codes and venting requirements.
Specifies required clearances around the dryer for proper operation and safety.
Lists essential requirements for the dryer's installation location.
Recommended spacing for installing the dryer in recessed areas or closets.
Guidelines for installing the dryer under a counter.
Recommended spacing for closet installations with a stacked washer and dryer.
Spacing requirements for dryer installation on a pedestal in a closet.
Minimum ventilation openings required for cabinet installation with doors.
Specific requirements for installing the dryer in mobile homes.
Highlights user's responsibility for qualified electrical installation and code compliance.
Details the necessary voltage, amperage, and circuit requirements for the dryer.
Explains how to connect the dryer using a power supply cord or direct wire.
Instructions for using a UL-listed power supply cord kit.
Procedures for properly grounding the dryer for electrical safety.
Step-by-step guide for connecting the dryer using a power supply cord.
Step-by-step guide for directly wiring the dryer to the electrical supply.
Instructions for installing strain relief for a power supply cord.
Details on connecting a 4-wire power supply cord, required for mobile homes.
Instructions for installing strain relief for a direct wire connection.
Step-by-step guide for direct wiring a 4-wire connection for the dryer.
Instructions for connecting a 3-wire power supply cord to the dryer.
Instructions for directly wiring a 3-wire connection for the dryer.
Steps for optional 3-wire connections where codes prohibit cabinet-ground to neutral.
Critical warnings about dryer venting to prevent fire hazards.
Ensures dryer exhaust is directed outdoors, adhering to codes and ordinances.
Instructions for inspecting and preparing an existing dryer vent system.
Guidelines for installing a new dryer exhaust vent system.
Specifies approved materials for dryer exhaust vents (heavy metal).
Recommendations for using rigid metal vents for best drying performance.
Guidelines and restrictions for using flexible metal dryer vents.
Advice on using 45° elbows for better airflow compared to 90° elbows.
Instructions on using clamps to seal all vent joints securely.
Illustrates typical rear, side, and bottom exhaust vent installations.
Shows alternate venting methods for installations with limited space.
Determines maximum exhaust length based on vent type, elbows, and hood style.
Guidelines for selecting the straightest and most direct path for the vent.
Advice on using the vent chart to optimize drying performance.
Step-by-step instructions for installing the dryer exhaust vent.
Instructions for attaching and adjusting the dryer's leveling legs.
Instructions for connecting the dryer vent to the exhaust outlet and hood.
How to check and adjust the dryer for proper levelness.
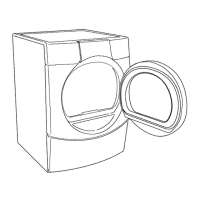
Step-by-step guide to change the dryer door from right-swing to left-swing.
Instructions for reversing the dryer door handle orientation.
Steps to reassemble and reinstall the dryer door after reversing swing.
Final checks after installation, including starting the dryer and checking for heat.
Basic steps to begin operating the dryer, including cleaning the lint screen.
How to select and use automatic drying cycles based on load dryness.
Explains the technology behind Auto Moisture Sensing Plus for efficient drying.
Instructions for selecting and adjusting Timed Dry cycles.
How to stop the dryer during operation.
Steps for pausing a cycle and how to restart it within a 5-minute window.
How to enable and disable the control lock to prevent unintended use.
Provides advice on care labels, fabric softener, load separation, and wrinkling.