8 9
BEFORE FIRST USE
1. Carefully unpack your Kenmore Espresso Machine and check that all parts are present. Remove
any promotional labels or stickers and safely dispose of plastic bags or small pieces that could
present a suocation or choking hazard.
2. Wash all removable parts and accessories (water tank, portalter, lter baskets, milk pitcher,
tamper, drip tray and cover, accessory storage tray, coee scoop, and bean hopper and lid) by
hand with warm water and a mild dish detergent, rinse, and dry thoroughly.
3. Wipe the outside of the espresso machine with a clean, damp cloth to remove any dirt or dust
and dry thoroughly.
NOTE - Do not use abrasive cleansers or scouring pads when cleaning your espresso machine. Do
not wash any parts or accessories in the dishwasher.
INSTALLING THE WATER TANK
Fill the water tank with cold, ltered water up to the MAX marking. Replace the water tank at the
back of the machine, pushing down rmly to ensure it is properly positioned
NOTE - Always check the water level before use and rell the water tank daily. We recommend
against using demineralized or distilled water as this can aect the taste of your espresso.
If your water tank needs relling while your espresso machine is powered on, the , ,
and indicators will light up red and the machine will beep 3 times. If the tank is completely
empty you will also hear the water pump stop working.
ASSEMBLING THE BEAN HOPPER
1. Rotate the grind size selector so the arrow is pointing towards the grinder and check that the
bean hopper gasket is in place (Figure 1). Turn the bean hopper lock/release counterclockwise to
the unlocked (horizontal) position (Figure 2).
2. Position the hopper over the grinder using the grind size selector and indicator as a guide and
then turn the lock/release clockwise to the locked (vertical) position (Figure 3) to secure.
NOTE - If the bean hopper is unlocked or not installed correctly when the machine is powered on,
the indicator lights will ash red as a warning.
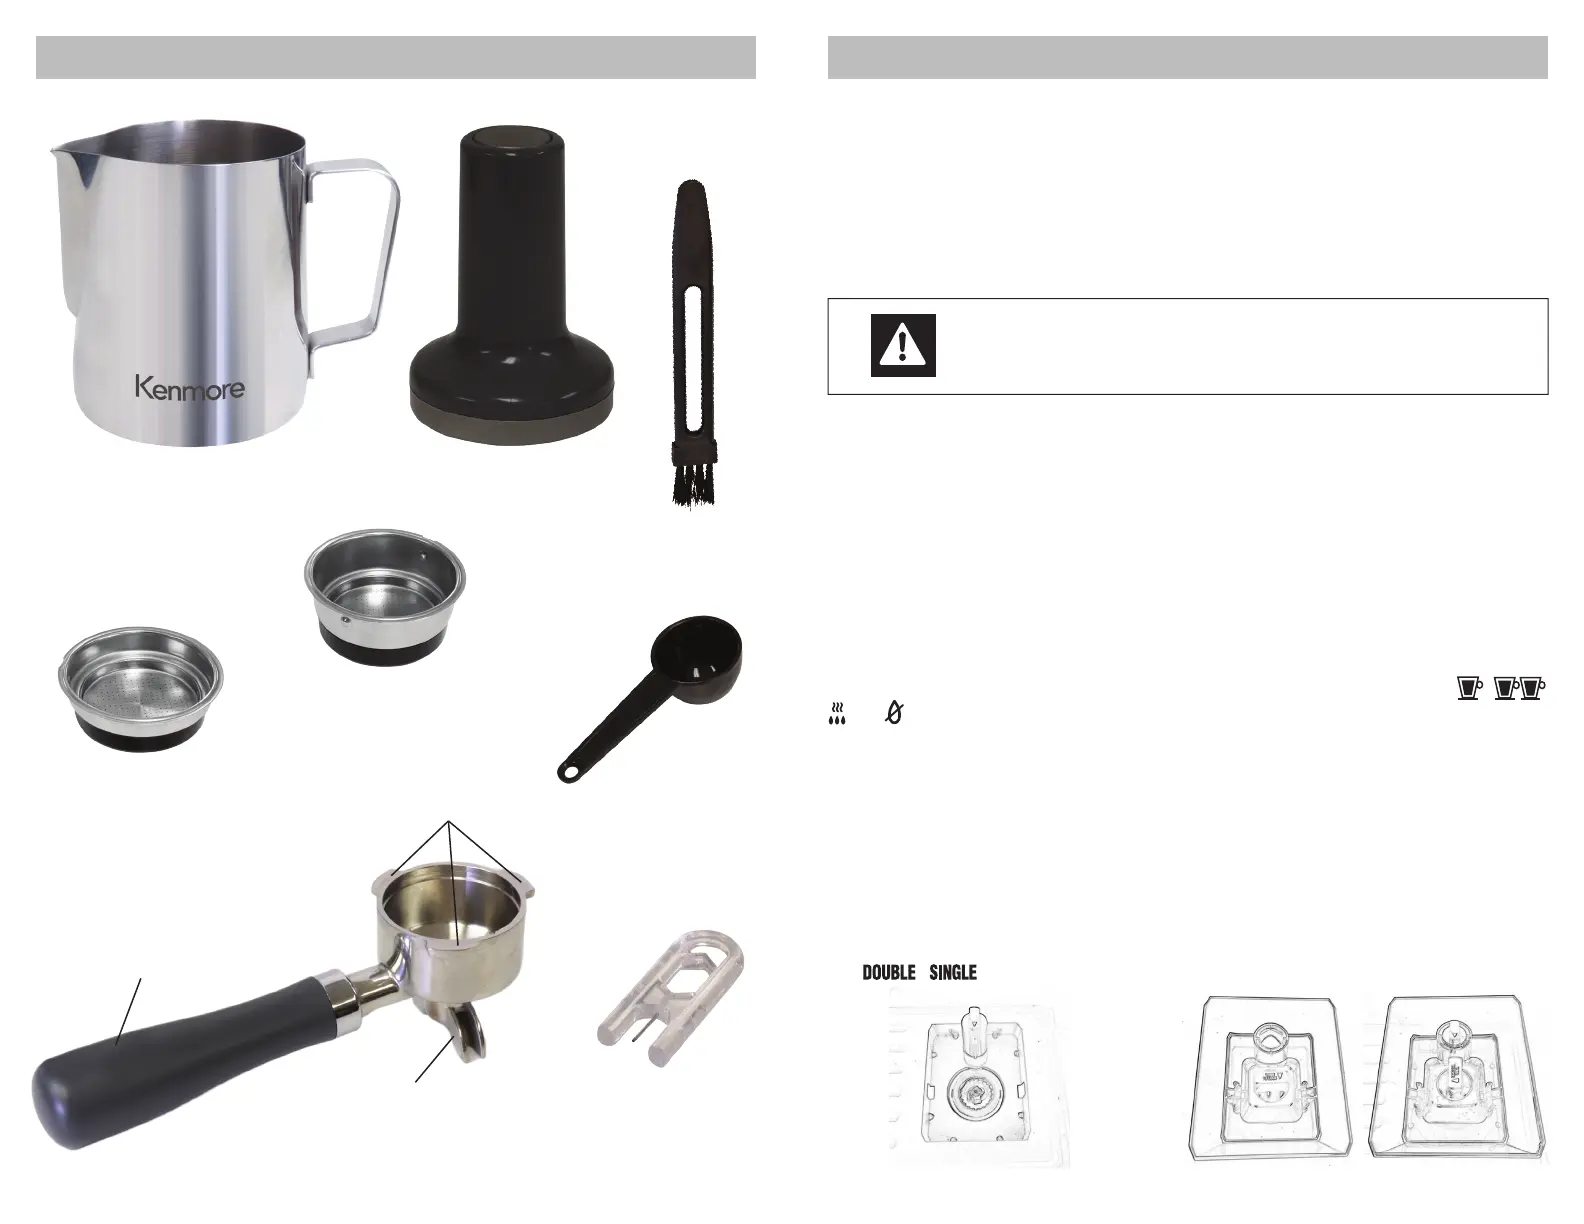
KNOW YOUR ACCESSORIES SETTING UP YOUR ESPRESSO MAKER
stainelss steel frothing mug
1-cup / single shot
double-wall lter
2-cup / double shot
double-wall lter
portalter
spout
locking tabs
safe-to-touch handle
steam wand cleaning pin
grinder cleaning
brush
coee measuring
scoop
Fig. 1
Fig. 2
tamper
WARNING - To protect against electrical shock, do not
immerse the espresso machine body, control panel,
power cord, or electrical plug in any liquid.