Installation – The valve should be opened to the fully open position before proceeding with the
Indicator Post installation.
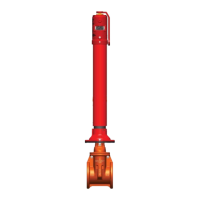
1. Disassembly of the Indicator Post Unit
Telescoping Barrel Units
• Remove the Top Section from the end of the barrel.
• Loosen the two screws on the barrel and slide off the top of the standpipe.
Fixed Length Units
• Remove the Top Section from the end of the standpipe.
2. Base Flange Installation:
• Attach the base flange along with the standpipe to the valve plate using the four 5/8”
bolts and nuts provided.
3. Grade Line Adjustments:
Telescoping Barrel Units
• Lower the barrel over the standpipe until the grade line mark on the barrel is at
ground line height and then tighten the two screws securely.
Fixed Length Units
• Cut the required length off the bottom of the standpipe so that the indicated grade line
of the standpipe is at the ground line height and then secure to the base flange by
tightening the two screws.
4. Extension Rod Adjustments:
Lower the stem into the barrel/standpipe, placing the crane coupling over the valve
operating nut.
It is necessary that the stem engage the operating nut a minimum of 2 inches, but not more
than 5 inches.
To check for correct engagement, the end of the stem should be from 7 inches to 10 inches
above the top of the standpipe (Fixed Length Units) or the top of the telescoping barrel.
5. Target (Open and Shut) Adjustments
 Loading...