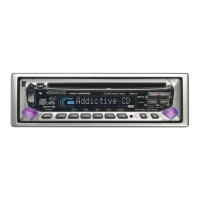
This document describes the Kenwood KDC-MP533V CD-Receiver, an in-car audio system designed to play CDs, MP3, and WMA audio files, as well as Video CDs (VCDs). It also features a tuner for radio reception and an auxiliary input for external audio devices.
General Features
The KDC-MP533V offers a range of general features for controlling power, source selection, volume, and audio settings.
Power Control:
- Turning ON: Press the [SRC] button.
- Turning OFF: Press and hold the [SRC] button for at least 1 second.
Source Selection:
- Press the [SRC] button to cycle through available sources.
- Available sources include "TUNER" (radio), "CD" (for CD/VCD playback), "AUX" (auxiliary input), and "STANDBY" (illumination-only mode).
- The auxiliary input can only be selected if the "Built-in Auxiliary Input Setting" is set to "ON" (see Menu System).
- The unit can play discs containing Video CD files, referred to as VCDs in the manual.
Volume Control:
- Increasing Volume: Turn the [VOL] knob clockwise.
- Decreasing Volume: Turn the [VOL] knob counterclockwise.
Attenuator:
- Quickly reduces the volume.
- Press the [ATT] button to toggle the Attenuator ON and OFF.
- When ON, the "ATT" indicator blinks on the display.
System Q:
- Allows selection of preset sound settings optimized for different music genres.
- To Select Sound Type:
- Select the desired source by pressing the [SRC] button.
- Press the [Q] button. The current sound setting is displayed.
- Each press of the [Q] button cycles through available sound settings: "NATURAL," "ROCK," "POPS," "EASY," "TOP40," and "JAZZ."
- These settings can be further customized via the Speaker Setting. If customized, "USER" is displayed.
Audio Control:
- Provides adjustments for various audio parameters.
- To Adjust Audio Items:
- Select the desired source by pressing the [SRC] button.
- Enter Audio Control mode by pressing the [VOL] knob.
- Select the audio item to adjust by pressing the [VOL] knob. Items include "BAS L" (Bass level), "MID L" (Middle level), "TRE L" (Treble level), and "BAL" (Balance).
- Adjust the selected item by turning the [VOL] knob.
- Exit Audio Control mode by pressing any button other than the [VOL] or [ATT] button.
Audio Setup:
- Allows setting of system-wide sound parameters like Volume offset and Loudness.
- To Adjust Audio Setup Items:
- Select the desired source by pressing the [SRC] button.
- Enter Audio Setup mode by pressing and holding the [VOL] knob for at least 1 second.
- Select the audio setup item to adjust by pressing the [VOL] knob. Items include "V-OFF" (Volume offset) and "LOUD" (Loudness).
- Adjust the selected item by turning the [VOL] knob.
- Volume offset: Sets each source's volume relative to the basic volume.
- Loudness: Compensates for low and high tones at low volumes. When ON, the "LOUD" indicator is illuminated.
- Exit Audio Setup mode by pressing and holding the [VOL] knob for at least 1 second.
Speaker Setting:
- Fine-tunes the System Q values for optimal sound based on speaker type.
- To Set Speaker Type:
- Enter Standby mode by pressing the [SRC] button until "STANDBY" is displayed.
- Enter Speaker Setting mode by pressing the [VOL] knob.
- Select the speaker type by turning the [VOL] knob. Options include "SP OFF," "SP 5/4" (for 5 & 4 in. speakers), "SP 6*9/6" (for 6 & 6x9 in. speakers), and "SP OEM" (for OEM speakers).
- Exit Speaker Setting mode by pressing the [VOL] knob.
Switching Display:
- Changes the information displayed on the unit.
- To Switch Display Items:
- Enter Switching Display mode by pressing and holding the Control knob for at least 1 second. "DISP SEL" is displayed.
- Select the display item by pushing the Control knob towards [◄◄] or [►►].
- Tuner source: "FREQ" (Frequency), "CLOCK."
- CD source: "D-TITLE" (Disc title), "T-TITLE" (Track title), "P-TIME" (Track number & Play time), "CLOCK."
- Audio file source: "TITLE" (Song title & Artist name), "ALBUM" (Album name & Artist name), "FOLDER" (Folder name), "FILE" (File name), "P-TIME" (Track number & Play time), "CLOCK."
- VCD source: "P-TIME" (Track number & Play time), "CLOCK."
- Standby/Auxiliary input source: "SRC NAME" (Source name), "CLOCK."
- If information cannot be displayed, "Play time" is shown. Selecting clock display changes the display setting for all sources to clock display. Album name cannot be displayed for WMA files.
3. Exit Switching Display mode by pressing the Control knob.
Theft Deterrent Faceplate:
- The faceplate can be detached to deter theft.
- Removing:
- Press the Release button to drop open the faceplate.
- Pull the faceplate to the left side to detach it.
- Reattaching:
- Align the shaft on the unit with the depression on the faceplate.
- Push the faceplate in until it clicks into place.
- Important: Attach the panel while the car's electrical system is operating. Handle the faceplate with care as it is precision equipment. Store it in its case away from direct sunlight, excessive heat, humidity, and dust. Do not touch the terminals.
TEL Mute:
- Automatically mutes the audio system when a call comes in.
- When a call comes in: "CALL" is displayed, and the audio pauses.
- Listening to audio during a call: Press the [SRC] button. "CALL" disappears, and audio resumes.
- When the call ends: Hang up the phone. "CALL" disappears, and audio resumes.
- Note: To use this feature, the MUTE wire must be connected to your telephone via a commercial accessory (refer to "Connecting Wires to Terminals").
Tuner Features
The unit's tuner allows for radio reception with various tuning and memory functions.
Tuning:
- To Select a Station:
- Select "TUNER" source by pressing the [SRC] button.
- Select the band (FM1, FM2, FM3, AM) by pushing the Control knob towards [FM] or [AM].
- Tune up or down by pushing the Control knob towards [◄◄] or [►►].
- The "ST" indicator illuminates when receiving stereo FM stations.
Tuning Mode:
- Choose between automatic or manual tuning.
- Press the [AUTO] button to cycle through modes:
- "AUTO 1" (Auto seek): Automatic search for a station.
- "AUTO 2" (Preset station seek): Searches in order of stations stored in preset memory.
- "MANUAL" (Manual): Normal manual tuning control.
Station Preset Memory:
- Stores radio stations for quick recall.
- To Store a Station:
- Select the band by pushing the Control knob towards [FM] or [AM].
- Select the frequency to store by pushing the Control knob towards [◄◄] or [►►].
- Press and hold the desired [1] - [6] button for at least 2 seconds. The preset number display blinks once. One station can be stored per button on each band.
Auto Memory Entry:
- Automatically stores stations with good reception.
- To Perform Auto Memory Entry:
- Select the band by pushing the Control knob towards [FM] or [AM].
- Press and hold the [AME] button for at least 2 seconds. "A-MEMORY" is displayed. The process completes when 6 stations are stored.
Preset Tuning:
- Recalls stored stations.
- To Recall a Station:
- Select the band by pushing the Control knob towards [FM] or [AM].
- Press the desired [1] - [6] button.
Frequency Step Setting:
- Changes the tuning frequency step for FM and AM bands.
- The original setting is 50 kHz for FM and 9 kHz for AM.
- To Change Frequency Step:
- Turn the power OFF by holding the [SRC] button for 1 second.
- While pressing the [1] and [5] buttons, press the [SRC] button. Release [SRC] first, then [1] and [5].
- The frequency step changes to 200 kHz for FM and 10 kHz for AM. Repeating the operation returns to the original setting. Changing the frequency step deletes stored frequencies.
CD/Audio File/VCD Control Features
The unit supports playback of CDs, MP3/WMA audio files, and VCDs, offering various control options.
Playing CD, Audio File & VCD:
- When no disc is inserted:
- Drop open the faceplate by pressing the Release button.
- Insert a disc.
- Push the faceplate on the left side to return it to its former position.
- Caution: Ensure the faceplate does not interfere with the shift lever or other vehicle functions. Do not use the unit with the faceplate open to prevent dust entry.
- The "IN" indicator illuminates when a disc is inserted.
- PBC (Playback Control) function is not supported for VCDs.
- When a disc is inserted:
- Select "CD" source by pressing the [SRC] button.
- Pause and Play: Press the Control knob to toggle between pause and play.
Ejecting a Disc:
-
- Drop open the faceplate by pressing the Release button.
- Press the [▲] button to eject the disc.
- Push the faceplate on the left side to return it to its former position.
Fast Forwarding and Reversing:
- Fast Forward: Hold down the Control knob towards [►►I]. Release to resume playback.
- Reverse: Hold down the Control knob towards [◄◄I]. Release to resume playback.
- Note: Sound is not output during fast forward/reverse search for audio files and VCD video tracks.
Track/File Search:
- Searches for a song on the disc or in the audio file folder.
- Push the Control knob towards [◄◄] or [►►I].
Folder Search (Audio File Function):
- Selects folders on audio file media.
- Push the Control knob towards [FM] or [AM].
Direct Track/File Search (Remote Control Function):
- Searches by entering the track/file number using the remote control.
- To Perform Direct Search:
- Enter the track/file number using the number buttons on the remote control.
- Press the [◄◄] or [►►I] button.
- To Cancel: Press the [►II] button.
Track/File/Folder Repeat:
- Replays the current song or audio file folder.
- Press the [REP] button to cycle through repeat modes:
- CD/VCD source: "TRAC REP" (Track Repeat), "REP OFF."
- Audio file source: "FILE REP" (File Repeat), "FOLD REP" (Folder Repeat), "REP OFF."
Scan Play:
- Plays the first part of each song on the disc or in the audio file folder to help you find a desired song.
- To Start Scan Play: Press the [SCAN] button. "TRAC SCN" or "FILE SCN" is displayed.
- To Release: Press the [SCAN] button when the desired song is playing.
- Note: Scan Play is not available for discs containing Video CD files.
Random Play:
- Plays all songs on the disc or in the audio file folder in random order.
- Press the [RDM] button to toggle Random Play ON and OFF.
- When ON, "DISC RDM" or "FOLD RDM" is displayed.
- Pushing the Control knob towards [►►I] during Random Play starts the next random song.
Folder Select (Audio File Function):
- Quickly selects a desired folder.
- To Enter Folder Select Mode: Press the [F.SEL] button. "FOLD SEL" is displayed. The current folder name is shown.
- To Select Folder Level: Push the Control knob towards [FM] (1 level down) or [AM] (1 level up).
- To Select Folder in Same Level: Push the Control knob towards [◄◄] (previous folder) or [►►I] (next folder).
- To Return to Top Level: Press the [3] button.
- To Scroll Folder Name Display: Push the Control knob towards [FM] for at least 2 seconds.
- To Decide Folder to Play: Press the Control knob. Folder Select mode releases, and the audio file in the displayed folder plays.
- To Cancel Folder Select Mode: Press the [F.SEL] button.
Audio Output Select (VCD Function):
- Changes the audio output to Left or Right STEREO.
- Press the [M/S] button to cycle through options:
- "ST": Stereo sound output.
- "LL": Outputs Left channel sound to both left and right speakers.
- "RR": Outputs Right channel sound to both left and right speakers.
- Note: This function is canceled when playing the CD-DA part of a mixed Video CD.
Text/Title Scroll:
- Scrolls the displayed CD text or audio file text.
- Push the Control knob towards [FM] for at least 2 seconds.
The Menu system allows configuration of various unit functions, including beep sounds, clock adjustment, and display settings.
Basic Operation Method:
- Enter Menu mode: Press and hold the [MENU] button for at least 1 second. "MENU" is displayed.
- Select menu item: Push the Control knob towards [FM] or [AM].
- Set menu item: Push the Control knob towards [◄◄] or [►►I].
- Exit Menu mode: Press the [MENU] button.
Menu Items and Settings:
Touch Sensor Tone (In Standby mode):
- Sets whether a beep sound is heard during operation.
- "BEEP ON": Beep is heard.
- "BEEP OFF": Beep is canceled.
Dimmer (In Standby mode):
- Dims the display automatically when the vehicle's lights are turned ON.
- "DIM ON": Display dims.
- "DIM OFF": Display does not dim.
Manual Clock Adjustment (In Standby mode):
- To Adjust Clock:
- Select "CLK ADJ" by pushing the Control knob towards [FM] or [AM].
- Enter Clock Adjust mode by pressing and holding the Control knob for at least 1 second. The clock display blinks.
- Adjust hours by pushing the Control knob towards [FM] or [AM].
- Adjust minutes by pushing the Control knob towards [◄◄] or [►►I].
- Exit Clock adjustment mode by pressing the [MENU] button.
CRSC (Clean Reception System Circuit) (In FM reception):
- Temporarily alternates reception between stereo and mono to reduce multi-path noise in FM.
- "CRSC ON": CRSC is ON.
- "CRSC OFF": CRSC is OFF.
- Note: Strong electrical fields may cause unstable sound quality when CRSC is ON; turn it OFF in such situations.
DSI (Disabled System Indicator) (In Standby mode):
- A red indicator blinks on the unit after the faceplate is removed, warning potential thieves.
- "DSI ON": LED flashes.
- "DSI OFF": LED OFF.
Auxiliary Input Display Setting:
- Selects the display when changing to the Auxiliary input source.
- To Set Display:
- Select "AUX" source by pressing the [SRC] button.
- Enter Menu mode by holding [MENU] for 1 second.
- Select "NAME SET" by pushing the Control knob towards [FM] or [AM].
- Enter Auxiliary input display setting mode by holding the Control knob for 1 second. The currently selected display is shown.
- Select the Auxiliary input display by pushing the Control knob towards [◄◄] or [►►I]. Options include "AUX," "DVD," "PORTABLE," "GAME," "VIDEO," and "TV."
- Exit Auxiliary input display setting mode by pressing the [MENU] button.
- Note: If no operation occurs for 10 seconds, the current name is registered, and the setting mode closes.
Built-in Auxiliary Input Setting (In Standby mode):
- Sets whether the Built-in Auxiliary Input function is enabled.
- "AUX OFF": No Auxiliary Input when selecting the source.
- "AUX ON": Auxiliary Input is available when selecting the source.
CD Read Setting (In Standby mode):
- Forces playback of CDs with special formats if problems occur.
- "CD READ1": Plays CD and Audio file.
- "CD READ2": Plays CD by force.
- Note: "CD READ2" may not play Audio files, and some music CDs may not play even in "CD READ2" mode.
Text Scroll:
- Sets how displayed text scrolls.
- "SCL AUTO": Repeats scroll.
- "SCL MANU": Scrolls when the display changes.
Switches the NTSC/PAL setting (In Standby mode):
- Alternates between NTSC and PAL broadcast modes.
- "P/N PAL": Set for PAL broadcast mode areas.
- "P/N NTSC": Set for NTSC broadcast mode areas.
- Note: The PAL or NTSC setting must match the connected monitor unit's setup for images to be displayed.
Remote Control Basic Operations
The remote control provides convenient access to many unit functions.
Loading and Replacing the Battery:
- Uses two "AA" / "R6"-size batteries.
- Slide the cover down to remove. Insert batteries with correct polarity (+ and -).
- Warning: Keep unused batteries out of reach of children. Do not place the remote control in hot places.
Remote Control Buttons:
- [VOL] buttons: Adjusts volume.
- [SRC] button: Cycles through sources.
- [ATT] button: Toggles Attenuator ON/OFF.
- [AUD] button: Selects audio items for adjustment.
- [FM]/[AM] buttons: Selects tuner band.
- [◄◄]/[►►I] buttons:
- Tuner: Tunes up or down the band.
- Disc: Goes forwards and backwards between track/files.
- [+]/[-] buttons (Disc source): Goes forwards and backwards between folders.
- [►II] button (Disc source): Toggles pause/play.
- [0]-[9] buttons:
- Tuner: Recalls preset stations [1]-[6].
- Disc: Enters track/file numbers during Direct Track/File Search.
Accessories/Installation Procedure
Installation:
- Safety Precautions:
- Disconnect the car battery before installation.
- Connect wiring harness wires in the correct order: ground, battery, ignition.
- Ensure speaker wires are correctly connected and not short-circuited or touching the vehicle chassis.
- If the car's ignition lacks an ACC position, connect ignition wires to a power source that turns on/off with the ignition key.
- Do not use excessive force or incorrect screws during installation.
- Mount the unit so the faceplate does not hit the console lid.
- Mounting angle should be 30° or less.
- Using the Relay Connector:
- Plug the vehicle's harness into the relay connector.
- Plug the parking brake detection wire into the relay connector.
- Lock the cable clamp.
- Press down on conductive metal until it's even with the plastic surface.
- Lock the lid.
- Screwing the Faceplate on the Unit (Optional):
- To fasten the faceplate to prevent it from falling off:
- Remove the hard rubber frame (see "Removing the Unit").
- Drop open the faceplate.
- Tighten the screw (ø2 × 5 mm) and bracket (Accessory⑥) in the specified hole.
- Tighten the screw (ø2 × 5 mm) and bracket (Accessory⑦) in the specified hole.
- Caution: Only use specified screw holes to avoid damaging internal mechanical parts.
Removing the Unit
Removing the Hard Rubber Frame:
- Engage the catch pins on the removal tool and remove the two locks on the upper level. Pull the upper frame forward.
- Remove the lower two locations similarly. The frame can also be removed from the bottom side.
Removing the Unit:
- Remove the hard rubber frame.
- Remove the screw (M4 × 8) on the back panel.
- Insert the two removal tools deeply into the slots on each side.
- Lower the removal tool towards the bottom and pull out the unit halfway while pressing inwards.
- Caution: Be careful to avoid injury from the catch pins on the removal tool.
- Pull the unit all the way out with your hands, being careful not to drop it.
Troubleshooting Guide
This section provides solutions for common issues.
General:
- No power: Check if the fuse has blown. Replace after checking for short circuits.
- Cannot switch source: Ensure media is inserted for the desired source.
- Memory erased when ignition OFF: Check ignition and battery wire connections.
- TEL mute not working: Check TEL mute wire connection. If it activates without a call, ensure it's not touching metal.
- Loudness not compensating high-pitched tone: Loudness does not compensate for high-pitched tones in Tuner source.
- No sound or low volume: Check fader/balance settings (center them). Reconnect input/output wires or wiring harness. Adjust Volume offset in Audio Setup.
- Poor/distorted sound: Check for pinched speaker wires. Ensure speakers are wired correctly to different output terminals.
- Touch Sensor Tone not sounding: Not output from the preout jack.
- Dimmer not working: Check Dimmer wire connection. Ensure setting is ON.
Tuner Source:
- Poor radio reception: Extend car antenna. Check antenna control wire connection.
Disc Source:
- Specified disc not playing, another playing: Clean the disc. Check for scratches. Try another disc.
- Cannot remove disc: If more than 10 minutes passed since ACC OFF, turn ACC ON and press Eject.
- Disc won't insert: Remove any already inserted disc.
- Direct Search not possible: Turn OFF Random Play or other functions.
Audio File Source:
- Cannot play audio file: Clean the media. Check for scratches.
- Sound skips: Clean the media. Check recording conditions; re-record if necessary.
- Track time not displayed correctly: May occur due to audio file recording conditions.
System Messages:
- TOC ERR: Disc is dirty, upside-down, or scratched. Clean and load correctly.
- E-05: Disc is upside-down. Load correctly.
- E-99: Unit malfunctioning. Press reset button. If persistent, consult service center.
- READING: Unit is reading disc data.
- IN (Blink): CD player section not operating. Reinsert CD. If persistent, switch off power and consult service center.
- PROTECT: Speaker wire short-circuit or touching chassis. Wire/insulate speaker cable properly and press reset button.
- NA FILE: Audio file format not supported.
- COPY PRO: Copy-protected file played.
- PRK OFF: Parking brake not applied during VCD playback.