Installation sequence
- Push the water inlet mechanism onto the valve block (figure 1)
- Screw the water inlet mechanism into the water inlet, glue the bracket (figure 2)
- Insert siphon trap into the outlet (figure 3)
- Turn on the water
- Flush the water inlet mechanism (figure 4)
- Put a battery into the control unit (figure 5a), or plug in the main connections (5b). The LED
flashes.
- Secure the control unit onto the valve block (figure 6A)
- Connect the control unit to the siphon trap (6B) and to the solenoid valve (6C)
- Check multi-function display (figure 8)
- Open the shut-off valve, test the water tightness (figure 7). Do not darken the room.
- Install the urinal to cover the daylight sensor (figure 9)
- Three minutes after completing the installation there will be a flush of approx. 10 seconds so that
the siphon trap is filled with water
- After a break of 8 seconds there will be another flush of approx. 2 seconds
- The urinal can then be used
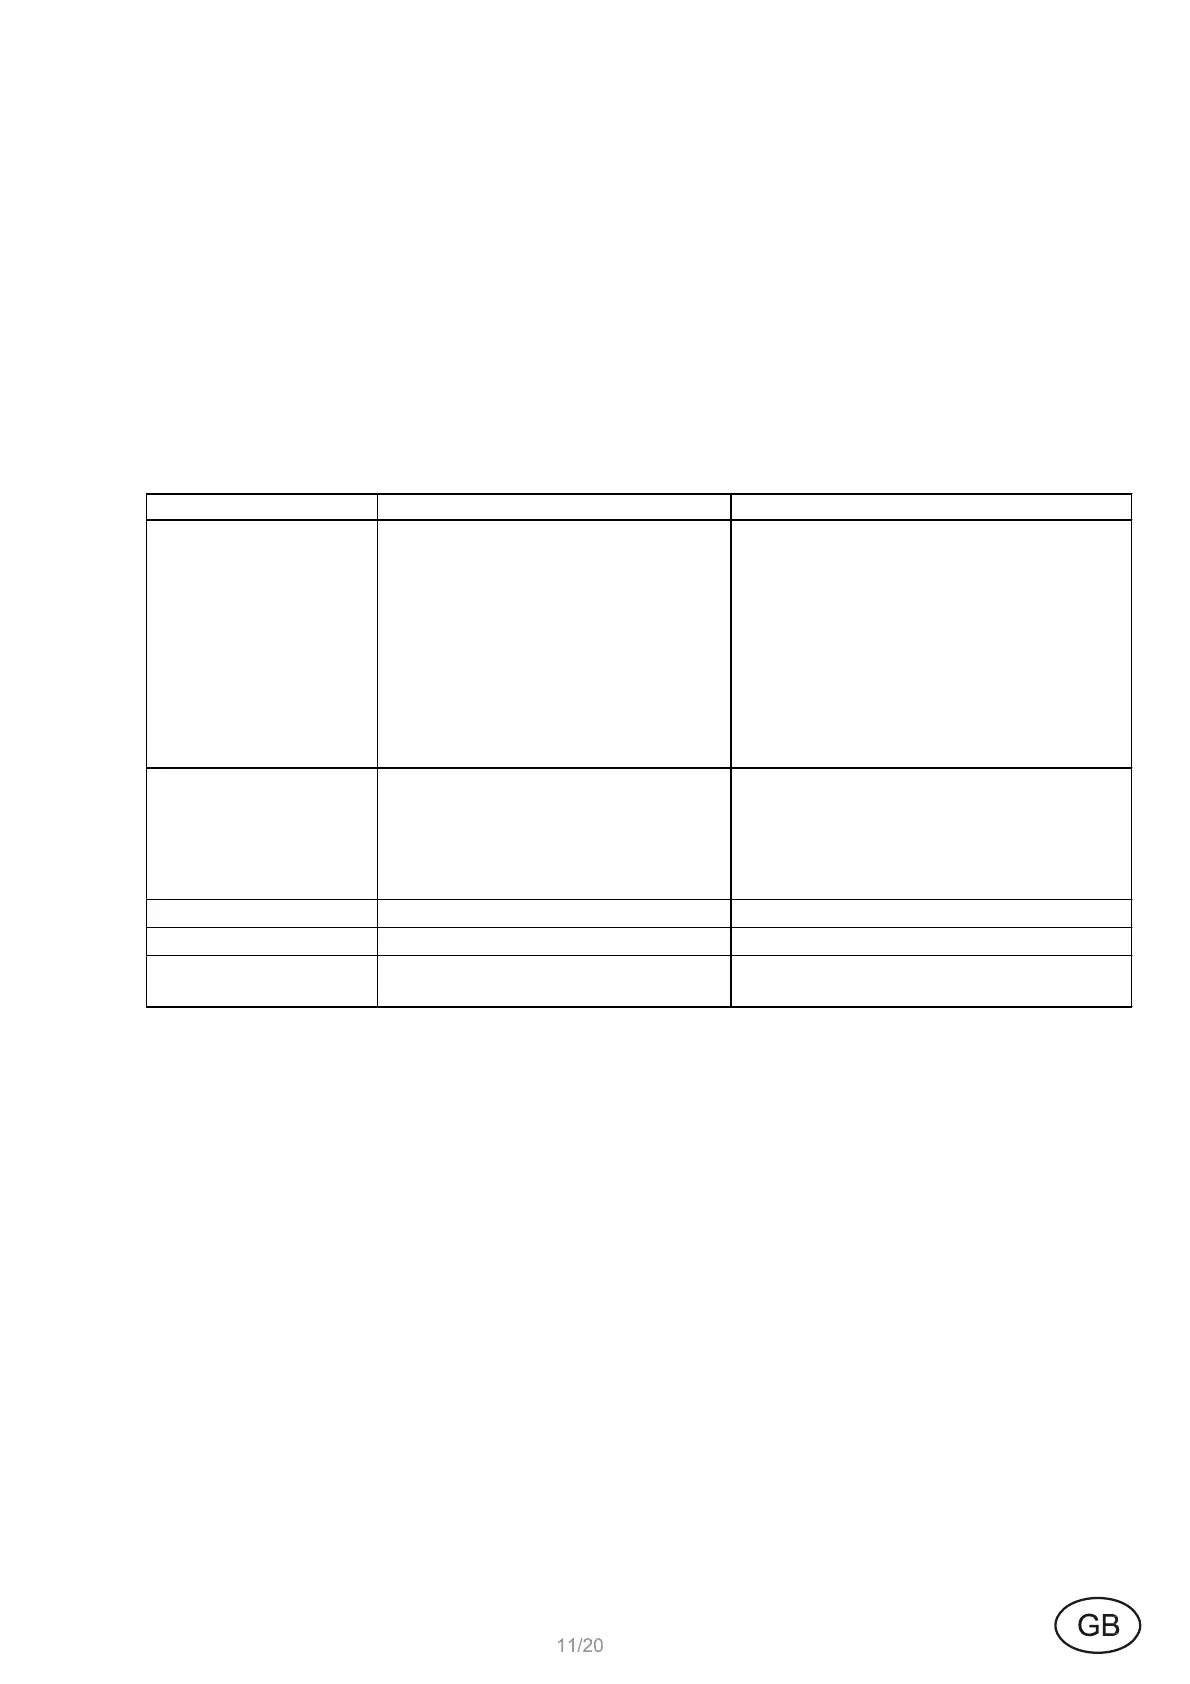
Fault Cause Solution
No flush
Water supply interrupted
Filter clogged
Solenoid valve damaged
Cable connections interrupted
Battery empty
Power supply interrupted
Cleaning session
Open shut-off or preliminary shut-
off device
Clean
Replace valve
Establish connections
Replace
Ensure power supply
Automatically latest after 30
minutes
Flush, low
Water supply reduced
Filter clogged
Solenoid valve damaged
Low water pressure
Open shut-off or preliminary shut-
off device
Clean
Replace valve
Flush volume increase (page 13.1)
Flush, constant
Solenoid valve damaged
Replace valve
Flushing every 60 sec.
Stadium mode
Automatic switchover
Residual water does
not flow off
Siphon trap or drains blocked
Replace or rectify