5
Conditions of use
► Observe the operating conditions for wa-
ter heating installations as dened in
DIN 18380 "VOB German Contract Proce-
dures for Building Services".
► Maintain water quality as dened in VDI
2035 "Prevention of damage in water heat-
ing installations".
► Observe the limitations for use in damp
rooms as dened in DIN 55900 "Coatings
for radiators".
► Use radiator only in closed heating systems.
► Store and transport radiator only in the
protective packaging.
► Observe minimum clearances between ra-
diator and surrounding objects for air cir-
culation.
Complaints
► Please contact the supplier.
Disposal
► Packaging and any parts that are not need-
ed should be recycled or disposed of prop-
erly. Observe local regulations.
Technical features
• Operating pressure: max. 10 bar
• Test pressure: 1.3 x operating pressure
• Flow temperature: hot water up to 110°C
(230°F)
Installation
Bracket installation (see Fig. 1–8)
► Check fasteners for damage.
► Prepare tools and fastening materials
(screws, washers and wall anchors). Use
only approved screws and wall anchors to
ensure the required load-bearing capacity
for the radiator (available separately from
the manufacturer).
► Mark position for upper holes to be drilled:
– For reference dimensions, see Fig. B.
► Drill holes and insert wall anchors. Note
walling material.
► Position, attach, align and secure brackets
based on the desired wall spacing.
► Install lower locking screws. Ensure that
the wall anchor is ush with the front edge
of the bracket.
► Attach sound-absorbing clips to all brack-
ets.
► Attach lift restraints to the outer brackets.
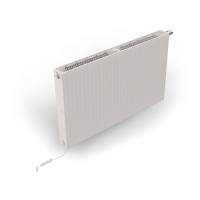
Heater installation (see Fig. 9–10)
Protect radiator from damage
► When installing, only remove protective
packaging at the fastening and connection
points.
► Only remove protective packaging com-
pletely during nal cleaning or prior to
commissioning.
Compact radiator connection
► Unscrew painted blind plugs at the desig-
nated connection points.
► Connect radiator with commercially avail-
able ttings upstream.
► Tightly cap open connections with vent
plugs (top) and blind plugs.
Only existing blind plugs may be used on Ker-
mi steel panel radiators.
Valve radiator connection
Valve with factory pre-set k
V
value (see manu-
facturer's data).
► Vent plugs (top) and blind plugs are factory
pre-assembled.
► Remove painted caps on the valve mount-
ings and dispose of, as they must not be
used as seals on the radiator.
► Connect radiator with commercially avail-
able ttings upstream on the valve mount-
ings.
Special connections
► See manufacturer's data.
Commissioning
► Fill the radiator and vent the radiator. Risk
of scalding!
► Check radiator and connections for leaks.