IMPORTANT: Please contact Customer Service if you have any problems or discover any missing parts.
IMPORTANT: Veuillez contacter notre Service Clientèle pour tout problème ou pièce manquante.
WICHTIG: Bitte wenden Sie sich an unseren Kundenservice, falls Sie irgendwelche Probleme haben oder
feststellen, daß Teile fehlen.
IMPORTANTE: Sírvase contactar con nuestro Servicio al Cliente por cualquier problema, o pieza que pudiera faltar.
IMPORTANTE: Si prega di contattare il Servizio Clienti per eventuali necessità.
BELANGRIJK: Neemt u in geval van problemen of missende onderdelen a.u.b. contact op met de klantenservice.
IMPORTANTE: favor entrar em contato com o Serviço ao Cliente se houver problemas ou se faltar peças.
ΣΗΜΑΝΤΙΚΟ: παρακαλώ επικοινωνήστε με την Εξυπηρέτηση Πελατών αν αντιμετωπίσετε κάποιο πρόβλημα ή αν λείπει
μέρος από την συσκευασία.
EN
IT
ES
PT
GR
NL
FR
GE
WWW.KETER.COM
USA & Canada:
1-(888)-374-4262
UK: Tel: 0121-5060008,
Fax: 0121-4220808
Other European Countries:
Tel: +31 (0) 161 22 8300
MONTAGEANLEITUNG MONTAGEVOORSCHRIFT
INSTRUÇÕES DE MONTAGEM
PT
NL
GE
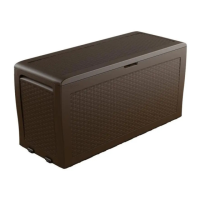
CITY BOX 30 US GAL | 113L
ASSEMBLY INSTRUCTIONS INSTRUCTIONS DE MONTAGE
INSTRUCCIONES DE MONTAJE ISTRUZIONI DI MONTAGGIO
EN
ITES
FR
100 kg
220 lb
20 kg
44 lb
590293