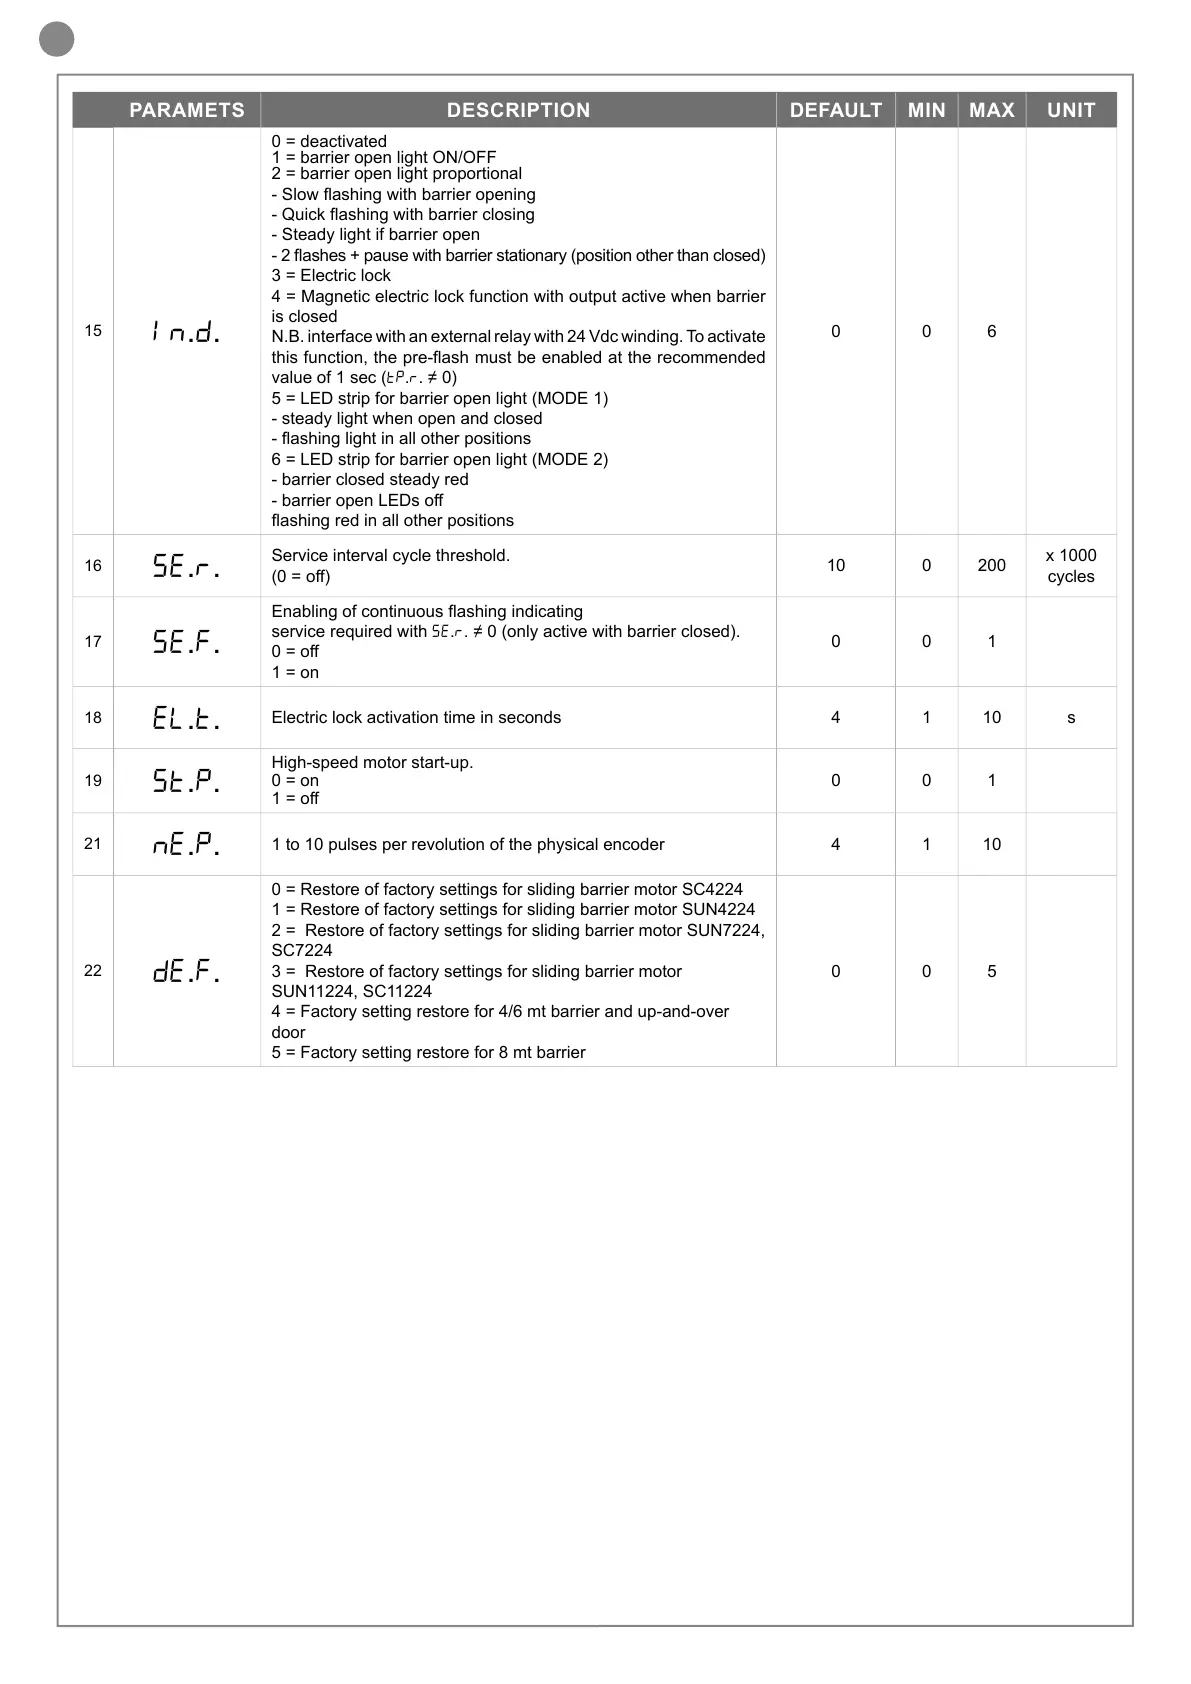
PARAMETS DESCRIPTION DEFAULT MIN MAX UNIT
15
IN.D.
0 = deactivated
1 = barrier open light ON/OFF
2 = barrier open light proportional
- Slow ashing with barrier opening
- Quick ashing with barrier closing
- Steady light if barrier open
- 2 ashes + pause with barrier stationary (position other than closed)
3 = Electric lock
4 = Magnetic electric lock function with output active when barrier
is closed
N.B. interface with an external relay with 24 Vdc winding. To activate
this function, the pre-ash must be enabled at the recommended
value of 1 sec (tP.r. ≠ 0)
5 = LED strip for barrier open light (MODE 1)
- steady light when open and closed
- ashing light in all other positions
6 = LED strip for barrier open light (MODE 2)
- barrier closed steady red
- barrier open LEDs o
ashing red in all other positions
0 0 6
16
se.r.
Service interval cycle threshold.
(0 = o)
10 0 200
x 1000
cycles
17
se.f.
Enabling of continuous ashing indicating
service required with se.r. ≠ 0 (only active with barrier closed).
0 = o
1 = on
0 0 1
18
EL.T.
Electric lock activation time in seconds 4 1 10 s
19
ST.P.
High-speed motor start-up.
0 = on
1 = o
0 0 1
21
NE.P.
1 to 10 pulses per revolution of the physical encoder 4 1 10
22
DE.F.
0 = Restore of factory settings for sliding barrier motor SC4224
1 = Restore of factory settings for sliding barrier motor SUN4224
2 = Restore of factory settings for sliding barrier motor SUN7224,
SC7224
3 = Restore of factory settings for sliding barrier motor
SUN11224, SC11224
4 = Factory setting restore for 4/6 mt barrier and up-and-over
door
5 = Factory setting restore for 8 mt barrier
0 0 5
and hold it down). A countdown should now appear: 49,48...,1 down
 Loading...