2
Connecting Multiple Amplifiers
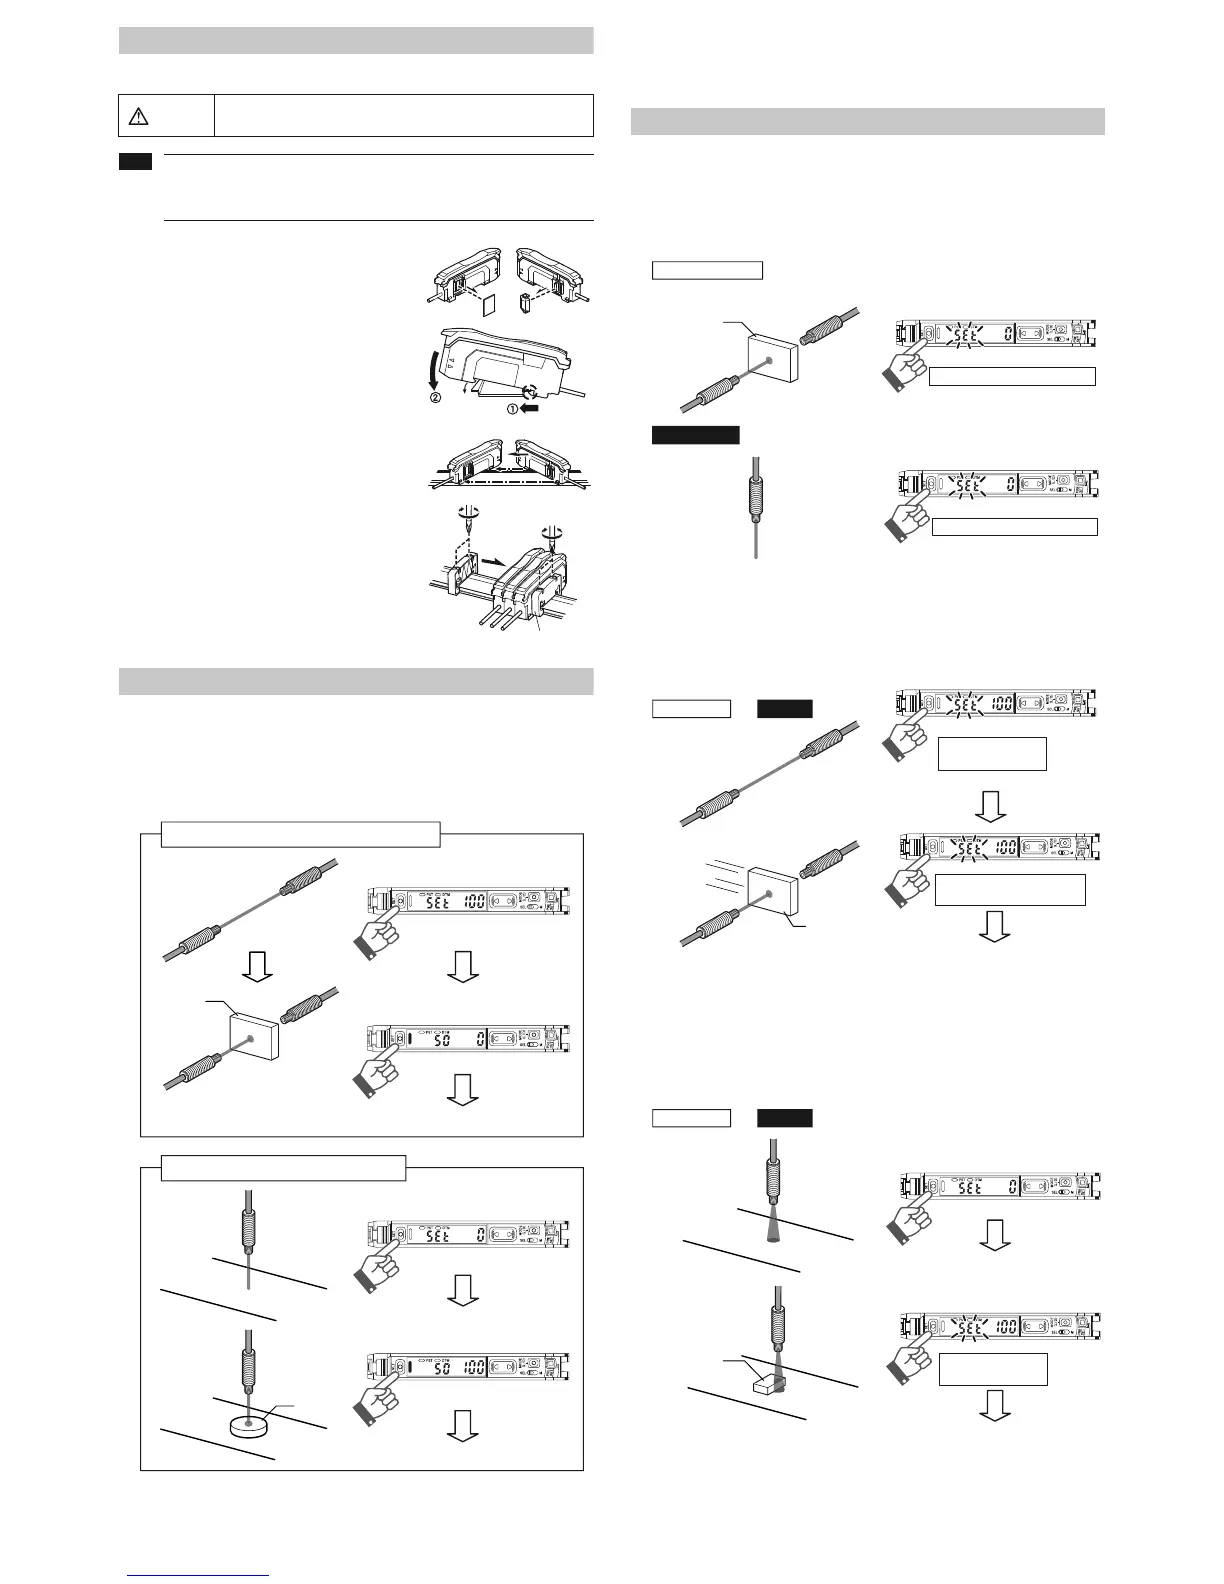
Up to 16 sub units can be connected to one main unit.
1 Remove the protection covers of the main unit and
sub unit(s).
2 Install the amplifiers one by one on the DIN rail.
3 Engage the two claws of the sub unit with the
recesses on the main unit side until you hear a
click.
4 Attach the end units (option: OP-26751) to the
both ends of the connected amplifiers in the same
way as in step (2).
5 Sandwich the amplifiers between the end units.
Tighten the screws at the top (two screws x two
units) with a Phillips screwdriver to fix the end
units.
Calibration Method
Detecting Even Small Differences
Two-point Calibration
Two-point calibration is the basic method for making calibration.
You can set the sensitivity level automatically, simply by pressing the [SET] button twice.
Just press once with the workpiece set up, and once without.
Two-point calibration performs detection at a location where there is a workpiece, and
another location where there is not, uses the intermediate value as the setting.
If the sensitivity difference does not have enough room, "- - - -" flashes for about two sec-
onds after the calibration is complete. The set value is stored in memory even in that case.
Other Calibration Methods
Increase Resistance to Dust and Dirt
Maximum Sensitivity Setting
In the state shown below, press and hold the [SET] button for three seconds and stop push-
ing when "5'6" flashes.
The sensitivity is set slightly higher than the light intensity.
Calibrate with Moving Workpiece
Full Auto Calibration
Press and hold the [SET] button with no workpiece in place, while “5'6” is flashing, pass
through a workpiece. (Continue pressing the [SET] button while the workpiece passes
through.)
Positioning Calibration
Press the [SET] button with no workpiece set.
Place the workpiece in the location you wish to position it, and press and hold the [SET] but-
ton for at least 3 seconds. Release the button when "5'6" flashes.
Mount on DIN rail and install on metal sheeting when connecting to
multiple amplifiers or mounting main units together.
• Multiple connections cannot be made to equipment other than the FS-N10
series.
• Turn the power off before connecting multiple sub units.
• Do not touch the expansion connector with your bare hands.
Warning
Workpiece
Through-beam model setting method
Settings complete
Press [SET] button once with
no workpiece set
Press [SET] button once with
workpiece set
Reflective model setting method
Workpiece
Settings complete
Press [SET] button once with
no workpiece set
Press [SET] button once with
workpiece set
Workpiece
Through-beam model
: with
workpiece set
Press and hold for 3 seconds or more
: without workpiece set
Reflective model
Press and hold for 3 seconds or more
Common to
Through-beam
and
ModelsReflective
Press and hold until
"
UGV
" flashes
Workpiece
While pressing the [SET] button
pass through a workpiece
Settings complete
Common to
Through-beam
and
Models
Reflective
Press [SET] button once with
no workpiece set
Press and hold [SET] button with
workpiece
set
Settings complete
Press and hold until
"
UGV
" flashes
 Loading...