4
Supra C500 Pro User Guide
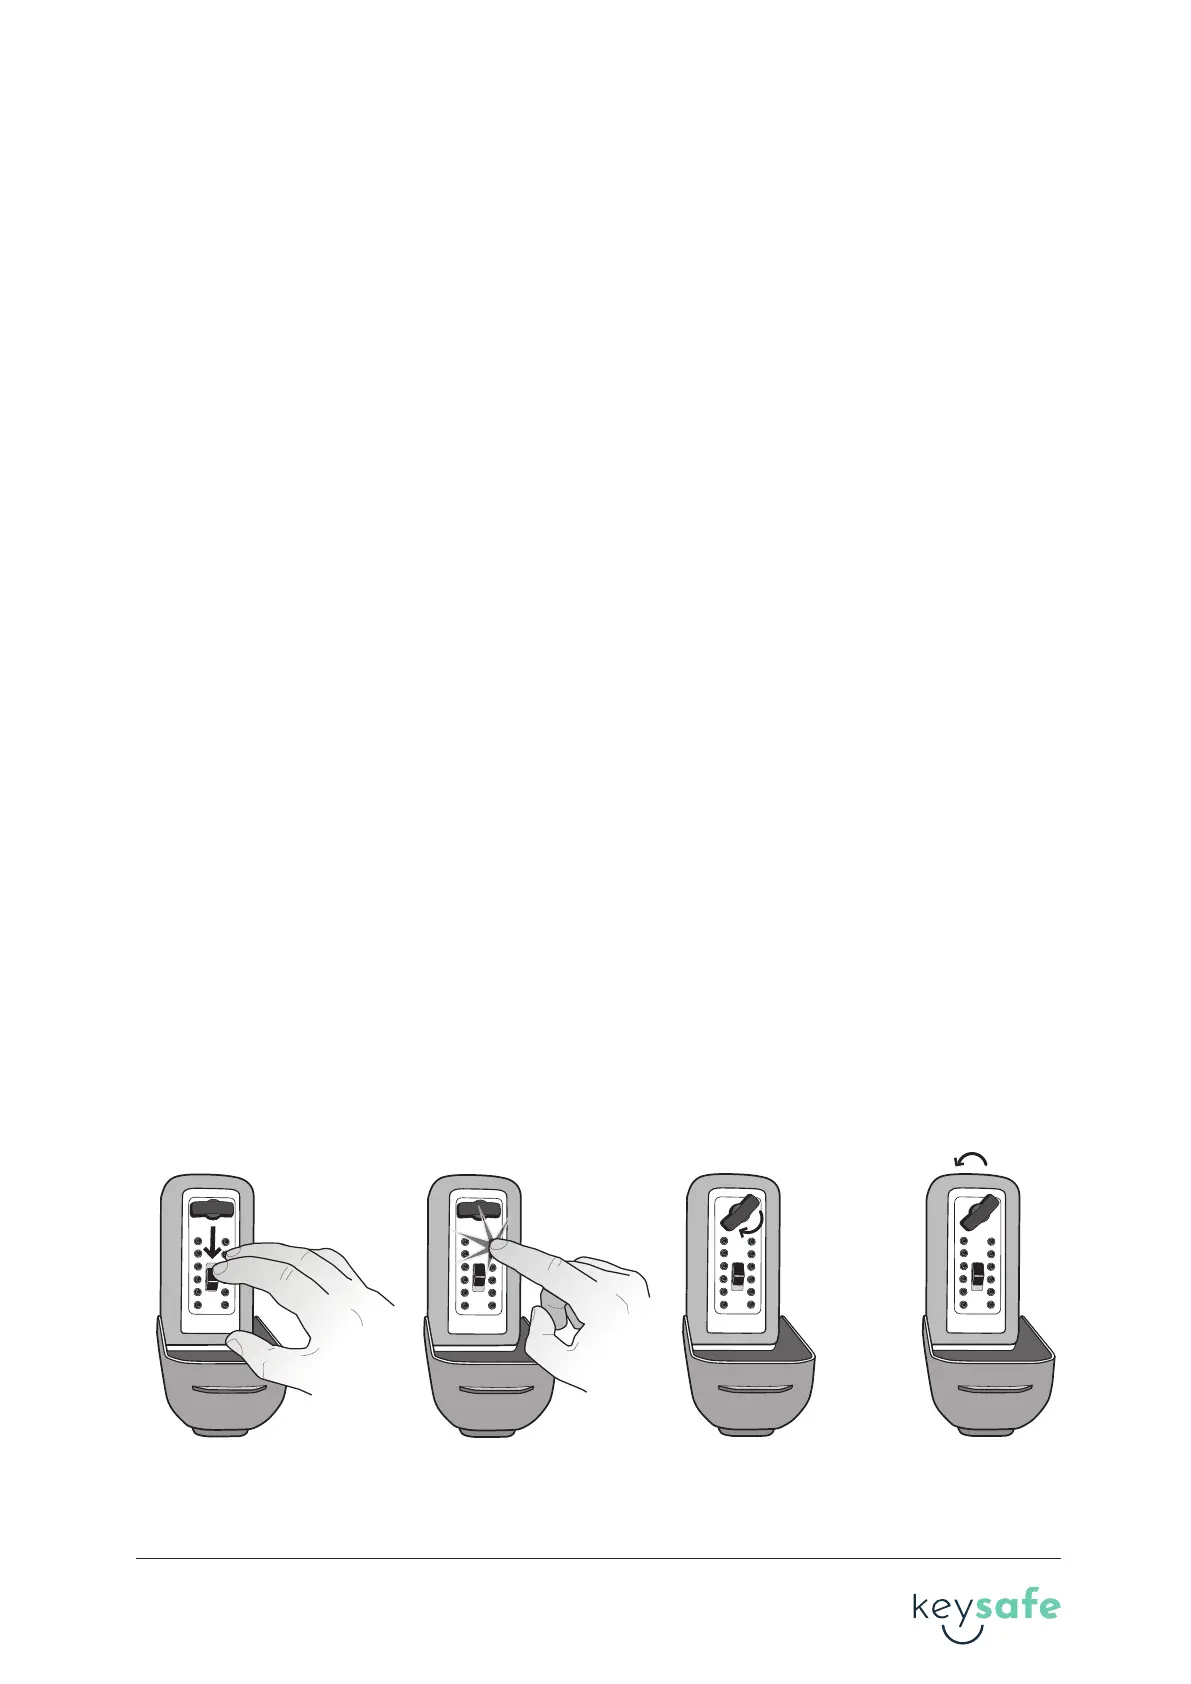
1. Press down on the CLEAR buon.
2. Enter the combinaon. If you enter an incorrect combinaon, press down on the CLEAR
buon to reset the buons and reenter the combinaon.
3. Turn the OPEN handle clockwise 180° to open. When you turn the handle, the combinaon
will clear.
Note: The open handle is designed so it cannot be forced open. If an incorrect code is entered
and the handle is forced, the handle will unlatch from the locking mechanism and turn freely
without opening. To reset the handle, turn it all the way back to the locked posion where it
will snap back into place.
4. To relock, close the lid and turn the OPEN handle counter-clockwise 180° back to the locked
posion.
D. Opening and closing your key safe
D.1 D.2 D.3 D.4
1
2
3
4
5
A
6
7
8
9
0
B
1
2
3
4
5
A
6
7
8
9
0
B
1
2
3
4
5
A
6
7
8
9
0
B
1
2
3
4
5
A
6
7
8
9
0
B
Note: You must use the included size 6x60mm masonry screws provided and install the
Keysafe into brick or concrete to maintain the LPS 1175 security cercaon.
When mounng on a rendered wall, the maximum thickness of the render cannot exceed
10mm.
Note: a rendered substrate is not covered within the approval to LPS 1175.
Note: Do not mount KeySafe closer than 6” or 15cm to the corner of a masonry surface. Make
sure KeySafe is mounted ush with masonry surface and the masonry screws are only installed
directly into brick. Never install masonry screws into mortar. Minimize all gaps between back
of KeySafe and masonry surface.
7. Tighten the screws unl the heads are snug against the back of the KeySafe. Be careful not to
over ghten the screws.
4 brand guideline
 Loading...