Steps to Install and Program the NETCOM6P…cont’d
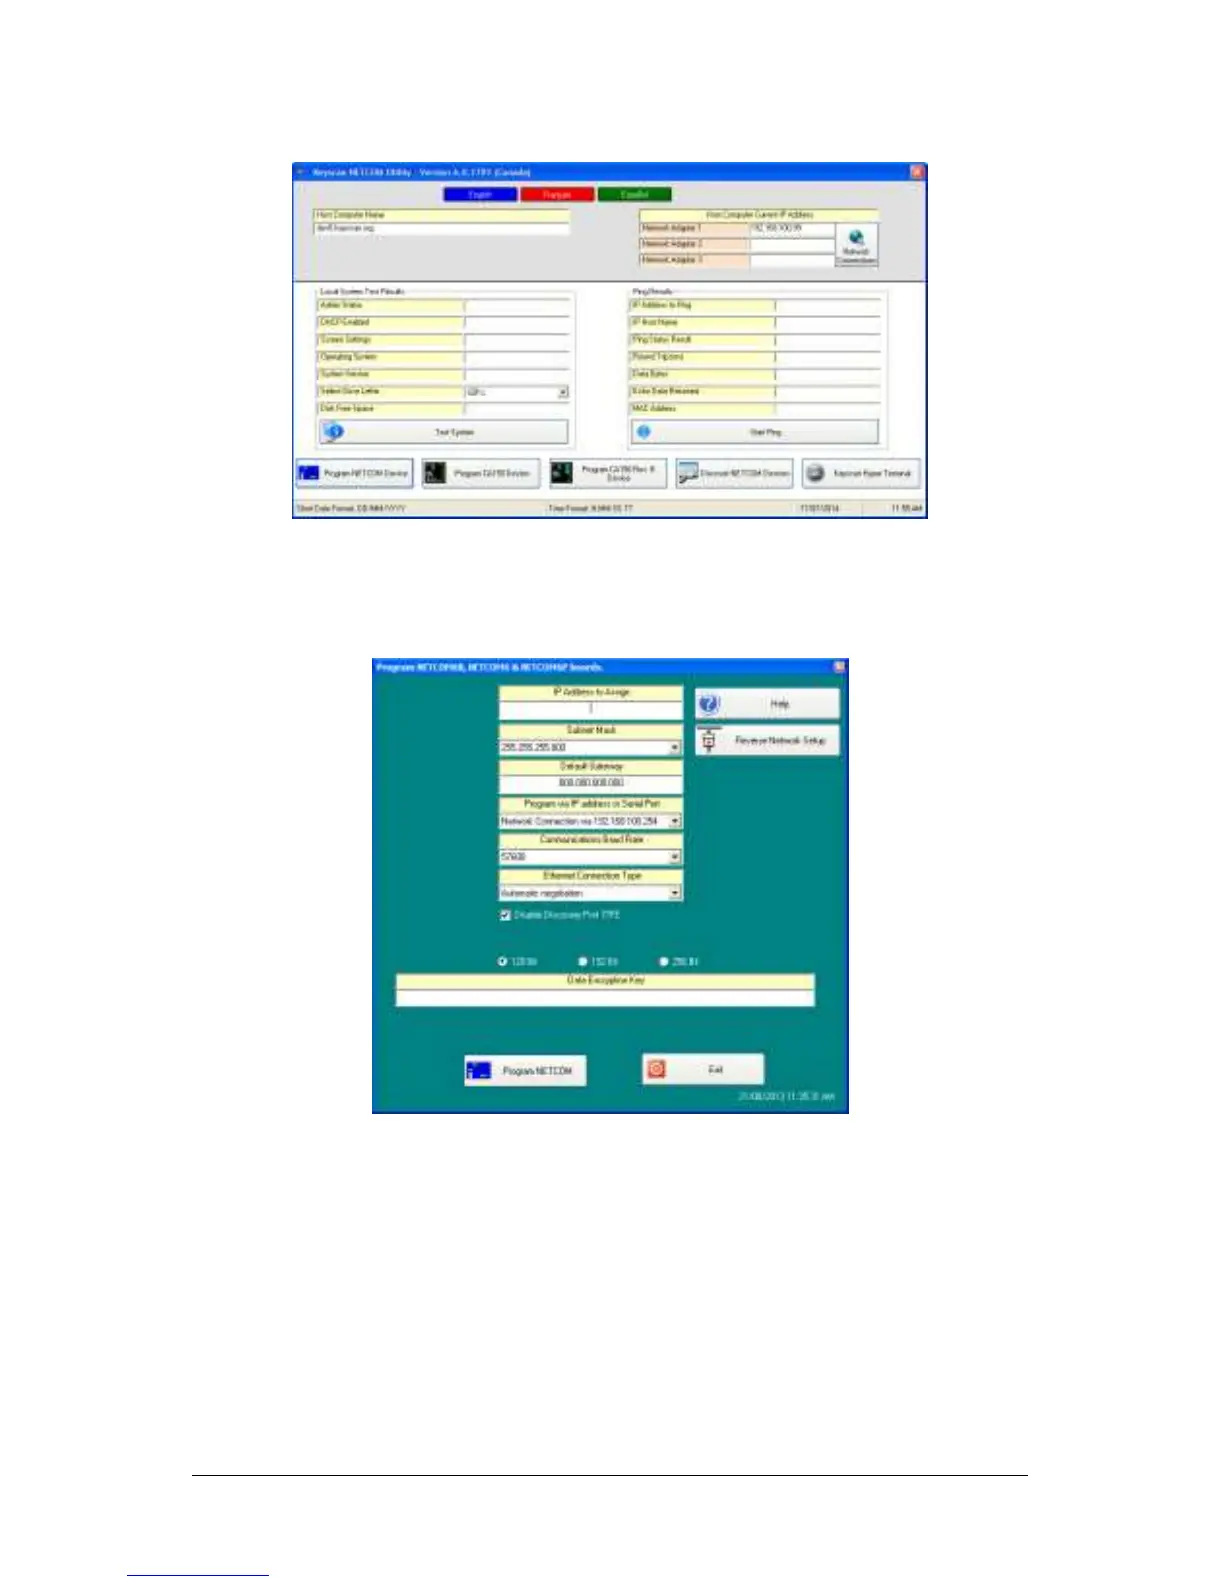
10. From the Keyscan NETCOM Utility screen, click Program NETCOM Device.
11. From the Select NETCOM Device Type screen, click on the Program NETCOM6 Family
of Boards button.
12. From the Program NETCOM6B, NETCOM6 & NETCOM6P Boards screen, enter the IP
address assigned to the NETCOM6P. If using DHCP, enter 0.0.0.0 in the IP Address to
Assign.
13. If a Subnet Mask is required, select it from the drop down list.
14. If the NETCOM6P requires a gateway to communicate on the network, enter the
gateway address in the default Gateway text box.
15. From the Program via IP Address or Serial Port, select the port on the PC/laptop with
the serial connection to the NETCOM6P via the CIMs COM2 terminal.
16. Select the baud rate that corresponds to the control board’s J16 or S2 communication
bit rate settings—9,600 or 57,600 for reverse network.
17. Leave Ethernet Connection Type set on Automatic Negotiation unless the IT
administrator gives a specific setting.
If the NETCOM device experiences network communication difficulties, you may
have to alter the Ethernet Connection Type from automatic negotiation. (The
Ethernet Connection Type is the network speed & duplex setting). Set the
NETCOM so it matches the network equipment setting. If the network equipment
 Loading...