Page 1
Pitching your Tent
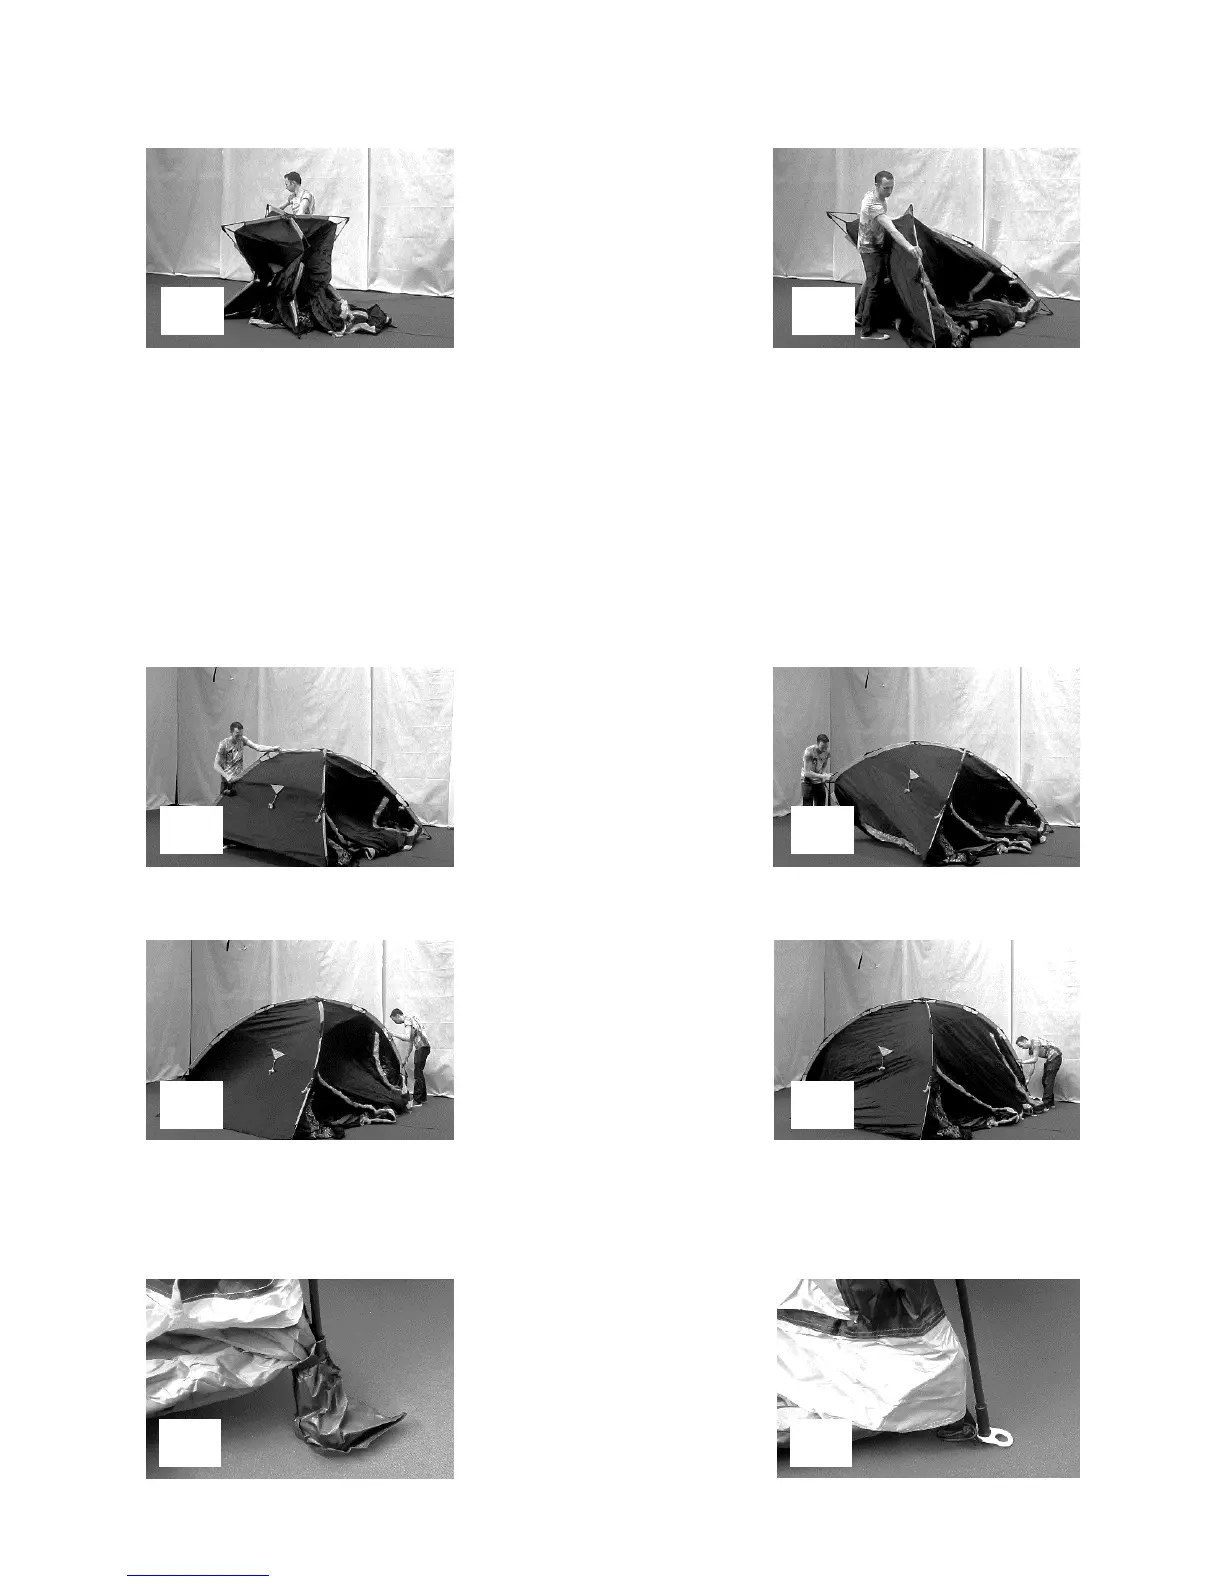
Place one hand under the central hub and lift the tent up (FIG 5), ensuring that there is no fabric trapped in the central hub
or locking joints. Holding the hub at shoulder height use your other hand to hold one of the poles just below an upper
manual joint. Push this joint downwards towards the centre of the tent, until the locking collar springs into place, thus
locking the joint. If your tent has just one manual joint on each pole then continue onto the remaining poles locking each
manual joint into position one by one until the tent is free standing.
If your tent has two manual joints on each pole, first lock the top joint into position, followed by the lower manual
joint. The central auto joint will automatically lock into position and the tent will become free standing.
(When doing this, take care to ensure that you do not restrict the movement of the pole sleeve, which must be able
to move freely along the top locking joint of each pole.) (See FIG. 6, 7, 8)
1 1
1 1
1 1
Now remove the small protective bags from the feet of the 4 main poles. These are intended for shipping protection
only and should be discarded responsibly. Fig’s 0 - 0
1 1