5
BEFORE USING THE APPLIANCE
Appliances with Isobutane (R600a): Isobutane is a natural gas that has no negative impact on the environment, but is flammable.
Therefore, make sure the refrigerant circuit pipes are not damaged.
DO NOT damage the appliance refrigerant circuit pipes.
This appliance is not intended for use by persons (including children) with reduced physical, sensory or mental
capabilities, or lack of experience and knowledge, unless they have been given supervision or instruction
concerning use of the appliance by a person responsible for their safety.
Children should be supervised to ensure that they do not play with the appliance.
OPERATION SAFETY HINTS
• Do not splash water onto the appliance.
• Do not store food or drinks in glass bottles in the freezer compartment.
• Do not operate the unit next to flammable gases.
• Do not store corrosive chemicals or liquids in the unit.
• Do not use flammable sprays near the unit when it is in operation.
• Do not put volatile chemicals such as ether and benzene in the refrigerator.
• Do not use or place electrical devices inside the appliance compartments if they are not of the type expressly authorized by
the Manufacturer.
Follow the instructions for installation, looking after, cleaning, operating and defrosting your appliances.
If you are going to store ice in the freezer section in a different container to those supplied, please make sure the container is sealed.
To prevent foods from drying and odours accumulating in your appliance, ensure that they are sealed in air-tight containers before loading.
When transporting your refrigerator or chest freezer ensure the unit remains in an upright position – DO NOT lie it on its side.
INSTALLATION INSTRUCTIONS
Your refrigerator must be positioned with sufficient ventilation on all sides. The following ventilation spaces are recommended
(refer to diagram 1):
300mm Above
80mm Behind
40mm Each Side
It is advisable to make sure that your appliance is placed on a level floor. This can be done by adjusting the leveling feet which are
found under the refrigerator in both the right and left front corners (refer to diagram 2).
Ensure that your refrigerator is tilted backwards (by adjusting the front feet) to assist with closing of the door. The door will NOT close
unassisted, i.e., it is not a self-closing door.
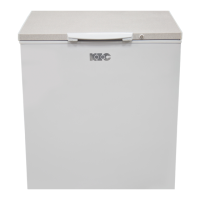
When installing the Chest Freezer; stand the unit in a well-ventilated area. This unit is not suitable for a built-in installation.
Where possible keep the appliance away from direct sunlight and other sources of heat, e.g., ovens, hobs, stoves.
DO NOT place your appliance near damp areas, as this can affect the cabinet’s insulation.
DO NOT operate the appliance next to flammable gases, or expose it to any corrosive or flammable chemicals. DO NOT store any
of these in your refrigerator.
It must be possible to disconnect the appliance from the power supply by unplugging it.
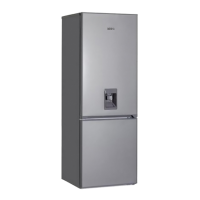
HOW TO OPERATE YOUR REFRIGERATOR
• First confirm that your power supply matches the required specifications. Plug the appliance into an earthed 220V – 240V 15A
plug socket and switch it on. Make sure to use an independent plug point without power interruptions (refer to diagram 3).
• Should you need to lengthen the power cord; be sure to use a three-core cable that does not exceed 1.5 meters.
• Set the adjustable thermostat at a setting of between 1 and 7 (thermostat/housing assembly) (refer to diagram 4).
• The refrigerator must be run for 24 hours before placing food in it.
• Stock your appliance and adjust the temperature if necessary (1 being the warmest and 7 being the coldest).
• Do not allow any article to touch the inner back panel of the fridge (refer to diagram 5).
• The recommended temperature setting is ‘4’. Adjusting this temperature to a colder than recommended setting will not cool
the compartments any faster. If you add food before the refrigerator has cooled completely, your food may spoil.
If the supply cord is damaged, it must be replaced by the manufacturer or its service agent or a similarly qualified person in order
to avoid a hazard.
HOW TO REMOVE AND REPLACE THE WATER TANK
• Remove the balcony positioned above the water tank (refer to diagram A).
• Simply lift up and out (refer to diagram B).
• Grip the water tank on both ends (refer to diagram C).
• Keeping the fridge door still, tilt the base of the water tank up slightly and pull up and out. The first couple of times will feel stiff,
this will loosen over time (refer to diagram D).
EN
 Loading...