EasyManua.ls Logo

KidKraft Fire Station Play Set User Manual

KidKraft Fire Station Play Set
4 pages
To Next Page IconTo Next Page
Page #1 background imageLoading...
Page #1 background image
Fire Station Play Set
Assembly Instructions
HARDWARE
A. Screw x 5 pcs
7/8 in / 22 mm
B. Grey Screw x 4 pcs
7/8 in / 22 mm
C. Screw x 3 pcs
11/16 in / 18 mm
D. Black Screw x 1 pc
11/16 in / 18 mm
E. Green Screw x 2 pcs
11/16 in / 18 mm
F. Red Screw x 8 pcs
5/8 in / 16 mm
The following tool
(not included) is
required for assembly:
Phillips
®
Screwdriver
PARTS LIST
4
x 4
9
2
1
12
x 2
7
11
x 2
13
10
8
5
6
15
14
16
17
18
x 2
x 2
19
20
21
Item #63236
Customer Service
1-800-933-0771
www.kidkraft.com
Please retain this information for future reference
To order replacement parts, please visit www.kidkraft.com
1
3
22
24
25
26
27
23
USE AND MAINTENANCE:
-Use on level surfaces only
-Please check assembly at regular intervals, and
frequently tighten hardware if necessary. If
maintenance is not carried out, the product could
cease to function properly.
WARNING:
CHOKING HAZARD. Small parts and sharp points, not suitable
for children under 3 years.
CAUTION:
ADULT ASSEMBLY REQUIRED. Hardware contains
small screws with sharp points. Keep unassembled
parts out of the reach of small children.
Question and Answer IconNeed help?

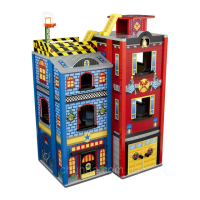
Do you have a question about the KidKraft Fire Station Play Set and is the answer not in the manual?

KidKraft Fire Station Play Set Specifications

General IconGeneral
BrandKidKraft
ModelFire Station Play Set
CategoryToy
LanguageEnglish

Summary

Assembly Steps Overview

Step 1: Base Assembly

Assemble the base structure with parts 1, 2, and 3 using screws A and C.

Step 2: Adding Vertical Supports

Attach vertical supports (part 4) to the base using screws A.

Step 3: Second Level Structure

Add the second level structure (part 7) to the vertical supports using screws A and D.

Step 4: Attaching Stairs and Shelves

Install stairs (part 8) and shelves (part 9) using screws E and C.

Step 5: Adding Roof Supports

Attach roof supports (part 4) to the structure using screws A.

Step 6: Installing Roof Panel

Place the roof panel (part 10) onto the supports.

Step 7: Securing Upper Structure

Secure the upper structure with screws B.

Step 8: Attaching Side Panels

Attach side panels (parts 11 and 12) using screws F.

Step 9: Attaching Other Side Panel

Attach another side panel (part 13) using screws F.

Step 10: Installing Floor Base

Attach the floor base (part 14) to the main structure.

Important Product Information

Cleaning Instructions

Use a slightly damp cloth and mild dishwashing liquid; avoid alcohol or ammonia.

Sole and Limited Warranty

Details the 90-day warranty against manufacturing defects and how to submit claims.

Related product manuals