EasyManua.ls Logo

KidKraft Summerhill F29050 User Manual

KidKraft Summerhill F29050
68 pages
To Next Page IconTo Next Page
Page #1 background imageLoading...
Page #1 background image
INSTALLATION AND OPERATING INSTRUCTIONS
To reduce the risk of serious injury or death, you
must read and follow these instructions. Keep and
refer to these instructions often and give them to
any future owner of this play system. Manufacturer contact information provided below.
OBSTACLE FREE SAFETY ZONE - 25’10” x 27’ area requires Protective Surfacing. See Page 3
MAXIMUM VERTICAL FALL HEIGHT - 6’9”(2.06m)
CAPACITY - 10 Users Maximum, Ages 3 to 10; Weight Limit 110 lbs. (49.9 kg) per child.
RESIDENTIAL HOME USE ONLY. Not intended for public areas such as schools, churches,
nurseries, day cares or parks.
Warning. Only for domestic use.
WARNING
Rev 09/12/2018
Table of Contents
Warnings and Safe Play Instructions ..........pg. 2
Protective Surfacing Guidelines. . . . . . . . . . . . . . . pg. 3
Instructions for Proper Maintenance .........pg. 4
About Our Wood – Limited Warranty .........pg. 5
Keys to Assembly Success ....................pg. 6
Part ID ................................... pg. 8-15
Step-By-Step Instructions ...............pg. 16-64
Installation of I.D./Warning Plaque ......Final Step
Summerhill Playset F29050
12 - 16 Hrs
TWO PERSON
ASSEMBLY
KidKraft, Inc.
4630 Olin Road
Dallas, Texas 75244 USA
customerservice@kidkraft.com
canadacustomerservice@kidkraft.com
1.800.933.0771
972.385.0100
For online parts replacement visit
https://parts.kidkraft.com/
KidKraft Netherlands BV
Olympisch Stadion 29
1076DE Amsterdam
The Netherlands
europecustomerservice@kidkraft.com
+31 20 305 8620 M-F from 09:00 to 17:30
(GMT+1)
For online parts replacement visit
https://parts.kidkraft.eu/
25'9"
11'5"
13'10"
27'
Cloud View Swing Set
25' 10"
Question and Answer IconNeed help?

Do you have a question about the KidKraft Summerhill F29050 and is the answer not in the manual?
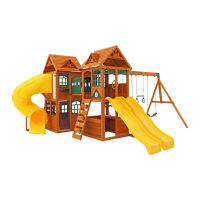
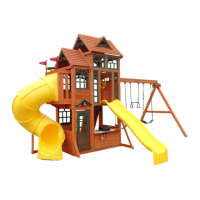
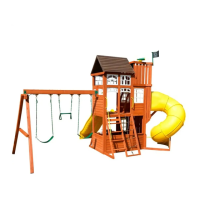
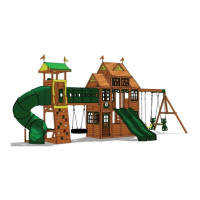
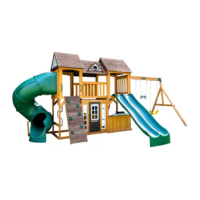
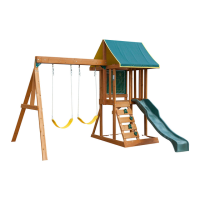
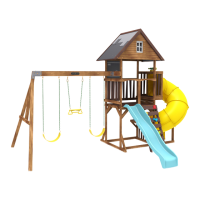
KidKraft Summerhill F29050 Specifications

General IconGeneral
Product NameKidKraft Summerhill F29050
CategoryPlay Sets & Playground Equipment
Recommended Age3-10 years
Assembly RequiredYes
MaterialWood
ColorNatural
FeaturesSlide, Swings, Climbing Wall

Summary

Warnings and Safe Play Instructions

Serious Head Injury Hazard

Identifies risks associated with improper play surface installation.

Collision Hazard

Details safe placement to avoid obstructions around the play area.

Strangulation Hazard

Warns against items that can cause entanglement and strangulation.

Tip Over Hazard

Emphasizes the need for level location and proper anchoring.

Safe Play Guidelines

Provides rules for safe usage, including supervision and attire.

Protective Surfacing Guidelines

Loose-Fill Material Requirements

Specifies depth and type of loose-fill surfacing for fall protection.

Poured-In-Place Surfaces

Discusses alternative surfacing options like rubber tiles or poured surfaces.

Surfacing Placement Zones

Defines the required safety zone dimensions for surfacing.

Proper Maintenance Instructions

Beginning of Season Inspection

Details checks for hardware, wood, and surfacing at the start of use.

Periodic During Season Checks

Outlines regular checks for hardware, swing hangers, and surfacing.

End of Season Storage and Checks

Covers swing storage and final checks before winter.

Step 1: Inventory Parts Before Assembly

Verify All Components

Instructions for checking wood, hardware, and accessories against identification sheets.

Step 2: Front and Back Wall Prep Part 1

Assemble Wall Frame Panels

Connects end posts and panel supports to form wall sections.

Install T-Nuts for Connections

Taps T-nuts into specific panel holes for later fastening.

Step 2: Front and Back Wall Prep Part 2

Attach Upright Support Boards

Installs upright boards into the wall frame using hex bolts.

Step 3: End Wall Prep Part 1

Prepare End Panels and T-Nuts

Places panels and taps T-nuts for the end wall assembly.

Assemble End Wall Frame Structure

Connects end posts and panel frames to form the end wall.

Step 3: End Wall Prep Part 2

Secure End Wall Frame with Bolts

Fastens the end wall frame components using hex bolts and washers.

Step 4: Frame Assembly Part 1

Connect Main Wall Panels

Attaches the SW Wall Panel between front and back walls.

Pre-drill and Fasten Frame Sections

Uses pilot holes and wafer lag screws to join frame components.

Step 4: Frame Assembly Part 2

Attach End Wall to Main Frame

Secures the assembled end wall to the front and back wall structure.

Step 4: Frame Assembly Part 3

Step 5: Floor Assembly Part 1

Step 5: Floor Assembly Part 2

Step 5: Floor Assembly Part 3

Step 5: Floor Assembly Part 4

Step 6: Swing Beam Assembly

Step 7: Swing End Assembly

Step 8: Attach Swing End to Swing Beam

Step 9: Attach Swing Assembly to Fort

Step 10: Install Ground Stakes

Step 13: Access Ladder Assembly Part 1

Step 13: Access Ladder Assembly Part 2

Step 13: Access Ladder Assembly Part 3

Step 14: Vertical Wall Assembly Part 1

Step 14: Vertical Wall Assembly Part 2

Step 16: Attach Slide to Fort

Step 71: Attach Swings

Final Step: Attach I.D. Plaque

Related product manuals