22 of 42
Revision 2.06
KiloVault
®
LLC • 330 Codman Hill Road, Boxborough, MA 01719 • +1 (888) 218-5924 • info@kilovault.com • www.kilovault.com
4.6.2. Disconnecting the HAB™
NEVER reverse the polarity (positive and negative) of your unit’s connections. NEVER short
circuit your HAB™.
If disconnecting more than one HAB™, power off the other units one-by-one by
pressing each unit’s power button.
Set the disconnect switch on the side of the HAB™ to the OFF position.
Disconnect the power cables from the HAB™ to the inverter (or to the DC bus if
installing more than one HAB™), making sure to use overcurrent protection as
required.
Disconnect the Modbus communication cable between the Leader HAB™ and the
Inverter (if available).
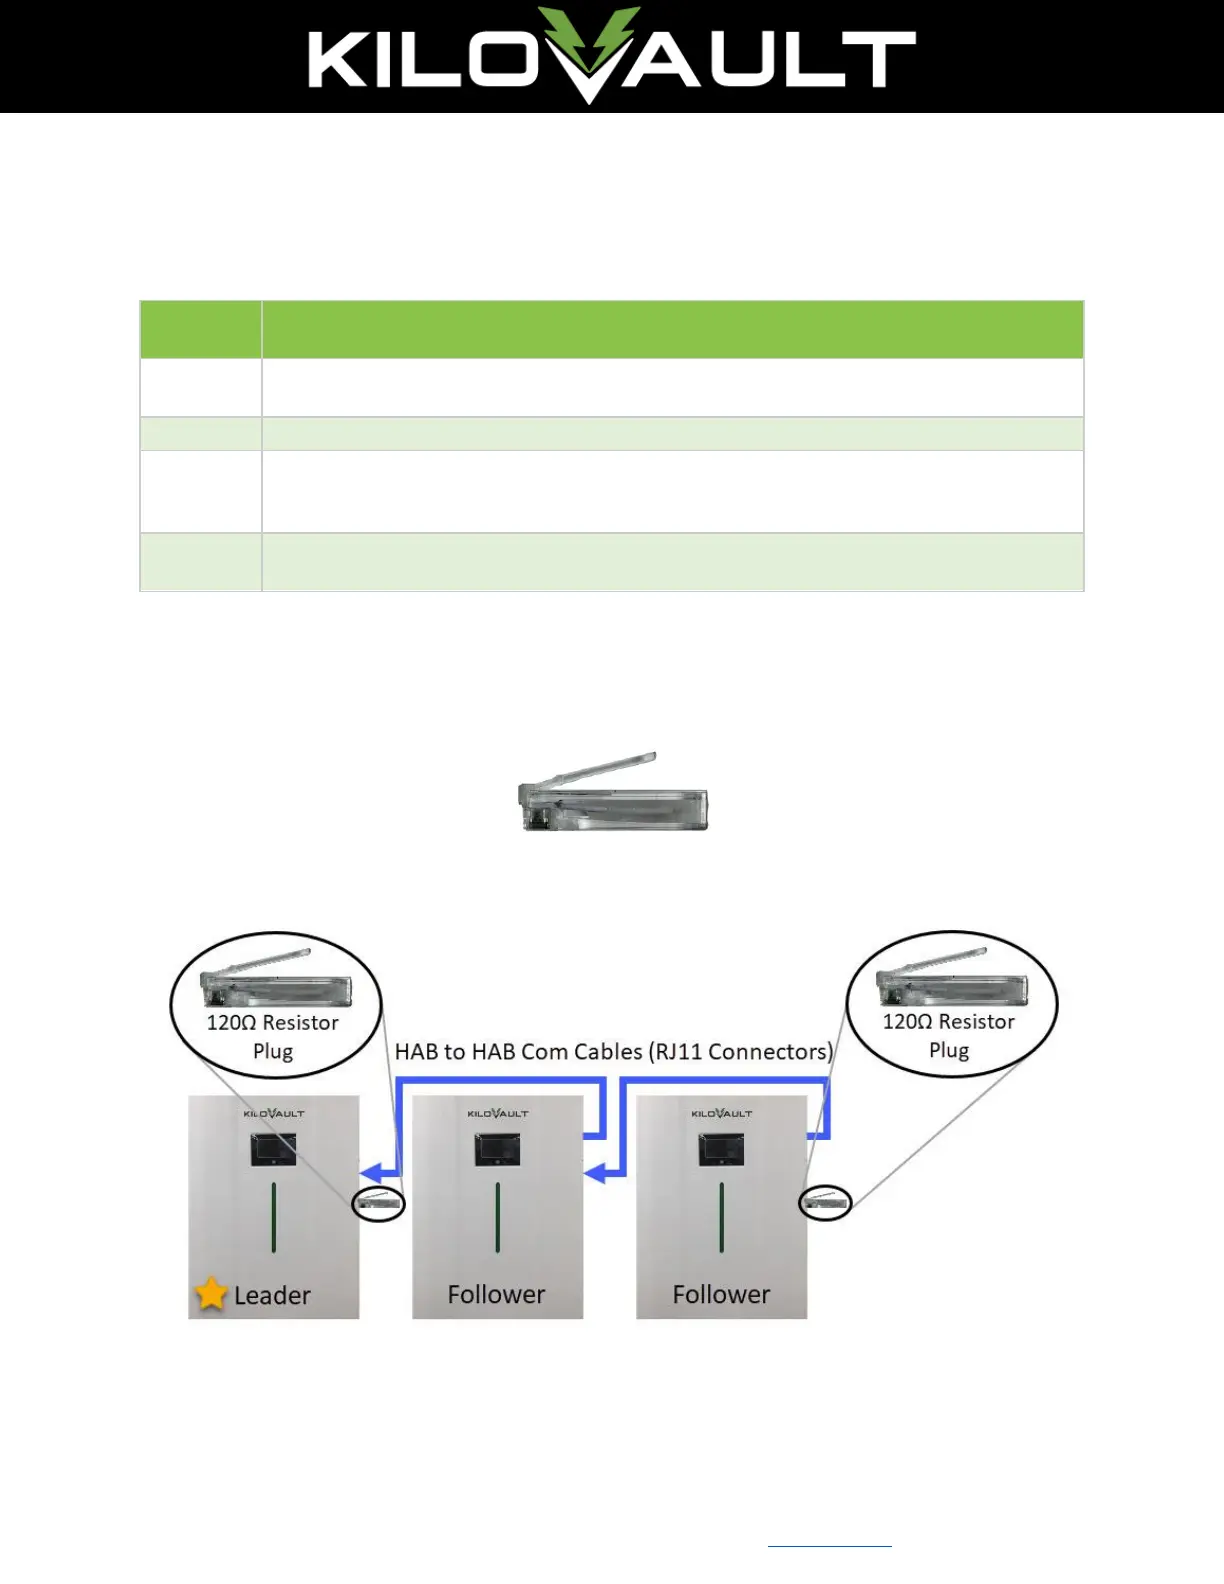
4.6.3. RJ11 Resistor Plug Installation
A clear RJ11 resistor plug is enclosed in each HAB™ unit. Plug one end into the first and last
units in the string as shown.
Figure 11: RJ11 120 Ω Clear Resistor Plug
Figure 12: Resistor Plug Installation
 Loading...