This document is the owner's assembly and operating manual for the Kincrome K12067 Hydraulic Trolley Jack, a workshop tool designed for professional use.
Function Description
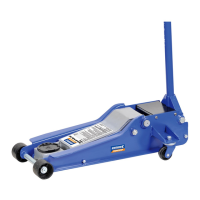
The Kincrome K12067 Hydraulic Trolley Jack is designed for lifting and lowering vehicles. It operates hydraulically, using a pump handle to raise the load and a release valve to lower it. The jack is intended for automotive use only and should not be used to raise structures, buildings, or human loads. It is crucial to use the jack on a solid, level surface and to support the raised vehicle with vehicle support stands (not included) before working underneath it.
Important Technical Specifications
- Working Load Limit: 3000 KG
- Height Lowered: 100 mm
- Height Raised: 550 mm
- Handle Length: 1760 mm
- Head Cap Diameter: 100 mm
- Total Weight: 48 KG
- Part Number: K12067
- Recommended Oil Type: SAE 10 Hydraulic Jack Oil (do not mix oil types or use brake fluid, alcohol, glycerin, detergent, motor oil, or dirty oil).
Usage Features
Unpacking and Assembly:
- Place the carton in a clear, open area.
- Remove the jack and the three handle pieces (A, B, C) from the carton.
- Insert handle piece (A) into middle handle piece (B), and (B) into (C), ensuring holes align for retaining clips.
- With the jack on its wheels on a flat surface, slide the assembled handle into the handle base.
- Rotate the handle until the square-shaped hole slips over the shaft in the handle base.
- Verify the handle is properly fitted using finger pressure. Loosen the handle 1/2 turn for easy rotation.
- At the rear of the jack, a large metal clip holds the handle base flat. Carefully remove this clip by pulling it out while keeping the handle pushed down. Release pressure and discard the clip.
Testing Handle Operation:
- Twist the handle completely clockwise until it stops to tighten the valve for raising the jack. Do not force or overtighten.
- Pump the handle a few times to raise the jack about halfway. If it doesn't rise, check if the handle is correctly inserted over the hex shaft in the handle base.
- To lower the jack, twist the handle slowly counterclockwise. A normal hissing sound indicates pressure release.
Preparing Work Area:
- Inspect the jack for damage or wear before each use. Test it unloaded. Do not use if damaged or malfunctioning.
- Consult the vehicle manufacturer's owner's manual for jacking procedures, vehicle weight, recommended jack type, and jack support locations. Do not exceed the 3000 kg working load limit.
- Clear children and others from the work area. An adult should be nearby for assistance but must stay clear. No person should remain in or enter a vehicle being lifted or supported by a jack/stands.
- Never get bodily under a vehicle supported only by a hydraulic trolley jack.
- Clear obstructions from the work area.
- Use the jack for lifting and lowering only; support the raised vehicle on vehicle support stands.
- Ensure the jack and vehicle are on solid, level ground (paved or concrete driveway/garage floor). The jack must be free to roll during lifting and lowering.
- Set the vehicle's parking/emergency brake and put the gearshift in park (manual transmissions in lowest gear). Turn the ignition off and to the "LOCK" position, ensuring the steering wheel locks.
- Chock the unlifted wheels to prevent rolling.
- Center the load on the head cap to avoid instability.
- Have jack stands ready and understand their instructions before lifting the vehicle.
- Plan the jack's location under the vehicle, ensuring it contacts only a designated jack support area.
Lifting Vehicle:
- With the lifting arm fully lowered, roll the jack into position beneath the vehicle's jack support area.
- Twist the jack handle completely clockwise.
- Slowly pump the handle until the lifting head cap just contacts the support area.
- Inspect the head cap position to ensure it is centered and properly engaging the support area.
- Continue pumping the handle to lift the vehicle to the desired height, monitoring the head cap position.
- Place jack stands under additional vehicle support areas.
- SLOWLY twist the jack handle counterclockwise to ease the vehicle onto the jack stands.
- Caution: Do not lift any vehicle with its engine running or start any vehicle supported by a jack or jack stands.
Working on Vehicle:
- Do not move or roll a jack supporting a vehicle.
- Never place any part of your body beneath a vehicle supported by a jack.
- Be careful of forces applied to the vehicle (e.g., torque on nuts/bolts) as they can cause instability if jack stands are not properly placed.
- Do not turn the vehicle ignition or attempt to start a vehicle supported by a jack or jack stands.
Lowering Vehicle:
- Ensure the area under and near the vehicle is clear of all persons and obstructions.
- Reposition the jack under the same support area used for lifting.
- Twist the handle completely clockwise.
- Pump the handle until the head cap just contacts the support area under the vehicle.
- Check that the head cap is centered under the support area.
- Slowly pump the handle to lift the vehicle off the jack stands.
- Remove the jack stands, setting them aside, clear of the vehicle.
- With a firm grip on the jack handle, SLOWLY twist the handle counterclockwise until the jack just begins to lower.
- Carefully control the speed of descent to prevent property damage or injury.
Maintenance Features
Lubricating:
- Lubricate all moving parts monthly with general-purpose grease for efficient operation.
- Apply grease to joints on lift arm hinges, push rods, handle base, rear caster wheels, and front roller.
- Ensure lifting arm pivot point #37 is well lubricated to prevent creaking sounds under heavy loads.
Maintaining Oil Level:
- Important Note: Always use SAE 10 Hydraulic Jack Oil when adding or replacing oil. Do not mix oil types or use brake fluid, alcohol, glycerin, detergent, motor oil, or dirty oil, as improper fluid can cause serious internal damage.
- Adding Oil: With the head cap fully lowered and the jack on level ground, remove the Air Vent Valve. The oil level should be visible approximately 12 mm below the valve hole. Do not overfill. If low, add oil as needed, then close the air vent valve.
- Replacing Oil: For better performance and longevity, replace the oil supply once a year.
- To drain oil, open the Air Vent Valve and loosen the Release Valve by turning the handle counterclockwise.
- Be very careful not to let dirt or foreign matter enter the system.
- Invert the jack over a suitable container and allow the oil to drain.
- Close the release valve by turning the handle clockwise.
- Fill with SAE 10 Hydraulic Jack Oil.
- Close the Air Vent Valve and wipe away any spilled fluid.
- Test the jack before lifting a load.
Cleaning:
- Wipe the jack clean with a soft cloth only.
- Do not use gasoline, kerosene, or other solvents or abrasive cleansers, as they can cause deterioration of the hydraulic seals.
Storage:
- Before storage, twist the handle 1-1/2 turns counterclockwise to release pressure in the hydraulic cylinder.
- Leave the handle in this position.
- Store the jack on a level surface, in a clean, dry environment, preferably indoors, to protect it from moisture.
Repairing Jack:
- There are no user-serviceable parts except as outlined above.
- Only trained, licensed, and certified repair personnel should attempt repairs or parts replacement.
- Any modifications to the jack, other than those performed by the manufacturer or their designee, will void all warranties.