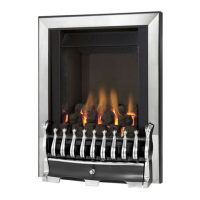
SECTION 4
MAINTENANCE
Servicing Notes
Servicing should be carried out annually by a competent person such as a
GAS SAFE registered engineer. It is a condition of the Kinder lifetime
guarantee schemes that this is carried out by a competent person i.e a GAS
SAFE registered Engineer in accordance with these servicing notes.
The condition of the coals should be checked and if necessary the whole set
should be replaced with a genuine replacement set.
The burner assembly is designed to be removed as a complete unit for ease of
access. After any servicing work a gas tightness check must always be
carried out.
4.1 Removing the burner assembly from the fire (all models)
4.1.1 Remove ash-pan, fret assembly / trim or fascia from the front of the fire.
4.1.2 Isolate the gas supply, remove the glass frame as shown on in section
2.10 then remove the ceramics. Remove the 2 off fixing screws which
hold the burner heat shield in place.
4.1.3 Remove the front ceramic support, which is held in position by 2
screws.
4.1.4 Loosen the burner pipe, which is situated behind the burner from the
bulkhead fitting.
4.1.5 Remove the left and right hand burner retaining brackets, which are
held in position by 2 screws.
4.1.6 Lift the burner assembly clear from the firebox.
4.1.7 Re-assemble in reverse order and carry out a gas tightness test.
4.2 Removing the piezo igniter (manual control models only)
4.2.1 Remove ash-pan, fret assembly / trim or fascia from the front of the fire.
4.2.2 Remove the 4 off screws which hold the control panel in place.
Remove the 2 off fixing screws which hold the burner heat shield in
place.
4.2.3 Remove the piezo retaining nut and disconnect the ignition wire
4.2.4 Replace the piezo and re-assemble in reverse order.
36
 Loading...