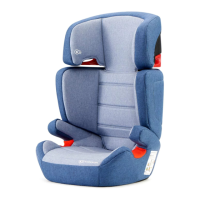
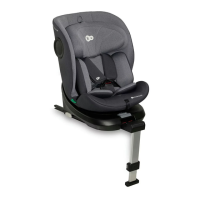
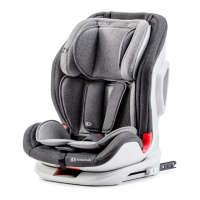
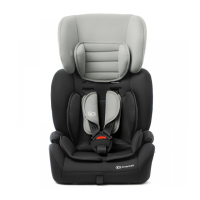
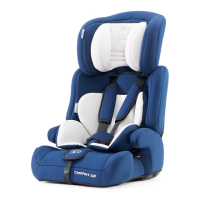
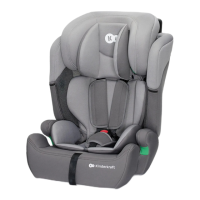
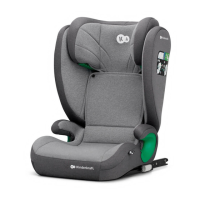
The Kinderkraft JUNIOR FIX 2 i-Size is a car seat designed for the safe transport of children, adhering to the UN/ECE Regulation No. 129 (UN/ECE R129/03) for child restraint systems. This forward-facing car seat is suitable for children with a height ranging from 100 to 150 cm.
Function Description
The primary function of the JUNIOR FIX 2 i-Size car seat is to provide a secure and comfortable seating solution for children in a vehicle. It is engineered to protect children during travel by integrating with the car's safety systems. The car seat can be installed using two main methods:
- ISOFIX + three-point car seat belt: This method combines the rigid attachment of the ISOFIX system with the vehicle's three-point seat belt for enhanced stability and safety.
- Three-point car seat belt: For vehicles without ISOFIX, or as an alternative, the car seat can be secured solely with the vehicle's three-point seat belt.
The car seat features a movable backrest that allows for accurate adjustment to the plane of the vehicle seat, ensuring a snug fit. A key safety feature is the adjustable headrest, which can be set to one of ten height options to properly accommodate the child's growth and ensure the shoulder safety harness passes correctly between the child's shoulder and neck (through the middle of the collarbone). This prevents the harness from pressing against the child's neck or slipping off the shoulder.
Usage Features
Installation:
-
Backrest Installation:
- Place the backrest behind the seat and hook its bottom onto the seat.
- Adjust the backrest until it locks into a vertical position, indicated by an audible "click."
- Cover the inside of the car seat by fastening the fasteners on the backrest. It's crucial to check for any obstacles in the connector area between the backrest and the seat during rotation.
-
Securing the Child and Car Seat (ISOFIX + three-point car seat belt):
- Press the ISOFIX latch release buttons and extend them fully.
- Insert both ISOFIX latches into the designated installation points on the vehicle seat until an audible "click" is heard for each.
- Push the car seat firmly against the vehicle seat backrest, applying even pressure on both sides.
- Verify that the backrest of the car seat rests flat against the vehicle seat backrest.
- Confirm proper ISOFIX attachment by ensuring both button indicators are completely green. An audible clicking sound and a check for secure installation without play are essential. If the latches come out, repeat the steps.
- Place the child in the car seat.
- Adjust the headrest to the child's height.
- Pass the vehicle seat belt through the car seat's shoulder guide and waist guides, then fasten it (an audible "click" should be heard). Pay close attention to the correct positioning of the belt in the guides.
- Ensure the waist seat belt runs as low as possible across the child's pelvis.
- Pull the waist section of the belt towards the buckle and then the shoulder section towards the belt retractor to eliminate any slack.
-
Securing the Child and Car Seat (vehicle three-point seat belt only):
- Ensure the car seat backrest rests flat against the vehicle seat backrest.
- Place the child in the car seat.
- Adjust the headrest to the child's height.
- Pass the car seat belt through the car seat's shoulder guide and waist guides, then fasten it (an audible "click" should be heard). Pay close attention to the correct positioning of the belt in the guides.
- Ensure the waist seat belt runs as low as possible across the child's pelvis.
- Pull the waist section of the belt towards the buckle and then the shoulder section towards the belt retractor to eliminate any slack.
Headrest Adjustment:
- Grasp the headrest adjustment lever on the back of the headrest and pull it gently upwards.
- Select one of the ten height options. Release the lever once the desired height is set.
- Always ensure the car seat headrest is locked in place. The shoulder safety harness must pass between the child's shoulder and neck (through the middle of the collarbone) without pressing on the neck or slipping off the shoulder.
Backrest Adjustment:
- Adjust the car seat backrest to fit snugly against the vehicle seat.
- If necessary, remove or adjust the vehicle's headrest to achieve a snug fit.
Safety Instructions:
- The car seat must NOT be installed on vehicle seats mounted backwards or sideways.
- It must NOT be placed on vehicle seats with an active front airbag.
- Installation is only permitted on vehicle seats with a three-point car seat belt.
- It is recommended to install the car seat on the vehicle's back seats only.
- Always refer to the vehicle's operating manual for suitability information.
- The safety harness must be adjusted to the child's body shape and not twisted. Avoid thick clothes under the harness.
- The waist part of the harness must run as low as possible across the child's pelvis.
- Replace the car seat after a traffic accident involving violent stresses.
- Do NOT modify the car seat or use components from other manufacturers.
- Protect the car seat from direct sunlight to prevent burns from heated parts.
- Never leave a child unattended in the car seat.
- Secure all luggage and objects in the car, especially on the rear parcel shelf, to prevent injuries during a collision.
- The car seat cannot be used without its cover.
- Use only manufacturer-recommended replacement covers, as the cover is an integral part of the safety system.
- Do NOT use any attachment points other than those described in the manual and marked on the car seat.
- Ensure all hard and plastic parts are placed to prevent them from being trapped by sliding seats or vehicle doors.
- Do not use the car seat if any parts are damaged or loose.
- In an emergency, it's crucial to quickly unfasten the car seat belts. Ensure the release button is not fully secured to prevent children from playing with it.
- Adults should always fasten their seat belts to set a good example and prevent posing a threat to the child.
- Always secure the car seat, even when not in use, to prevent injury to passengers during emergency braking.
- Regularly check the technical condition, fixing points, seams, and adjusting parts. Ensure all mechanical elements are fully operational. Do not grease or oil car seat parts.
- On delicate vehicle seats, place a blanket or towel under the car seat to prevent marks or discolouration.
- Failure to install the seat according to instructions can lead to danger.
Removing the Car Seat (ISOFIX installation system):
- Press the ISOFIX release buttons on both latches simultaneously.
- Once the latches are released and the ISOFIX button indicators turn red, slide the car seat out of the ISOFIX guides.
- Slide the ISOFIX latches back into the car seat base.
Removing the Car Seat Backrest for Storage:
- Uncover the inside of the car seat by unfastening the fasteners on the backrest.
- Push the backrest so it lies flat.
- Detach the backrest by pulling it out from the latches.
Maintenance Features
Cleaning:
- The car seat must not be used without its cover.
- The cover is removable and washable with a mild powder using a program for delicate fabrics (30°C).
- Follow the washing instructions on the cover information label. Washing at temperatures above 30°C may cause colours to fade.
- The cover should not be centrifuged or dried in a tumble dryer, as this may lead to separation of material layers.
- Prolonged sun exposure of the cover is prohibited.
- Plastic parts can be cleaned with soap and water.
- Do not use aggressive cleaning agents (e.g., bleach/stain removers).
Removing the Cover:
- Raise the headrest to its highest position.
- Uncover the car seat cover by replacing the material from the backrest to the headrest.
- Unfasten the fasteners on the edges of the fabric of the inner part of the car seat backrest.
- Unfasten all fasteners on the edges of the cover on the back of the car seat (both sides), on the backrest, and the seat.
- Pull the fabric off the sides of the car seat.
- Gently pull on the material to slide it off the waist safety harness guides on both sides of the car seat.
- Remove the fabric from the headrest, starting from its sides.
Installing the Cover:
- To reinstall the cover, reverse the removal steps.
- Align the cover with the attachment points on the car seat.
- Start by installing the cover on the shell of the car seat and then on the headrest part.