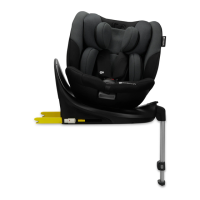
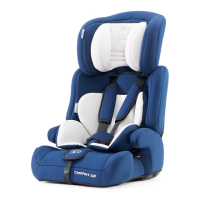
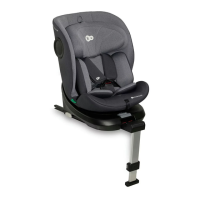
Kinderkraft I-360 Car Seat User Guide
The Kinderkraft I-360 is a versatile child restraint system designed, tested, and approved in accordance with UN/ECE Regulation No. 129 (ECE R129/03). This car seat is suitable for children ranging from 40 cm to 150 cm in height, offering various installation options to accommodate different age and size groups.
Function Description
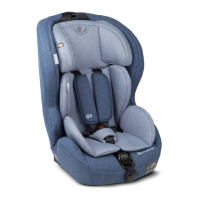
The I-360 car seat provides a secure and comfortable travel solution for children, adapting to their growth from infancy through early school age. It features an easy spin mechanism for convenient child placement and removal, an adjustable headrest, and a recline adjustment mechanism for optimal comfort and safety. The car seat can be installed using the ISOFIX system, a support leg, and/or the vehicle's three-point car seat belt, depending on the child's height and the car seat's orientation.
Important Technical Specifications
The I-360 car seat supports children across three main height ranges with specific installation methods:
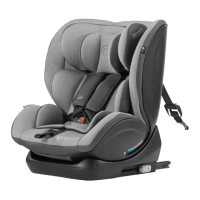
- 40 cm - 105 cm (Rearward-facing):
- Installation: ISOFIX + support leg + internal safety harness.
- This orientation is mandatory until the child is 15 months old and 76 cm tall.
- 76 cm - 105 cm (Forward-facing):
- Installation: ISOFIX + support leg + internal safety harness.
- Forward-facing is permitted only after the child is 15 months old and 76 cm tall.
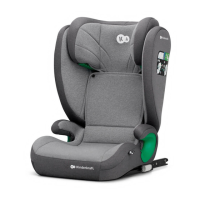
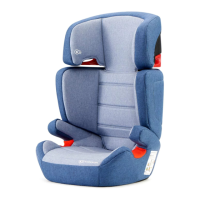
- 100 cm - 150 cm (Forward-facing):
- Installation options:
- ISOFIX + three-point car seat belt.
- Three-point car seat belt only.
- For this height range, the internal safety harness is stowed away.
Safety Instructions:
- DO NOT install the car seat on rearward-facing or side-facing seats in the vehicle.
- DO NOT place the car seat on seats equipped with an active front airbag.
- A car seat can be installed in the middle seat only if the seat is equipped with a three-point car seat belt, ISOFIX connectors, and a Top Tether strap.
- If the car seat is installed in the front seat of the vehicle, the front airbag must be deactivated. It is recommended to install the seat only in the rear seats of the car.
- The support leg must never be installed on a storage box in the floor of the car, as it can break during an accident. Always refer to the vehicle manual if in doubt.
- The support leg must always be supported, and no objects should be placed under it.
- The support leg should support the car seat without lifting the bottom part of the I-360 seat above the level of the vehicle's seat.
- Ensure all locking latches are properly attached, indicated by green button indicators.
Usage Features
Securing the Child:
- Installing the Insert (for children up to 76 cm):
- Connect the headrest part of the insert to the rest of the insert using fasteners.
- Detach the internal safety harness.
- Move the seat belt to the sides of the car seat.
- Place the insert in the car seat.
- Adjusting the Safety Harness:
- Loosen the harness by pressing the adjustment button and pulling the harness straps simultaneously.
- Unbuckle the harness and move it to the sides of the car seat.
- Place the child in the car seat.
- Fasten the harness.
- Adjust the harness to the child by pulling the adjuster strap.
- The shoulder safety harness should enter the backrest flat, horizontally, just above the child's shoulders.
- Headrest Height Adjustment:
- Grasp the headrest height adjustment strap (located on top of the headrest) and pull it up gently.
- Adjust the headrest to one of nine available options, ensuring the lower part is at the child's shoulder height and the headrest is locked in place.
- Backrest Angle of Incline Adjustment:
- Pull the backrest angle of incline adjustment lever.
- Adjust the seat angle to one of five available options.
- Release the lever and move the seat slightly until a "click" is heard.
- This adjustment is possible for children with a height of 76-105 cm.
- Easy Spin Mechanism:
- Pull the car seat easy spin lever.
- Rotate the car seat to the desired side until a "click" indicates it's locked.
- Place the child in the car seat and secure them with the safety harness.
- Important: The car seat cannot rotate if the support leg is not fully extended from the base.
- Tightening the Safety Harness:
- Pull the internal safety harness to eliminate slack in the waist section, ensuring it lies flat.
- Tighten the harness with the adjuster strap until it lies flat on the child's body.
- Ensure the safety harness is not twisted.
Installation in the Vehicle:
- Rearward-facing (40-105 cm) using ISOFIX and Support Leg:
- Unfold the support leg before placing the car seat in the car.
- Attach ISOFIX pads to the vehicle's seat connectors.
- Place the car seat with the unfolded support leg on the vehicle seat.
- Extend ISOFIX connector arms to maximum length by pressing the release button.
- Slide both ISOFIX latches into the vehicle seat mountings until a "click" is heard, then push the car seat against the backrest.
- Installing the Support Leg:
- Pull the support leg out of the base and unfold it until a "click" is heard.
- Press the leg height adjustment buttons to extend the leg automatically.
- Adjust the leg height so it presses firmly against the floor.
- Release the buttons. The correct installation indicator should be green.
- Forward-facing (76-105 cm) using ISOFIX and Support Leg:
- Unfold the stabilizing leg until a "click" is heard.
- Place the car seat on the vehicle seat.
- Connect the ISOFIX latches with the vehicle mountings.
- Push the car seat easy spin lever and turn the seat forward-facing until a "click" indicates it's locked.
- Press and hold the support leg height adjustment button until the leg extends and stands firm on the floor.
- Forward-facing (100-150 cm) using Three-Point Car Seat Belt (with or without ISOFIX):
- Install the car seat on the vehicle seat using ISOFIX connectors (if applicable), ensuring installation indicators turn green.
- Push the car seat as far as possible into the seat.
- Unfasten the internal safety harness fasteners and uncover the car seat backrest.
- Open the car seat cover and fasten the internal safety harness inside the seat (stowing it away).
- Place the child in the car seat.
- Adjust the headrest to the child's height.
- Guide the shoulder belt through the green shoulder belt guide.
- Guide the car seat belt through both lap belt guides.
- Fasten the car seat belt until a "click" is heard.
Stowing Away the Five-Point Safety Harness (for 100-150 cm height range):
- Loosen the safety harness fully (do not pull shoulder pads).
- Remove shoulder pads and buckle pad by unfastening fasteners.
- Place the headrest in the highest position.
- Unfasten the buckle.
- Put the buckle through the opening in the cover.
- Unfasten fasteners and uncover the car seat backrest.
- Open the storage cover.
- Fasten the five-point safety harness.
- Put the fastened safety harness into the storage compartment so it lies flat along the backrest.
- Put the cover back on the car seat using fasteners on the fabric edges.
- Adjust the headrest to the child's height.
Removing the Car Seat (ISOFIX system + support leg):
- Fold the support leg extension by holding the two buttons on the sides and pushing it up until a "click" is heard.
- Grasp the foot and slide it back into the support leg.
- Press the release button on both ISOFIX latches (indicators change from green to red).
- Slide the ISOFIX latches into the car seat using the sliding lever.
Maintenance Features
Removing the Cover:
- Remove the insert.
- Move the headrest to the highest position.
- Remove the shoulder pads and buckle pad.
- Unfasten four fasteners securing the cover to the front part of the backrest and side fasteners.
- Remove the fabric from the headrest, starting from the sides.
- Carefully remove the cover from the bottom of the car seat.
- Pull out the fabric around the side protection elements.
- Remove the entire fabric by pulling it over the top part of the car seat.
Installation of the Cover:
- To reinstall, reverse the removal steps. Adjust the cover to the installation points, starting with the car seat shell and then the headrest section.
Cleaning:
- NOTE: Do not use the car seat without the cover.
- The cover can be removed and washed using mild powder and a delicate wash cycle (30°C).
- Follow the washing instructions on the cover label. Colors may fade if washed above 30°C.
- Do not spin or tumble dry the cover (layers of material may split).
- Prolonged sun exposure of the cover is prohibited.
- Plastic parts can be cleaned with soapy water.
- Do not use aggressive cleaning agents (such as solvents).
- The safety harness can be cleaned in lukewarm soapy water.
- Warning! Metal snaps should never be removed from the safety harness.
For full warranty terms and conditions, visit WWW.KINDERKRAFT.COM.