This document is a user manual for the Kinderkraft I-GUARD car seat, model ECE R129.03 v.1.2. It provides instructions for installation, usage, and maintenance of the car seat.
Function Description
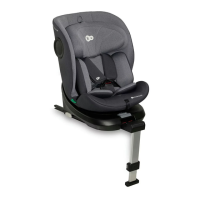
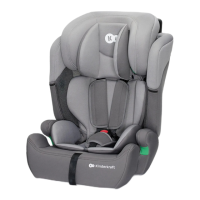
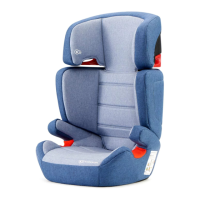
The Kinderkraft I-GUARD car seat is a child restraint system designed for the safe transport of children in vehicles. It is approved according to UN/ECE Regulation No. 129 (UN/ECE R129/03). The car seat is designed for children between 40 and 105 cm in height, which typically corresponds to ages from 0 months up to approximately 4 years old.
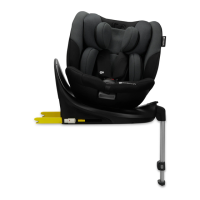
The car seat features a 5-point safety harness system to secure the child, a headrest, and a baby insert for very young children. It incorporates an ISOFIX attachment system with a support leg for secure installation in the vehicle. A key feature is its rotating mechanism, which allows the seat to be turned for easier child positioning and removal, as well as for switching between rearward-facing and forward-facing orientations. The backrest also offers multiple recline positions for comfort and safety.
Important Technical Specifications
- Model: I-GUARD
- Approval Standard: ECE R129.03
- Child Height Range: 40 cm to 105 cm (approximately 0 months to 4 years old)
- Installation Method: ISOFIX attachments and support leg
- Child Restraint: 5-point safety harness
- Orientation:
- Rearward-facing: 40 cm - 105 cm (0 months - approx. 4 years)
- Forward-facing: 76 cm - 105 cm (> 15 months - approx. 4 years)
- Recline Positions: Multiple positions, with position '1' being the most reclined for rearward-facing (40-105 cm) and positions '1' to '4' available for forward-facing (76-105 cm).
- Headrest Adjustment: Adjustable headrest height with integrated shoulder strap adjustment.
- Support Leg: Extendable support leg with height adjustment and indicator.
- ISOFIX Indicators: Green/red indicators on ISOFIX attachments and support leg to confirm correct installation.
Usage Features
Installation:
The car seat must be installed using the ISOFIX attachments and a support leg. It is crucial to consult both the car seat manual and the vehicle handbook for ISOFIX attachment point locations and suitability.
- Unfolding the Support Leg: Before placing the seat in the car, unfold the support leg (9).
- Removing ISOFIX Attachment Cover: If present, remove the cover (19) from the ISOFIX attachments (16) by pushing the ISOFIX release button (15).
- Attaching ISOFIX Guides: Attach the ISOFIX guides (18) to the car seat connectors (A.4).
- Extending ISOFIX Attachments: Slide the ISOFIX attachments (16) to their maximum length by unlocking and holding the sliding lever (12).
- Connecting ISOFIX: Connect the extended ISOFIX attachments (16) to the ISOFIX guides (18) until a "click" is heard. Verify correct installation by checking for green indicators on the button (15) and ensuring both button markers are completely green.
- Securing the Base: Push the base with a left-right movement towards the vehicle seat backrest until it aligns with the anti-rotation frame (14).
- Adjusting Support Leg: Adjust the support leg (9) height so that the foot meets resistance with the vehicle's ground. The leg height adjustment button (17) releases the lock. A green indicator on the footrest (10) confirms correct installation. The support leg must never hang in the air, and no objects should be placed under it. Ensure the support leg is supporting and not raising the bottom of the seat.
Orientation:
- Rearward-facing (40-105 cm): Push the seat rotation lever (7) to turn the seat rearward. A green indicator on the lever confirms a correctly locked position.
- Forward-facing (76-105 cm): Push the seat rotation lever (7) to turn the seat forward. A green indicator on the lever confirms a correctly locked position.
Child Securing:
- Loosening Harness: Press the 5-point harness adjustment button (4) and pull the harness to loosen it.
- Releasing Buckle: Release the buckle (3) and hook the 5-point harness on the harness holders (11) on the sides of the seat.
- Positioning Child: Place the child in the seat.
- Adjusting Headrest: Adjust the headrest (1) so that the shoulder straps enter the seat back flat, horizontally just above the child's shoulders. The headrest height adjustment lever (13) is used for this.
- Fastening Buckle: Fold the two buckle clasps together to interlock and insert them into the buckle (3) until a "click" is heard.
- Tightening Harness: Pull on the shoulder straps to remove slack in the hip area. Tighten the 5-point harnesses with the adjusting belt (5) until they lie flat and close to the child's body. Ensure that only one finger (approx. 1 cm) can be inserted between the straps and the child's chest. The harness must not be twisted and should be positioned as low as possible on the child's hips.
Baby Insert:
The baby insert (2) provides comfort and extra support for very young children. It must be used until the child reaches a height of 60 cm. After 60 cm, the insert should be removed and stored. Only the original Kinderkraft I-GUARD insert should be used.
Safety Precautions:
- Always ensure the 5-point seat belts are correctly adjusted and firmly fastened before every journey.
- Never twist the safety harness.
- The closer the belt is to the child's body, the greater the safety. Avoid thick clothing under the belt.
- Lap belts should run as low as possible across the child's groin.
- Only use the seat on forward-facing car seats. Do not install on rearward or side-facing seats.
- Do not place the child restraint on seats with active front airbags. If installed in the front seat, the front airbag must be deactivated.
- The seat should be replaced if it has been subjected to sudden stresses during a traffic accident.
- Never modify the car seat without approval from the relevant authority.
- Protect the car seat and child from direct sunlight.
- Never leave a child unattended in the car seat.
- Secure all luggage and objects in the vehicle.
- Ensure the seat is correctly positioned and secured even when not in use.
- Prevent the car seat from becoming jammed when closing vehicle doors or adjusting rear seats.
- Consider placing a blanket or towel under the car seat to prevent marks on delicate vehicle seat materials.
Maintenance Features
Cleaning:
- Cover: The cover can be removed and washed on a delicate program (30°C) using mild powder. Observe washing instructions on the cover label. Do not spin dry or tumble dry. Avoid prolonged sunlight exposure. The headrest insert foam can be removed before washing.
- Plastic Parts: Clean with a mild detergent and warm water. Do not use strong cleaning agents or bleach.
- Harness Components: Regularly check and clean the 5-point harness adjustment strap and crotch belt buckle with a soft cloth or sponge using warm water.
General Maintenance:
- Do not use the seat without the cover, as it is an important part of the safety system.
- Regularly inspect the seat, paying attention to attachment points, seams, and adjusting devices.
- Ensure all mechanical parts are fully functional.
- Never grease or oil any part of the child seat.
- Stop using the seat if parts are damaged or loose.
- Keep the instruction manual within reach, preferably in a designated place inside the seat under the backrest cover.
- Only use replacement covers recommended by the manufacturer.
- Do not use attachment points other than those described in the instructions.
- Ensure all hard components and plastic parts are positioned so they cannot be trapped by the vehicle's sliding seat or doors.
- In an emergency, it is important to release the seat belts quickly. Ensure the child does not play with the 5-point harness buckle.