ASSEMBLY/ADJUSTMENTS
Warning! Always unplug saw from power source before any of the following operations or
instructions.
ATTACHING BLADE
Note: The first time the blade bolt is removed from saw without a blade installed, it may be
necessary to place the blade wrench on the bolt head and tap it sharply in the
counterclockwise direction. Retract lower blade guard and assemble blade and clamp
washers. Make sure the large surface of outer clamp washer is toward blade. To prevent
blade rotation while tightening the blade clamping screw, raise the lower guard and place
the saw down on a piece of scrap wood. The blade teeth will dig into the scrap and
prevent rotation while you tighten the blade clamping bolt. Tighten blade clamping bolt
securely.
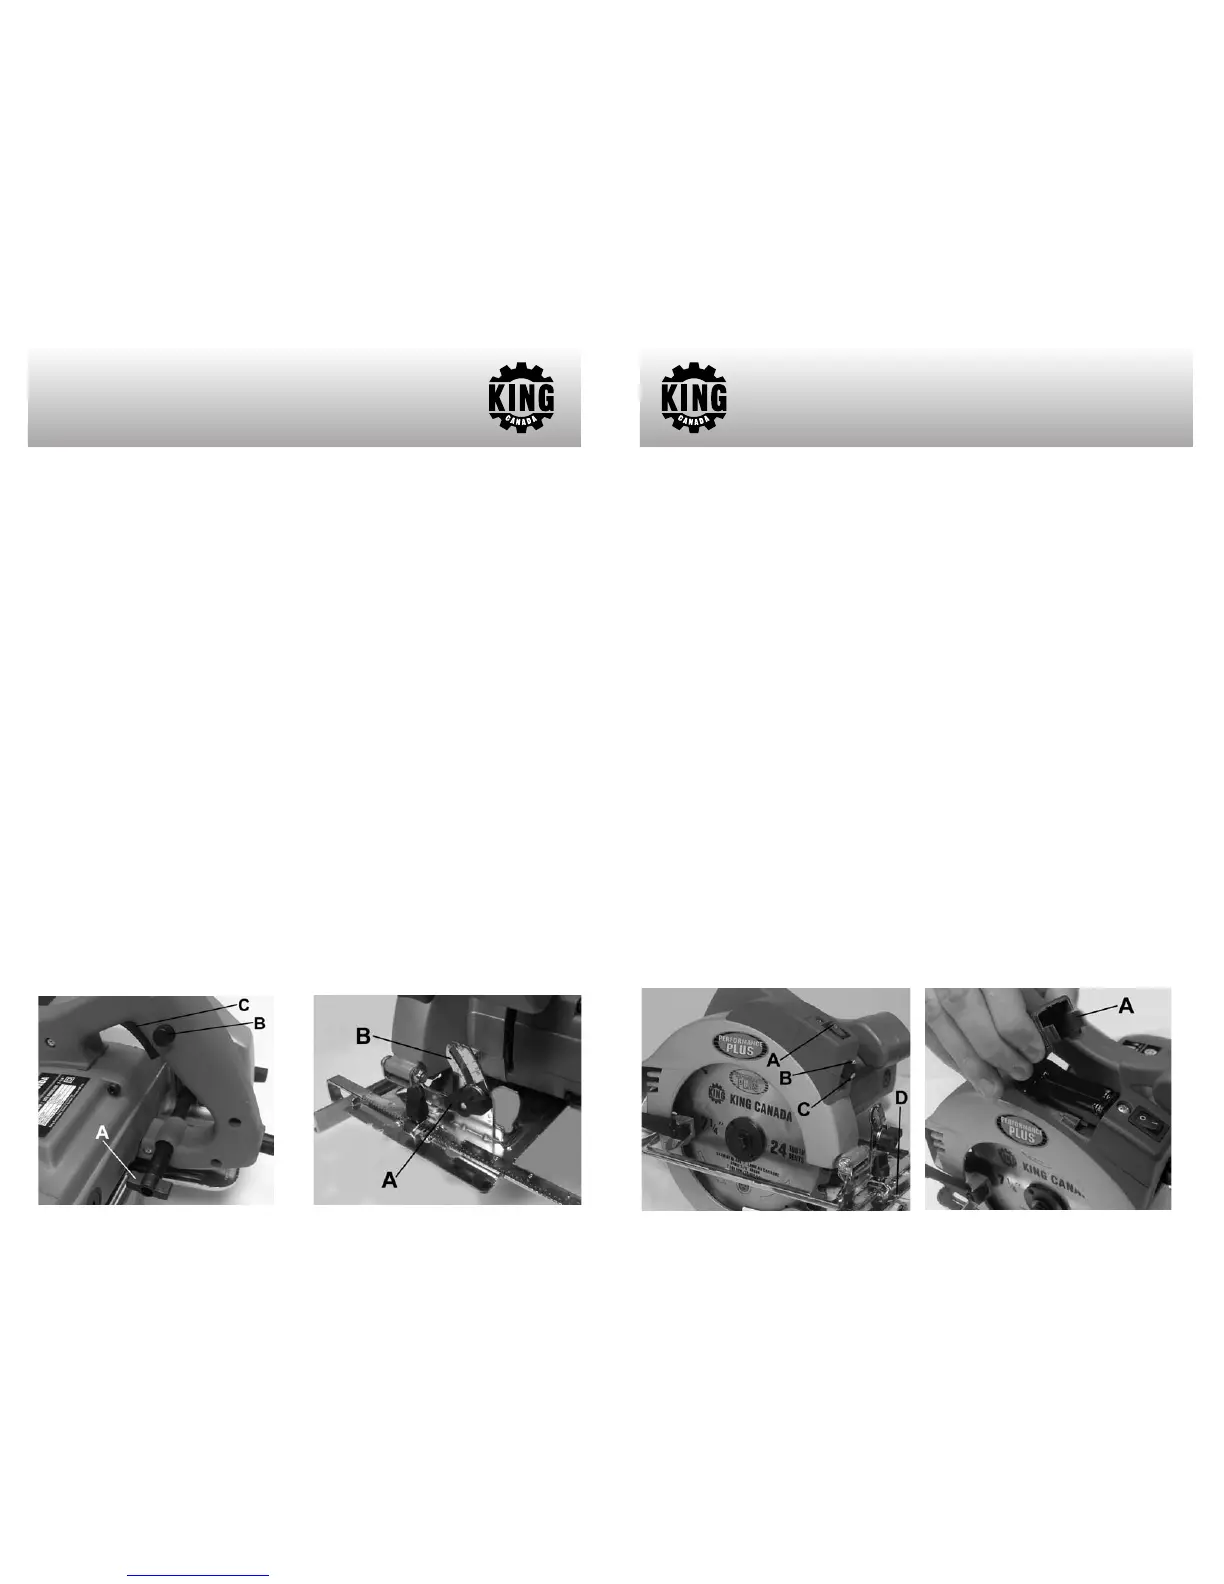
CUTTING DEPTH & BEVEL ANGLE ADJUSTMENT
Adjust depth of cut by loosening the depth adjustment knob (A) Fig.1 and set the base to the
desired depth. Retighten depth adjustment knob.
Adjust the bevel angle by loosening the bevel adjustment knob (A) Fig.2, use the bevel scale
(B) as a guide to set the desired bevel angle. Retighten bevel adjustment knob.
KERF PLATE ADJUSTMENT
Adjust kerf plate to read zero when the bevel scale reads zero by loosening the kerf plate
screw and sliding the plate as necessary. Align mark on kerf plate with drawn pencil line
and advance blade into cut. The kerf plate has lines for zero bevel and 45 degrees bevel
cutting.
TURNING SAW ON
This saw comes with a safety feature which prevents accidental starts. To turn the saw on,
press and hold the safety button (B) Fig.1 and then pull on the trigger (C).
FIGURE 1
FIGURE
2
USING THE LASER GUIDE SYSTEM
Warning! Do not stare directly into the laser beam.
1. Mark the line of the cut on the workpiece.
2. Adjust the depth and/or bevel angles of the cut as required.
3. Before clamping the workpiece in position, turn on the laser guide using the laser switch
(A) Fig.3. Align the line of cut on the workpiece with the laser guide.
4. Turn circular saw on and allow the blade to reach its maximum speed. Make your cut.
5. Switch off the laser guide on completion of the cut.
ADJUSTING LASER GUIDE SYSTEM
If your laser guide is not aligned with the blade kerf, a small adjustment can be made.
1. Loosen laser screw (B) Fig.3 located just above the laser guide.
2. Turn laser tip (C) until the laser beam is aligned with the saw blade mark (D) on the base
and retighten laser screw.
CHANGING BATTERIES
The laser guide system supplied with your circular saw is battery operated (AAA batteries not
included). To save battery life, only turn on the laser guide after you are ready to cut.
To change the batteries:
1. Press the battery cover locking tabs (A) Fig.4 on both sides and slide the battery cover
towards the back to remove it.
2. Remove both used batteries and replace with new ones. (2x AAA batteries)
3. Slide and snap the battery cover back into place.
MAINTENANCE
TURN OFF AND UNPLUG THE SAW WHEN PERFORMING ANY CLEANING OR OTHER
MAINTENANCE. Use only mild soap and a damp cloth to clean the tool. Never let any
liquid get inside the saw, never immerse any part of the saw into a liquid.
IMPORTANT: To assure product safety and reliability, repairs, maintenance and adjustment
should be performed by one of our authorized service centers or other qualified service
technicians, as always using identical replacement parts.
FIGURE
3
FIGURE 4
LASER GUIDE SYSTEM
& MAINTENANCE
 Loading...