Do you have a question about the King Living NEO and is the answer not in the manual?
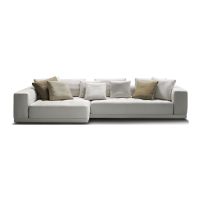
This document provides assembly instructions for the King Living Neo furniture, emphasizing the need for two people for safe assembly. It also includes instructions for joining two Neo platforms and highlights various features of the furniture.
The assembly process begins with opening the box. Users are advised to exercise caution when cutting open the box, specifically to avoid pushing the knife too far in. The recommended method is to lift the cardboard with one hand while cutting, ensuring the blade remains well away from the furniture to prevent damage. The main assembly of the furniture involves 21 steps, detailed through a series of illustrations.
The first four steps of the assembly guide users through preparing the furniture components. Step 1 shows a flat-packed box labeled "OPEN THIS SIDE," indicating the initial state of the product. Step 2 illustrates the process of opening the box, presumably by cutting along the indicated side. Steps 3A and 3B depict the attachment of a component, possibly a leg or a base support, using a tool. The illustration in 3A shows a hand holding a tool, likely an Allen key, to tighten a screw into a pre-drilled hole, while 3B shows the component fully attached. Step 4 shows the attachment of another component, possibly a foot or a castor, with a visible "x4" label, suggesting that this step is repeated four times for different parts of the furniture.
Steps 5 through 9 continue the assembly process, focusing on the base and frame of the furniture. Step 5 shows the base frame being assembled, with a hand guiding a component into place. Step 6 illustrates the attachment of a side panel or a backrest support, with a hand securing it to the base. Step 7 depicts the tightening of a screw or bolt, reinforcing the connection made in the previous step. Step 8 shows the attachment of another component, possibly a bracket or a connector, to the frame. Step 9 illustrates the completed base frame, ready for the next stage of assembly.
The subsequent steps, 10 through 14, focus on adding the main body and seating components. Step 10 shows a person lifting a large component, likely the main seating platform, and positioning it onto the assembled base. Step 11 illustrates the careful placement of the seating platform, ensuring it aligns correctly with the base. Step 12 depicts the attachment of the backrest or armrest components, with a hand guiding them into position. Step 13 shows the securing of these components, possibly with screws or clips. Step 14 illustrates the nearly completed furniture piece, with most major components in place.
The final steps, 15 through 21, involve adding cushions, covers, and making final adjustments. Step 15 shows a person placing a cushion onto the seat. Step 16 illustrates the placement of a backrest cushion. Step 17 depicts the adjustment or smoothing of the fabric or cover on the furniture. Step 18 shows a person making a final check or adjustment to the assembled piece. Step 19 illustrates the completed furniture, ready for use. Steps 20 and 21 show additional adjustments or the attachment of minor accessories, ensuring the furniture is fully functional and aesthetically pleasing.
Beyond the initial assembly, the manual provides instructions for the "Neo Joiner: Joining two platforms." This section is crucial for users who wish to combine multiple Neo furniture units to create larger configurations. The process involves five steps, illustrated with clear diagrams. Step 1 shows a tool, likely a spanner, being used to tighten a bolt that connects two platforms. Step 2 illustrates the alignment of two platforms, ensuring they are positioned correctly before joining. Step 3 depicts the insertion of a joining mechanism, possibly a bracket or a connector, between the two platforms. Step 4 shows the tightening of the joining mechanism, securing the two platforms together. Step 5 illustrates the completed connection, with the two platforms seamlessly joined. This feature allows for modularity, enabling users to customize their furniture layout according to their space and needs.
The "Features" section of the manual further details the assembly and use of the Neo furniture, particularly focusing on the attachment of cushions and covers. This section is presented through a series of nine illustrations. Steps 1 through 5 show the process of attaching and adjusting the seat cushions. Step 1 illustrates the placement of a seat cushion onto the frame, with visible circular markings on the frame, possibly indicating attachment points or alignment guides. Step 2 depicts a hand pressing down on the cushion, ensuring it is securely fitted. Step 3 shows the adjustment of the cushion, possibly to smooth out wrinkles or ensure proper alignment. Step 4 illustrates the final position of the seat cushion. Step 5 shows a side view of the cushion, highlighting its fit and form.
Steps 6 through 9 in the "Features" section focus on the backrest cushions and their integration with the furniture. Step 6 shows the placement of a backrest cushion onto the furniture frame. Step 7 illustrates a hand pressing the backrest cushion into place, ensuring it is firmly attached. Step 8 depicts the adjustment of the backrest cushion, possibly to ensure it is upright and properly aligned. Step 9 shows the completed furniture piece with all cushions in place, ready for use. These detailed steps ensure that users can properly assemble and set up their Neo furniture, maximizing comfort and aesthetic appeal.
The manual also includes customer care information for various regions, including Australia, New Zealand, Singapore, and Malaysia. This information provides contact details such as telephone numbers and email addresses for service inquiries, as well as website addresses for further support. This comprehensive support structure ensures that customers can easily access assistance for any assembly issues, product queries, or maintenance needs.
In summary, the King Living Neo furniture is designed for modularity and ease of assembly, with clear, step-by-step instructions provided. The furniture's design allows for the joining of multiple platforms, offering flexibility in configuration. The detailed illustrations guide users through every stage, from unboxing to final adjustments, ensuring a smooth and safe assembly experience. The emphasis on careful handling during unboxing and the requirement for two people for assembly highlight the importance of safety and proper procedure. The inclusion of customer care information further enhances the user experience by providing readily available support.
| Category | Sofa |
|---|---|
| Brand | King Living |
| Style | Modern |
| Modular Configuration | Yes |
| Upholstery Options | Fabric, Leather |
| Material | Fabric or Leather |
| Dimensions | Varies depending on configuration |