5
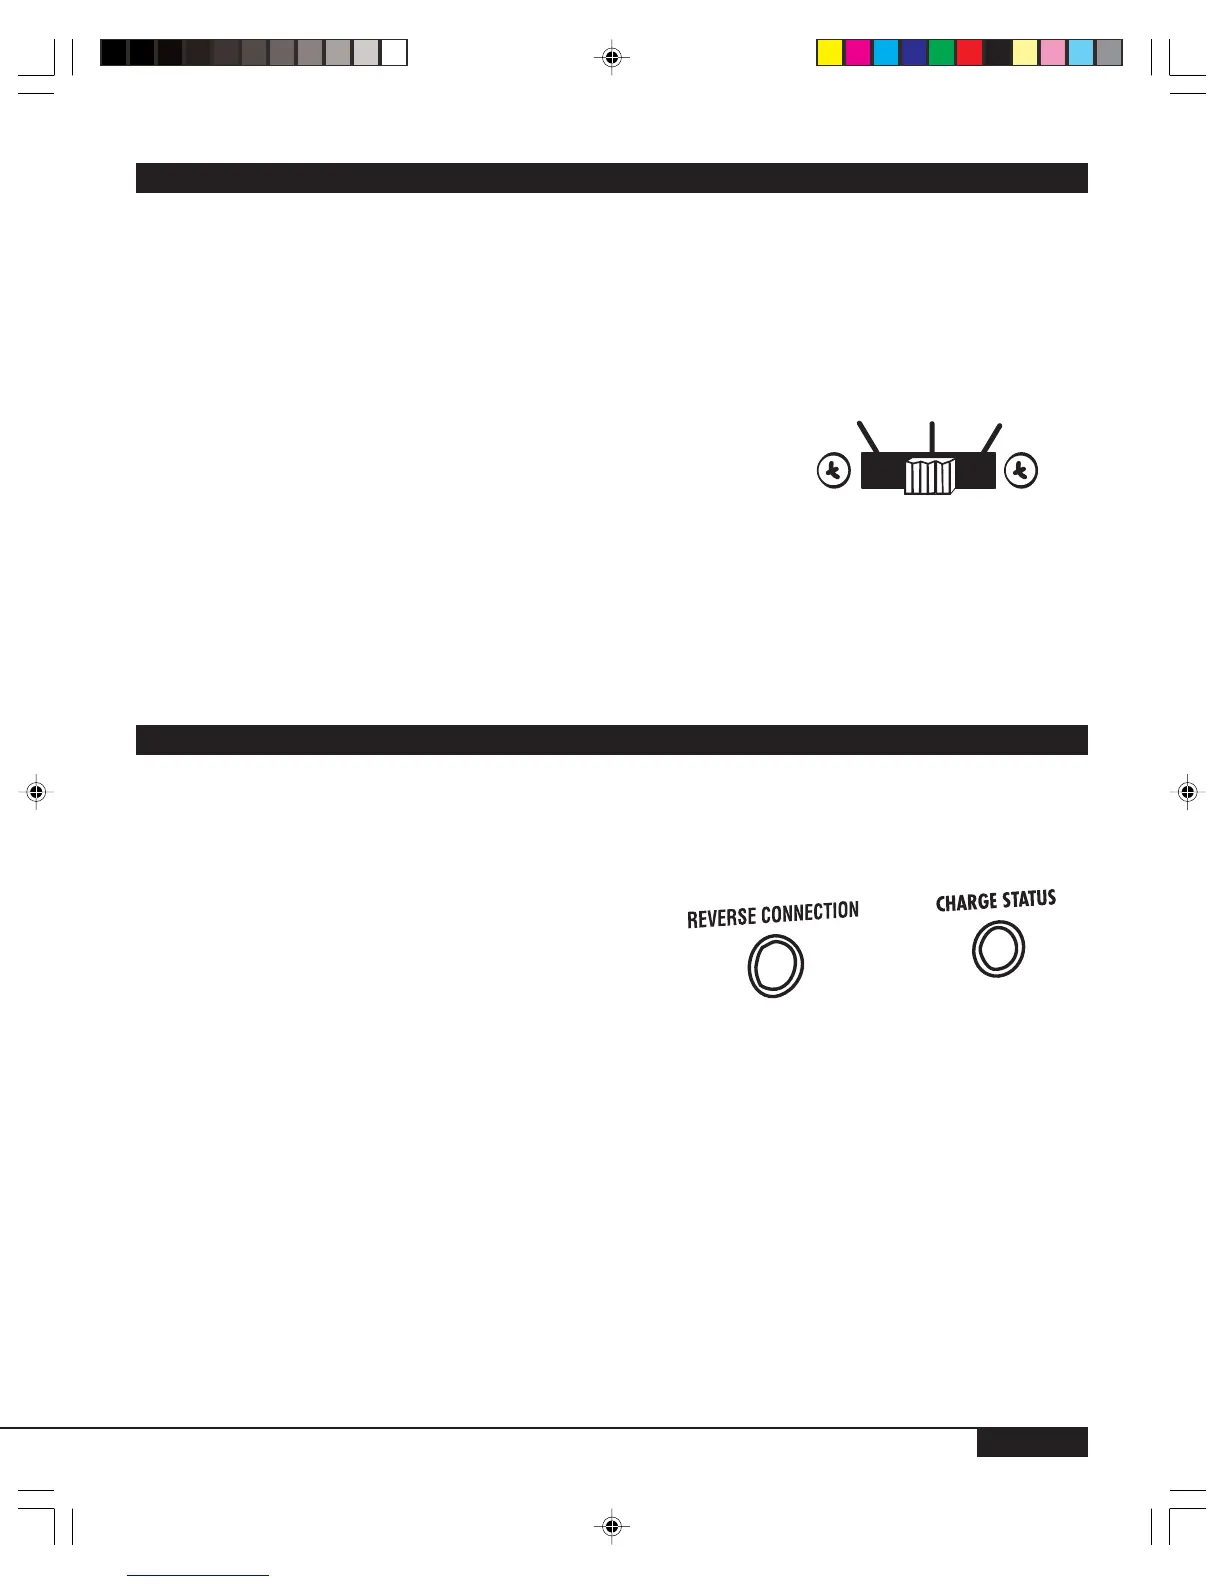
CHARGER CONTROLS
The charger control is located on the front panel of the charger unit. (See Figure 3.)
• The sliding selector switch offers two Charge Rates for charging various types of batteries.
• Select the correct switch position BEFORE connecting the charger to a battery or AC power source.
• Selections are made by sliding the switch into the correct position, corresponding with the type of battery
being charged, as follows:
FIGURE 3
SELECTOR SWITCH POSITION CHARGING RATE
LEFT 6 AMP/12 VOLT DC (LARGE BATTERIES)
CENTER 2 A
MP/12 VOLT DC (SMALL BATTERIES,
28 A
MP HOUR OR LESS)
RIGHT OFF
•Small 12 volt DC batteries such as those used in motorcycles, garden tractors, ATVs, jet skis, and
snowmobiles can be damaged by high rates of charge. ALWAYS select the 2 Amp/12 Volt setting
(CENTER switch position) to charge this type of battery and for a slower charging time on larger batteries.
WARNING:
If in doubt about battery size, charge at the 2 Amp rate. DO NOT overcharge batteries. ALWAYS ensure
that the selection corresponds to the voltage of the battery being charged.
INDICATORS
Indicators should not be used to determine the level of battery charge - this should be done using a hydrom-
eter or voltmeter. If the battery vent caps are not removable, then a voltmeter or load tester is used to deter-
mine the charge level of the battery.
• Reverse Polarity LED indicaters incorrect polarity connection to battery when lit
• Charge Status indicator
CHARGE STATUS LED
Not lit - - switch OFF - reverse polarity - no AC
YELLOW (power on) - battery not connected - AC applied
RED - Charging Battery
GREEN - Charging Complete
Typically 12.6 VDC is considered a full charge on a 12 volt battery if the voltage is measured one hour after
the charger is disconnected. During charging, a nominal 12 volt battery can be 13.6 volts or somewhat
higher, so it needs to rest after charging to measure actual state of charge.
2 Amp
12 V
OFF
6 Amp
12 V