The Kitchen Couture Digital Air Fryer, model KDF-540D-3, is a modern kitchen appliance designed for healthier, faster, and easier food preparation compared to conventional frying methods. It utilizes rapid hot air circulation to cook food from all sides, creating a crispy outer layer without the need for oil, thereby reducing fat content by up to 80%. This versatile air fryer is suitable for a wide range of ingredients and is a valuable addition to any home kitchen.
Function Description
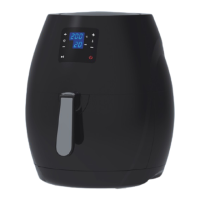
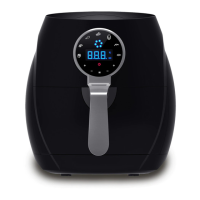
The air fryer operates by circulating hot air rapidly and evenly around food, heating it from all sides simultaneously. This process allows for efficient cooking and achieves a crispy texture similar to deep-frying but with significantly less fat. The appliance features a digital control panel that allows users to set and adjust temperature and time for precise cooking. It includes a main body, a frying tray, and a basket where ingredients are placed. A safety switch ensures proper operation.
Usage Features
Getting Started:
Before first use, it's essential to remove all packing material, stickers (except the rating label), and thoroughly clean the basket and frying tray with hot water and liquid washing soap using a non-abrasive sponge. The inside and outside of the appliance should be wiped with a moist cloth. To eliminate initial smells, the appliance should be run without food at 200°C for 30 minutes, and repeated if necessary after cooling.
Basic Operation:
- Power Connection: Insert the plug into an earthed wall socket. A "Beep--" sound will be heard, and all lights will briefly illuminate before turning off, leaving only the Power light on, indicating standby status.
- Power On: Touch the Power icon once. Lights will come on, and the default settings of 200°C and 12 minutes will be displayed.
- Temperature Adjustment: The cooking temperature can be adjusted from 80°C to 200°C using the Temperature Plus/Minus icons. Each touch adjusts the temperature by 10°C. For quicker adjustment, touch and hold the icons.
- Time Adjustment: The cooking time can be adjusted from 1 to 60 minutes using the Time Plus/Minus icons. Each touch adjusts the time by 1 minute. For quicker adjustment, touch and hold the icons.
- Starting/Pausing Cooking: Touch the Start/Pause icon once to begin cooking. A "Beep--" sound will be heard, the Start/Pause light will flash, and the timer will start counting down. To pause cooking, touch Start/Pause again. To resume, touch it one more time.
- Automatic Termination: Cooking automatically stops when the set time expires. The appliance will emit "Beep--" sounds 10 times. The heating element will turn off, but the fan will continue to operate for 1 minute to cool down the ingredients and the appliance. After 1 minute, the fan and all lights (except Power) will turn off, returning the appliance to standby mode.
- Manual Termination: Cooking can be manually stopped by touching the Power icon once. The appliance will return to standby status.
Cooking Steps and Tips:
- Preparation: Insert the plug, pull out the Frying Tray, and place it on a flat surface. Hold the handle and press the basket release button to detach the basket.
- Loading Ingredients: Place ingredients into the basket.
- Assembly: Install the basket correctly into the Frying Tray (a click will confirm proper installation). Push the Frying Tray back into the appliance.
- Cooking Process: Set the desired temperature and time using the digital controls. Start cooking.
- Checking Ingredients: During cooking, the Frying Tray can be pulled out to check ingredients. Both cooking and the timer will pause and resume automatically when the tray is reinserted.
- Shaking Ingredients: For certain ingredients, shaking halfway through the cooking time is recommended for even frying. Pull the Frying Tray out by the handle and shake it. Do not press the basket release button while shaking the tray in the air to avoid damage. To reduce weight, the basket can be detached from the frying tray and shaken separately.
- Serving: Once ingredients are ready, release the basket from the Frying Tray and empty it into a bowl or plate. For large or fragile items, use tongs.
- Batch Cooking: The appliance is ready to prepare another batch immediately after one is finished.
Personalized Settings:
The manual provides a table with recommended time and temperature settings for various ingredients (e.g., potatoes, meat, poultry, snacks). These settings are for reference and may need adjustment based on ingredient origin, size, shape, and brand.
- Smaller ingredients generally require less cooking time.
- Larger quantities may require slightly longer cooking times.
- Shaking smaller ingredients halfway through cooking optimizes results and prevents uneven frying.
- Fresh potatoes can be coated with a little oil for crispiness.
- Extremely greasy ingredients should not be prepared in the air fryer.
- The optimal amount for crispy fries is about 600 grams.
- Oven-ready snacks can also be prepared in the air fryer.
- Pre-made dough for snacks requires shorter preparation times than homemade dough.
- The appliance can reheat ingredients at 150°C for about 10 minutes.
- Preheating the appliance for 3 minutes before cooking can help reach the desired temperature.
Making Home-Made Fries:
- Peel and cut potatoes into sticks.
- Soak sticks in water for at least 30 minutes, then dry thoroughly with kitchen paper.
- Toss sticks with 1/2 tablespoon of olive oil in a bowl until evenly coated.
- Remove sticks from the bowl with fingers or a utensil to leave excess oil behind, then place them in the basket. Avoid tilting the bowl to pour all sticks at once, which can lead to excess oil in the Frying Tray.
- Fry according to the recommended settings.
Maintenance Features
Cleaning:
The appliance should be cleaned after every use.
- Cool Down: Unplug the appliance and allow it to cool down completely (at least 30 minutes). Removing the Frying Tray can expedite cooling.
- Exterior: Wipe the outside of the appliance with a moist cloth.
- Frying Tray and Basket: Clean these parts with hot water, liquid washing soap, and a non-abrasive sponge. They are dishwasher-safe. For stubborn food residues, fill the Frying Tray with hot water and soap, place the basket inside, and let them soak for approximately 10 minutes. Degreasing liquid can be used for food residues.
- Interior: Clean the inside of the appliance with a moist cloth or a non-abrasive sponge.
- Heating Element: Use a non-abrasive cleaning brush to remove any food residues from the heating element.
Important Cleaning Warnings:
- The Frying Tray, basket, and inside of the appliance have non-stick coatings. Do not use metal kitchen utensils or abrasive cleaning materials, as these can damage the coating.
- NEVER immerse the main body of the appliance in water or any other liquid.
Storage:
- Unplug the appliance and ensure it has cooled down completely.
- Make sure all parts are clean and dry.
- Store the appliance in a cool, dry place, away from direct sunlight.
Troubleshooting:
The manual provides solutions for common issues:
- Appliance not working: Check if it's plugged in and if cooking has been started.
- Ingredients not done: Reduce batch size, increase temperature, or extend cooking time.
- Unevenly fried ingredients: Reduce batch size or shake ingredients halfway through cooking.
- Fried snacks not crispy: Use oven-ready snacks, lightly brush with oil, dry potato sticks properly, cut potatoes thinner, or add slightly more oil.
- Frying Tray not pushing back properly: Ensure the basket is installed correctly and the basket is not overfilled.
- White smoke: Indicates greasy ingredients or residues from previous use. Fry greasy ingredients below 180°C and clean the basket and Frying Tray thoroughly after each use.
- Unevenly fried fresh potato fries: Soak potato sticks properly and use the right type of potato.
- Burning metal/plastic smell: Clean the appliance thoroughly and run it without food at 200°C for 30 minutes.
- Error codes 'E1' or 'E2': Indicates a faulty thermal part, requiring maintenance from a service center.
- Error code 'E3': Indicates high internal temperature. Terminate cooking, let the appliance cool, and restart. If persistent, contact a service center.