Do you have a question about the KitchenAid KBRS36FMX02 and is the answer not in the manual?
Details the physical measurements of the refrigerator, including depth, cord length, and water line.
Information on the tipping radius when the refrigerator is tilted on its side.
Requirements for door opening clearance and space needed between the refrigerator and a corner wall.
Shows clearances required for handles and door swing with custom panels.
Details on factory-available panels and custom kit options for various series.
Specifies edge routing requirements for the top grille panel's edges.
Explains how custom overlay panels blend refrigerator exterior with kitchen décor.
Details routing requirements for door and drawer panels for handle clearance.
Provides measurements for inset installation of side panels into cabinetry trim.
Discusses custom side panels for specific installation scenarios like limited cabinet space.
Defines how side panel dimensions are determined by installation type.
Gives measurements for flush installation of side panels.
Provides measurements for recessed inset installation of side panels.
Covers custom side panels for Classic and Overlay series in various installation types.
Defines how side panel dimensions are determined by installation type for Classic/Overlay series.
Lists necessary tools and parts required for installation, including specific screw types and panel materials.
Specifies requirements for refrigerator placement, including clearance, floor support, and ceiling height.
Details the necessary electrical supply, outlet type, and precautions against shock hazards.
Outlines plumbing requirements, shutoff valve location, and connection methods for water supply.
Instructions for safely unpacking the refrigerator, including removing tape and shipping materials.
Steps to reduce the refrigerator's tipping radius by removing top grille and side trims if needed.
Guidance on safely moving the refrigerator into the home using an appliance dolly.
Instructions for securing the refrigerator with anti-tip boards to prevent tipping hazards.
Detailed steps for connecting the water supply line to the refrigerator, including valve installation.
Instructions for plugging in the refrigerator, ensuring proper electrical connection and safety.
Steps for carefully moving the refrigerator into its final built-in location.
Guidance on adjusting leveling legs to ensure the refrigerator is stable and supported.
Instructions for installing custom door and drawer panels for the Classic Series refrigerator.
Steps for installing custom door overlay panels according to specifications for the Overlay Series.
Procedure for checking and adjusting the refrigerator's levelness using leveling legs.
Steps for removing, reinstalling, and adjusting the refrigerator door for proper alignment.
Instructions for installing side panels into the cabinet trim or on the outside of the side trim.
Instructions for fitting and attaching the base grille and skirt to the refrigerator.
Steps to prepare and clean the water system, including the ice maker and filter.
Final checks and steps to complete the refrigerator installation and ensure proper operation.
| Brand | KitchenAid |
|---|---|
| Model | KBRS36FMX02 |
| Category | Refrigerator |
| Configuration | Freestanding |
| Ice Maker | Yes |
| Water Dispenser | Yes |
| Finish | Stainless Steel |
| Color | Stainless Steel |
| Energy Star Certified | Yes |
| Defrost Type | Automatic |
| Shelves Material | Glass |
| Adjustable Shelves | Yes |
| Door Bins | Yes |
| Crisper Drawers | Yes |
| Interior Lighting | LED |
| Door Alarm | Yes |
| Warranty | 1 Year Limited |
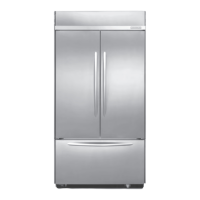
| Type | French Door |
| Capacity | 25 - 26 cu. ft. |
| Width | 36 in. |
| Depth | 34 5/8 inch |