Do you have a question about the KitchenAid KDTE334DSS and is the answer not in the manual?
Lists necessary tools and parts for installation.
Notes on checking local codes and electrical setup for first-time users.
Lists extra tools required for specific installation steps.
Lists external parts required for water supply and connections.
Steps for preparing cabinet with existing utility hookups.
Steps for preparing cabinet with new utility hookups.
Guidance on preparing and routing electrical supply.
Drilling a hole for the water supply line.
Measuring the water supply line for length.
Drilling a hole for the drain hose connection.
Routing the drain hose through the cabinet.
Connecting the drain hose to a waste tee or disposer.
Sliding the clamp onto the drain hose connector.
Finalizing the drain hose clamp position.
Cleaning and drying the cabinet area for barrier installation.
Applying the moisture barrier to the underside of the countertop.
Removing and discarding foam blocks from the dishwasher.
Laying the dishwasher on its back for preparation.
Removing the plastic rail covers from the dishwasher frame.
Removing the access panel for further steps.
Removing the terminal box cover for electrical connections.
Installing the strain relief for the power cord.
Routing the power cord into the terminal box.
Connecting the ground wire to the terminal box.
Connecting the remaining power wires (black/white).
Securing the power cord using the strain relief.
Reinstalling the terminal box cover.
Measuring the cabinet opening dimensions for installation.
Adjusting the front legs of the dishwasher.
Adjusting wheels and leveler legs for proper height.
Adding shims for built-up floors to level the dishwasher.
Attaching the dishwasher to the countertop.
Attaching the dishwasher to the cabinet sides.
Sliding nut and ferrule onto copper tubing.
Adding a 90° elbow fitting to the water supply line.
Moving the dishwasher into its final position near the opening.
Verifying the position of water and drain hoses.
Checking door tension by opening and closing it.
Decreasing door spring tension if door closes too quickly.
Increasing door spring tension if door falls open.
Sliding the dishwasher into the cabinet opening.
Aligning the dishwasher front with cabinet doors.
Tightening the 90° elbow fitting to the water supply valve.
Checking the water supply connection for leaks.
Connecting the drain hose to the drain system.
Removing the terminal box cover for wiring.
Installing the strain relief for the direct wire connection.
Routing the electrical cable into the terminal box.
Connecting the ground wire in the terminal box.
Connecting the remaining electrical wires.
Securing the cable using the strain relief.
Reinstalling the terminal box cover.
Verifying dishwasher alignment in the cabinet opening.
Fastening the dishwasher to the cabinet or countertop.
Checking the spacing between the dishwasher tub and opening.
Checking door clearance for proper operation.
Reinstalling the access panel for plastic panel models.
Reinstalling the access panels for metal panel models.
Reconnecting electrical power at the fuse box or circuit breaker.
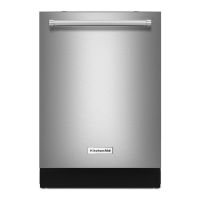
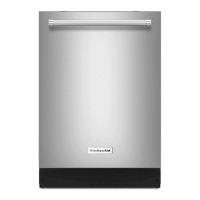
| Type | Built-In |
|---|---|
| Color | Stainless Steel |
| Number of Wash Cycles | 5 |
| Capacity | 14 Place Settings |
| Control Type | Electronic |
| Depth | 24.5 inches |
| Height | 34.5 inches |
| Number of Options | 6 |
| Energy Star Certified | Yes |
| Third Rack | Yes |
| Soil Sensor | Yes |
| Delay Start | Yes |
| Stainless Steel Tub | Yes |
| Width | 23 7/8 Inches |



 Loading...