INSTALLATION
REQUIREMENTS
IMPORTANT:
• Observe all governing codes and ordinances.
• Installer: Leave Installation Instructions with homeowner.
• Homeowner: Keep Installation Instructions for future
reference and for the local electrical inspector's use.
• Keep cardboard shipping piece or plywood under
refrigerator until it is installed in the operating position.
• Comply with installation specifications and dimensions.
• Remove any moldings or decorative panels that prevent
the refrigerator from being serviced.
• Contact a qualified electrical installer.
Tools needed:
Make sure that you have the tools necessary for proper
installation:
• Hand drill or electric drill • 7/16in. and 1/2in. open-end
(properly grounded) wrenches
• 1/4in, nut driver and • Two adjustable wrenches
drill bit
• Flat-blade screwdriver • Socket wrench
Parts needed:
• Your refrigerator dealer has a kit available with a 1/4in.
(6.35 mm) saddle-type shutoff valve, a union, and copper
tubing.
• Or you can purchase a 1/4in. (6.35 mm) copper tubing with
shutoff valve and a 1/4in. (6.35 mm) compression fitting
(coupling).
• Depending on water line connections, you may also need
a 1/4in. (6.35 mm) nut and 1/4in. (6.35 mm) ferrule.
Top View
35112"
(90.2 cm)
•_- 15_/2"-_-I[.,_-- 19112"
(39.4 cm) I (49.5 cm)
23/8......................................................1
(S.0cm)
1. Dimensionsmay vary based on model
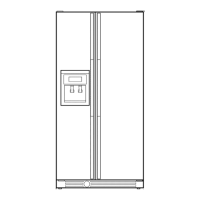
Side View
= 5t (181.6,_,,711/2"2cm)
(142 cm
1
3°/8,,19.2cml2 t ,/.,,16.4r.r.) ..........................................................3
1.Dimensions shown from floor with rollersset
at minimum height
2. Overaflcabinet height with rollers at
maximum height
3. Minimum height
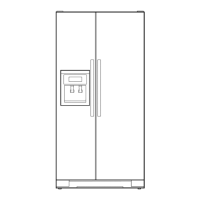
Front View
m
677/8''
(172.5cm)
R