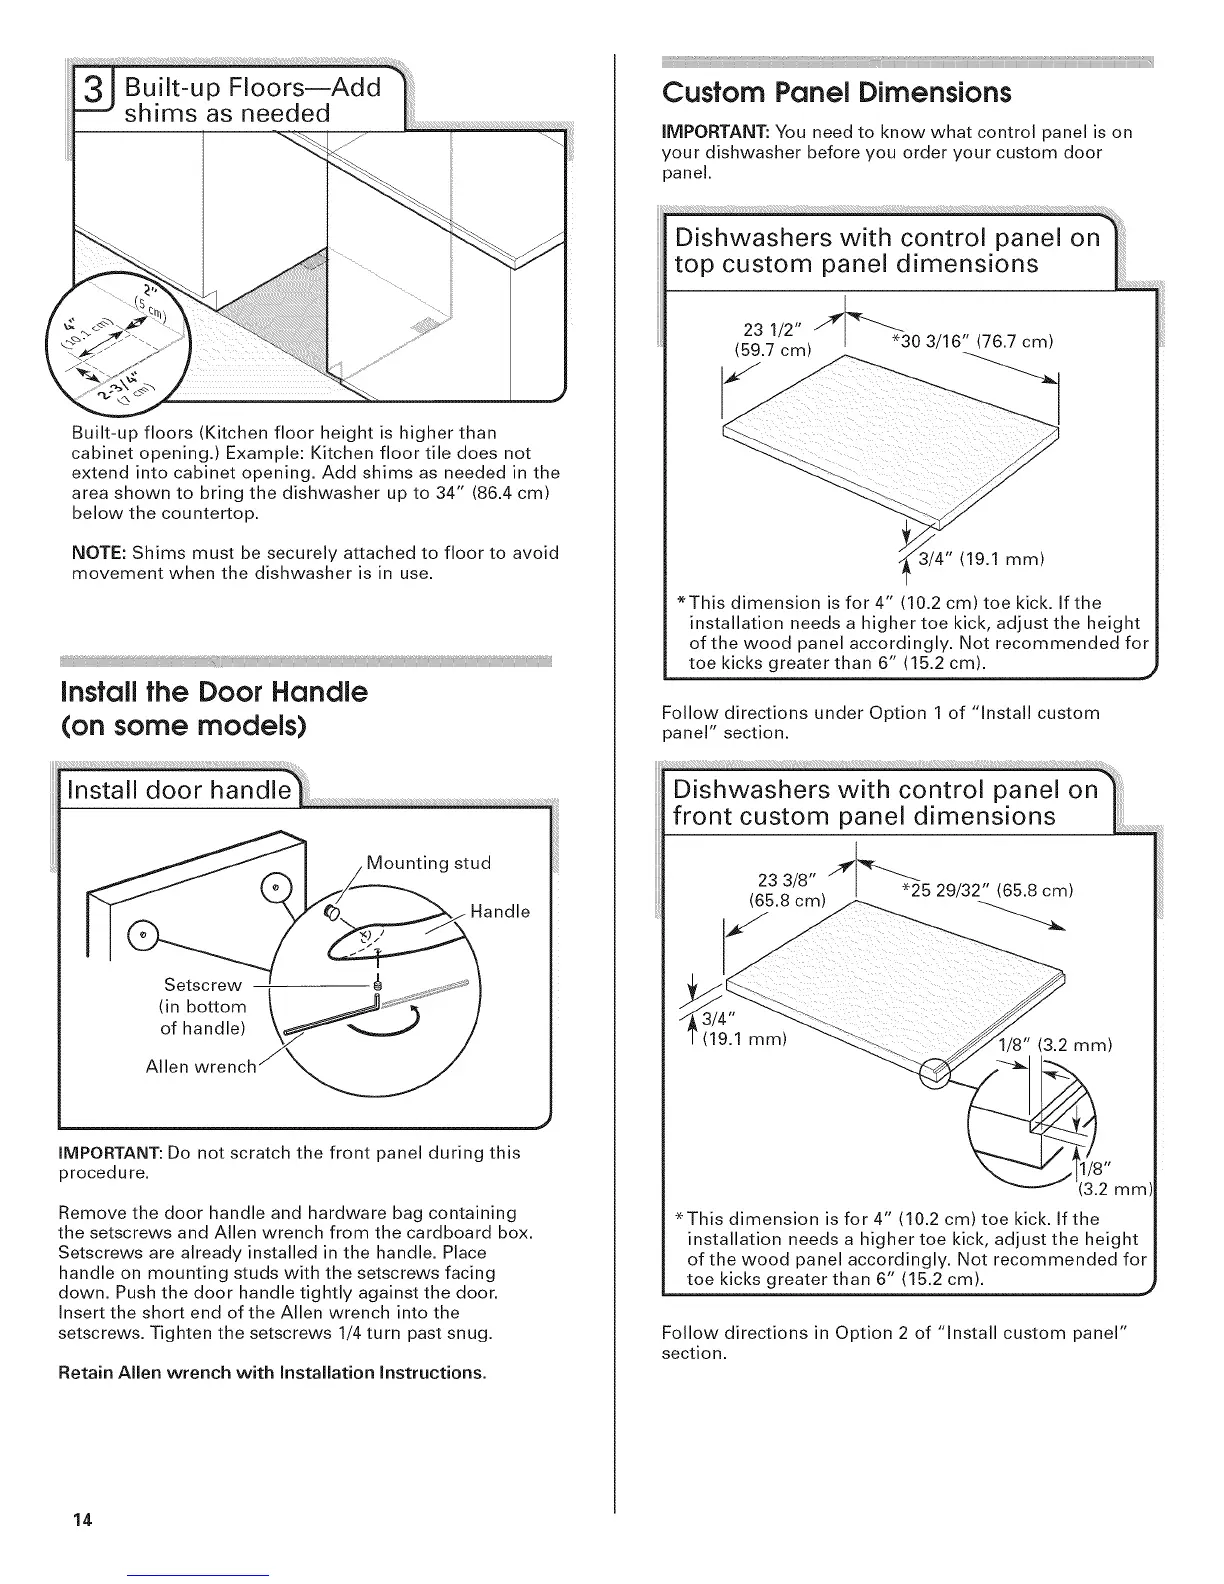
Built-upfloorsKitchenfloorheightishigherthan
cabinetopening.)Example:Kitchenfloortiledoesnot
extendintocabinetopening.Addshimsasneededinthe
areashowntobringthedishwasherupto34"(86.4cm)
belowthecountertop.
NOTE:Shimsmustbesecurelyattachedto floorto avoid
movementwhenthedishwasherisinuse.
Mountingstud
Handle
Setscrew
(inbottom
of )
Allen
IMPORTANT:Donotscratchthefrontpanelduringthis
procedure.
Removethedoorhandleandhardwarebagcontaining
thesetscrewsandAllenwrenchfromthecardboardbox.
Setscrewsarealreadyinstalledinthehandle.Place
handleonmountingstudswiththesetscrewsfacing
down.Pushthedoorhandletightlyagainstthedoor.
InserttheshortendoftheAllenwrenchintothe
setscrews.Tightenthesetscrews1/4turnpastsnug.
RetainAllenwrenchwithInstallationInstructions.
IMPORTANT:Youneedto knowwhatcontrolpanelison
yourdishwasherbeforeyouorderyourcustomdoor
panel.
Dishwashers with control panel on
top custom panel dimensions
23 1/2" /" _ -_Z.30 3/16" (76.7 cm)
7 cm'
*This dimension is for 4" (10.2 cm) toe kick. If the
installation needs a higher toe kick, adjust the height
of the wood panel accordingly. Not recommended for
toe kicks greater than 6" (15.2 cm).
Follow directions under Option 1 of "Install custom
panel" section.
Dishwashers with control panel on
front custom panel dimensions
(19.1 mm)
(3.2 mm)
mm)
*This dimension is for 4" (10.2 cm) toe kick. If the
installation needs a higher toe kick, adjust the height
of the wood panel accordingly. Not recommended for
toe kicks greater than 6" (15.2 cm).
Follow directions in Option 2 of "Install custom panel"
section.
14
 Loading...