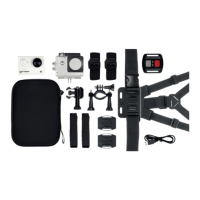
12 13
[...continued] Before use
The following indicators can be seen on the TFT display screen:
• Work mode:
The
icon shown in the top left corner of TFT display screen indicates that the camera is in video recording
standby state
• Battery power:
The
icon shown in the bottom left corner of the TFT display screen indicates how much battery power is left
• Resolution of video recording:
In the bottom left corner of the TFT display screen, 1080P/960P/720P/WVGA will show to indicate the video
recording resolution in standby mode
• Spare storage capacity:
In the bottom right corner of the TFT display screen,
will indicate whether an external card is available and will
indicate spare storage capacity
• In preview state, the camera will not respond to operations of “<” and “>”
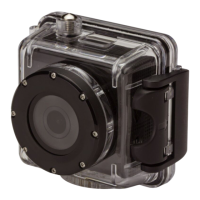
• The camera can be charged with the included cable. The red indicator on the top of the unit will flash slowly during
charging and will remain red once fully charged
Note: Before use, please check that there is enough battery power. If not, please charge the camera using the included
USB cable. The red indicator will flash slowly during charging and will remain red with the battery icon
displayed
on the TFT display screen after charging
2. Formatting the micro SD card
Please use a high-speed micro SD card only and format it on the camera before recording or taking a picture.
If the micro SD card has been used on other devices, please format it on the camera before any operation.
Note: Please confirm whether the files on the micro SD card are needed before operating. Locked files on the camera
can be formatted to remove. Formatting will wipe all data on the micro SD card
3. Setting the date and time
A yellow number indicates the current cursor position. By pressing the “<” or “>” key, you can move the cursor to the
setup interface
and select the date or time. Press the “OK” key to confirm, which will turn this number red and the
value of the date or time can be changed. Then press the “0K” key again to finish. Finally, move the cursor to using
the “<” or “>” key and press the “OK” key to confirm.
 Loading...