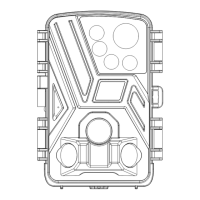
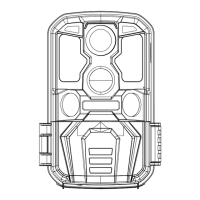
This document describes the KJK trail camera models KJK227/LK227, a device designed for wild monitoring.
Function Description
The KJK trail camera operates by triggering an infrared sensor to capture images when animals move within its monitoring range, sensing changes in infrared light. When an animal enters the monitoring range, the camera activates to capture images and save files. It remains in a dormant standby state when no animal is detected, reactivating upon re-entry into the monitoring range.
The camera offers three modes: Photo, Video, and Photo&Video. In Photo mode, it only takes photos. In Video mode, it only records videos. In Photo&Video mode, it takes photos before recording videos. During recording, the screen automatically turns off to save power, but can be reactivated by pressing any button.
The camera can be used for targeted recording during specific time intervals, and a PIR interval setting prevents excessive recording by delaying image/video capture after initial motion detection. It also features a time-lapse photography function, allowing it to capture images at set intervals to observe processes like plant flowering.
For night operation, the infrared light automatically turns on, illuminating objects within a range of 3-20 meters. However, animals too close to the camera may cause overexposure.
Important Technical Specifications
- Image Sensor: 5 megapixel CMOS image sensors
- Lens: F1.8
- Photo Resolution: 32M, 24M, 20M, 12M, 8M, 5M, 3M, 1M
- Video Resolution: 3840x2160, 2688x1520, 1920x1080, 1280x720, 720x480, 640x480
- Storage Medium: Memory card (maximum support 128GB)
- File Format: JPEG (for photos), AVI (for videos)
- USB: USB 2.0 (for data transfer only, not charging)
- DC Power Supply: External 6V/1.5A (interface size: head diameter 3.5mm * needle core 1.35mm)
- Menu Language: English, French, Spanish, German, Portuguese, Italian, Chinese
- Battery: 8x 1.5V AA alkaline batteries (rechargeable batteries are not recommended due to lower voltage)
- Microphone: Built-in
- Speaker: Built-in
- Operating Temperature: -20°C to +60°C
- Storage Temperature: -30°C to +65°C
- Size: 97x140x67mm
- Trigger Time: 0.1S
- Total PIR Angle: 120°
- Waterproof Rating: IP66
Usage Features
Quick Start:
- Battery Installation: Open the battery cover and insert 8x 1.5V AA alkaline batteries, observing polarity. Do not mix old and new batteries.
- Memory Card Installation: Insert a Class 10 or above memory card into the card slot, following the direction indicated by the card symbol.
- Power On: Switch the camera power to "SETUP" mode. The LCD will display a preview interface.
- Format Memory Card: Access the menu, select "Format memory card," and confirm with "Yes."
- Reset Settings (Optional): In the menu, select "Reset Settings" and confirm with "Yes" to restore factory settings.
- Set Time & Date: In the menu, select "Time & date," adjust to the current time, and save. Choose between 24h or 12h format.
- PIR Interval: Set "PIR interval" to 10S to reduce trigger delay.
- Exit Setup: Press the MENU button to exit the Setup Menu and return to the preview interface.
- Activate Monitoring: Switch the camera to "ON" mode. After a 5-second countdown, the LCD will turn off, and the camera will enter working mode.
Modes and Settings:
- Photo Mode: Choose pixel resolutions from 1M to 32M. Higher resolution means clearer images but fewer stored photos.
- Video Mode: Choose pixel resolutions from 640x480 to 3840x2160. Higher resolution means clearer videos but shorter recording time.
- Photo&Video Mode: Captures photos before recording videos.
- Video Length: Set video length from 1-60 seconds or 1-10 minutes. Longer videos increase power consumption.
- PIR Interval: Set motion sensing delay from 5-59 seconds or 1-60 minutes to prevent excessive file storage.
- Sensitivity Motion Sensors: Adjust sensitivity (High, Medium, Low) based on environmental conditions to optimize detection and minimize false triggers.
- Target Recording Time: Configure the camera to operate only during specified time intervals.
- Timed Lapse: Set intervals for time-lapse photography (e.g., 1 hour for plant growth observation). Note that monitoring functions are disabled when this mode is active.
- Time & Date: Set current time, date format (DD/MM/YY, YY/MM/DD, MM/DD/YY), and time format (12-hour or 24-hour).
- Password Protection: Set a 4-digit password (0-9 and letters). If forgotten, hold MENU+REPLAY buttons while switching to SETUP mode to unlock.
- Serial NO: Set a unique 4-digit serial number for the camera.
- Replay Mode: In SETUP mode, press REPLAY to view captured images and videos. Use UP/DOWN buttons to navigate and OK to play/pause videos.
- File Management:
- Delete Current File: Delete the currently selected image or video.
- Delete All Files: Delete all images and videos from the memory card.
- Activate Slide Show: Play images as a slide show, with each image displayed for 2 seconds.
- Write Protect: Protect current or all files from accidental deletion.
Installation and Positioning:
- Wall Mounting: Use the provided metal plate to mark and drill holes, insert green components, fix the kit, and then attach the camera.
- Tree Mounting: Thread the installation belt through the holder on the back of the camera and secure it to a tree. The fixing kit can also be used for added security.
- Calibration: In SETUP mode, walk in front of the camera at different distances and angles. If the LED indicator flashes, you are within the monitoring range. This helps determine the best installation position.
- Height: Generally, a height of 1-2 meters is recommended, varying with animal size.
- Environment: Avoid direct sunlight or areas with branches to prevent glare and unnecessary triggers.
- ON Operation Mode: After countdown, the camera enters monitoring mode. It activates when an animal enters the secondary sensor detection area and takes photos/videos if the animal moves towards the primary sensor area.
USB Connection:
- Connect the camera to a computer using the micro USB cable. The camera will automatically turn on.
- It will be recognized as a "Removable Storage Device."
- Double-click to access the "DCIM" folder, where photos and videos are stored in subfolders.
- Files can be copied or moved to the computer. Alternatively, the memory card can be inserted into a card reader.
Maintenance Features
- Memory Card Handling: Always turn off the camera before inserting or removing the memory card. If the memory card is not installed correctly or is not functioning, an "X" icon will appear on the screen, and the card must be formatted before use. If using a card from another device, format it on a computer to FAT32 before installing.
- Battery Usage: Use high-performance 1.5V AA alkaline batteries for optimal battery life. Do not use 1.2V rechargeable batteries, as their lower voltage can affect camera performance, especially for night shots. Remove batteries if the camera will not be used for a long time to prevent leakage.
- Lens and Sensor Protection: Keep the camera lens and infrared window clean. Use a soft glasses cloth for cleaning. Avoid scratching the LCD, lens, infrared sensor, and LED glasses with sharp objects.
- Low Battery: Replace all batteries promptly when the battery level is low to prevent damage from electrolyte leakage.
- Protective Film: For first-time use, remove any protective film from the lens and sensors to ensure proper motion detection.
- On-site Installation: Ensure the camera's socket and DC plug at the bottom are sealed to prevent rain damage.
- USB Cable: The provided mini USB cable is for data transfer only; do not use it to charge the camera or batteries, as this can cause serious damage.