52
Installation
Installing the appliance
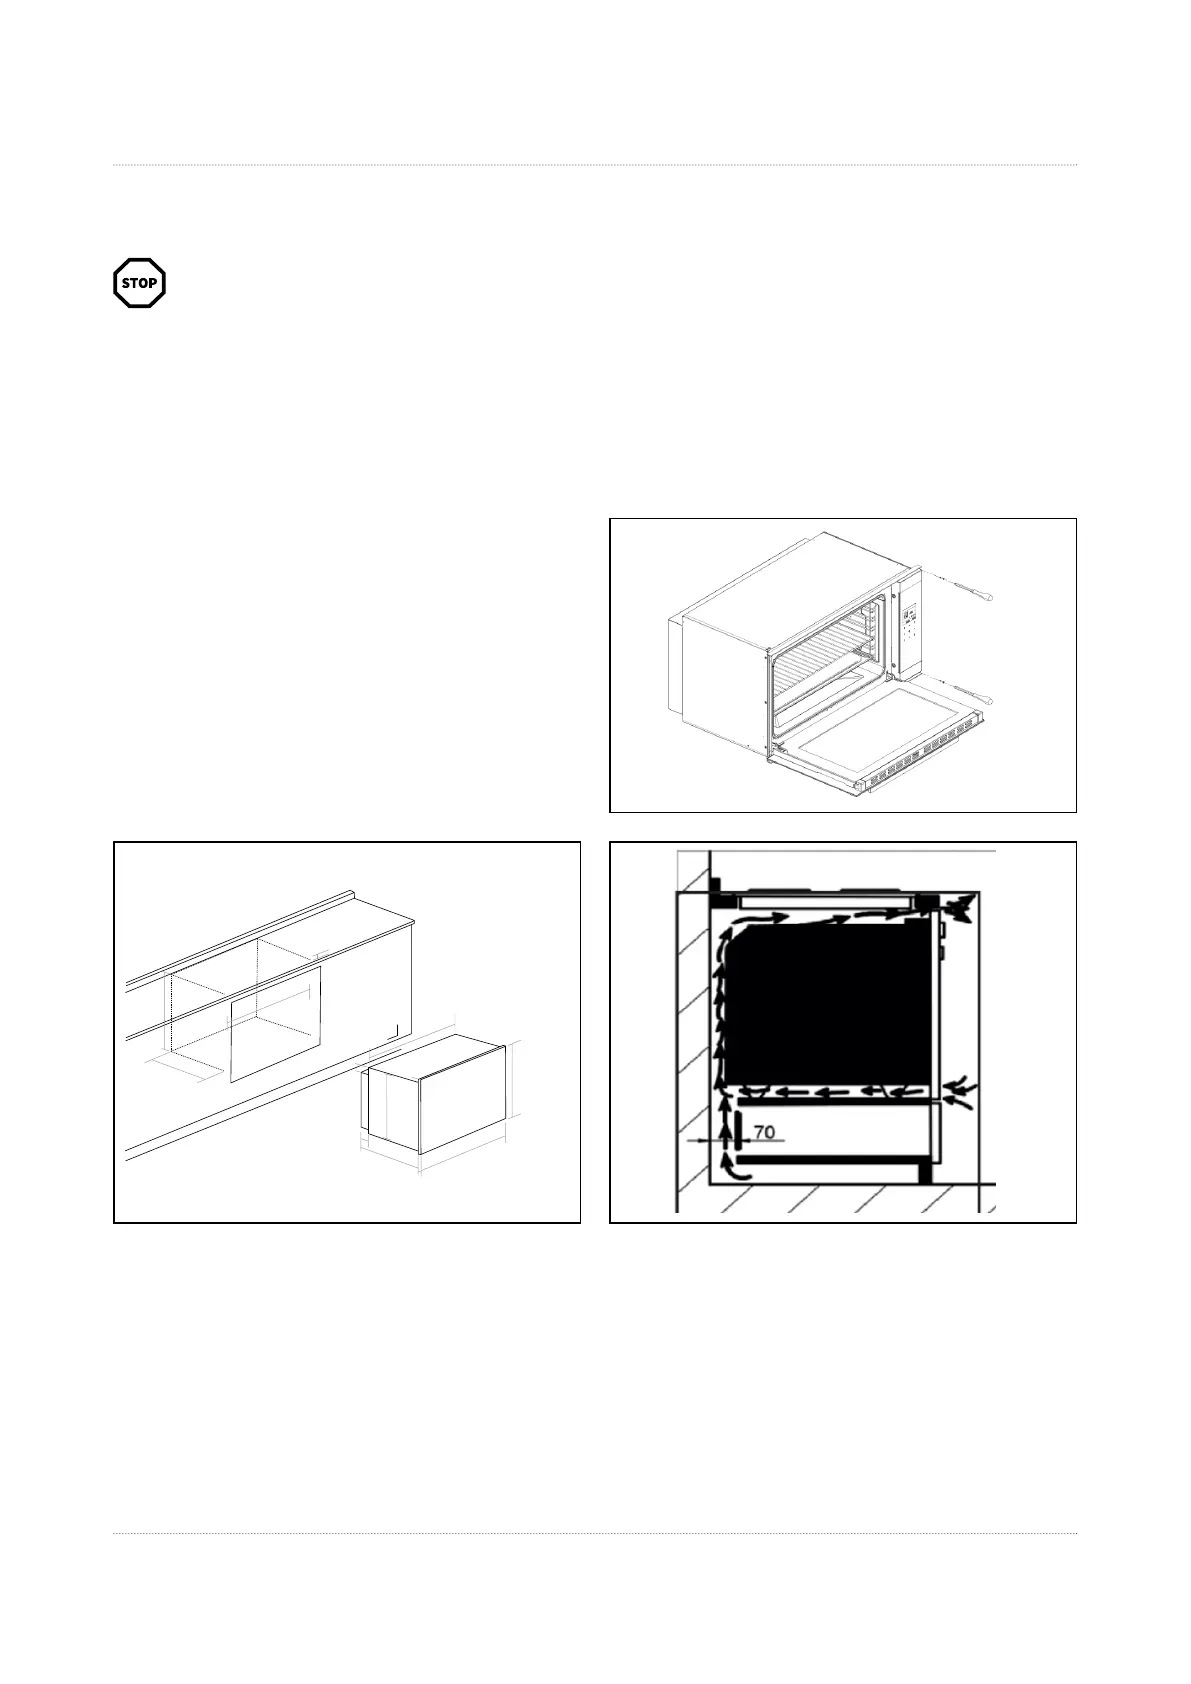
• Fit the appliance into its surround (beneath a work-top
or above another appliance) by inserting screws and
plastic covers into the 4 holes that can be seen in the
frame of the oven (g.1,A).
• For the most efcient air circulation, the oven should be
tted according to the dimensions shown in the instal-
lation sketch (g. 2). (For full dimensional drawings of
your oven to help with installation, please see section
„oven dimensions“.)
• The rear panel of the cabinet must be removed so that
air can circulate freely. The panel to which the oven is
tted should have a gap of at least 70 mm at the rear
for ventilation (g. 3).
For a built-in oven to work well the cabinet must be
of the right type:
• The panels of the adjoining furniture should be heat
resistant. Particularly when the adjoining furniture is
made of veneered wood, the adhesives should be able
to withstand a temperature of 120°C. Plastic materials
or adhesive which cannot withstand this temperature
will become deformed or unstuck.
• To comply with safety regulations, once the appliance
has been tted it should not be possible to make con-
tact with the electrical parts.
• All parts which offer protection should be xed in such
a way that they cannot be removed without the use of a
tool.
Important: Unplug your oven before performing
installation or maintenance!
Installation should be carried out according to the
instructions by a professionally qualied person.
The manufacturer declines all responsibility for any
damage to persons, animals or things due to a wrong
installation.
1
3 2
A
A
172mm
min. 550mm
860mm
min. 50mm
849mm
51.3mm
5.4mm
23.7mm
546mm
897mm
468mm
103mm
475mm
Duration End
C
°