37
EN
BEFORE FIRST USE
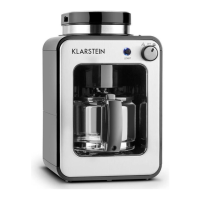
• Carefully unpack your machine and remove packing materials.
• Place the machine on a at surface and ensure steam vent (13) is not blocked by the
wall or any other material.
• Wipe the machine with a damp cloth to remove any dust.
• Push the lter holder button (Fig. 6), remove the GoldTone lter and the lter insert and
clean as described in chapter CARE AND CLEANING.
• Make sure the drip stop of the lter insert is working properly. The spring should
allow the drip stop to move up when pressed and automatically pop back out when
released. (Fig. 5)
• Remove the water tank from the machine and remove the charcoal lter holder.
• Rinse out the water tank for rst time use and ll the water tank to the 12 cups
marking. Place back onto the machine and press down to fully engage the base
valve.
• Remove the charcoal cartridge and measuring scoop from the carafe and wash the
carafe.
Note: The lter insert, GoldTone lter, the glass carafe and carafe lid are dishwasher
safe (upper rack, away from any heating element). Do not immerse the machine in
water or any other liquid.
Let some water brew through the machine without any coffee as follows:
1 Plug in machine and make sure the GoldTone lter and lter insert are in place.
2 Place dry carafe with lid in the machine.
Note: Never put wet carafe onto the heating plate! Always dry the carafe before
inserting back into the machine. When brewing, always have the carafe lid and bean
container lid securely in place.
3 Push the GROUND COFFEE button, then the BREW button (Fig. 2). The machine
starts processing the water into the carafe.
4 After all water has passed through, push the BREW button again to turn off
machine.
5 Empty carafe and dry.