ENGLISH
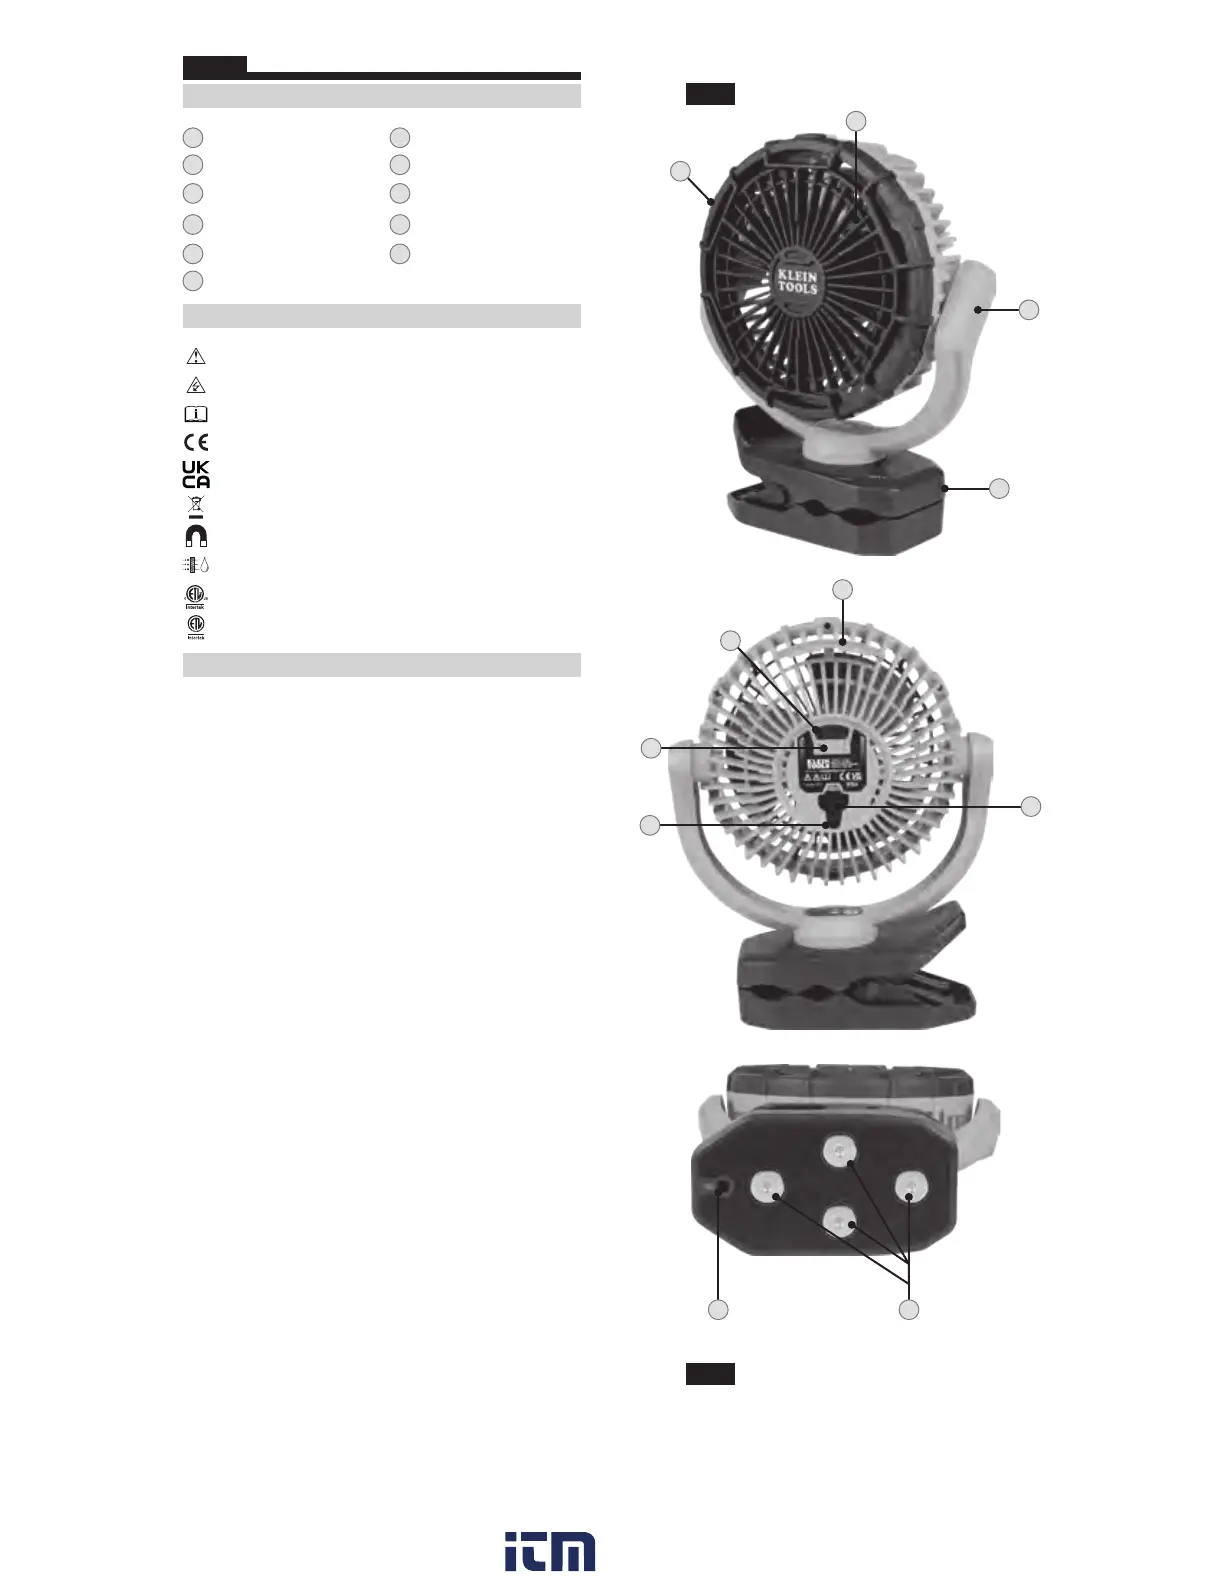
FEATURE DETAILS (FIG.A)
1
Fan blades
7
Battery status indicator
2
Fan cage
8
Charging port cover
3
Fan cage arms
9
USB-C input
4
Clamp
(with rubberized grip)
10
#10D Nail Hole
5
Handle
11
Magnets (x4)
6
Power button
SYMBOLS ON PRODUCT (FIG.B)
Warning or Caution
Risk of Electrical Shock
Read Instructions
Conforms with European Economic Area directives
Conforms with United Kingdom Conformity
Assessment Requirements
WEEE: Electronics disposal
Magnet
IP54 Ingress Protection Rating
Independently tested by Intertek and meets
applicable standards
Energy efciency veried
OPERATING INSTRUCTIONS
Read these instructions carefully before operating and keep for
future reference.
CHARGING BATTERY
•
Connect USB-C cable connection to the fan, plug the other
end of cable into USB (2.0 or higher) port, or AC adapter
(not included). USB adapter/power supply should not
exceed the specified charging voltage and current
(Max. 5.0V DC, 2.4A).
•
The battery level indicator bars will illuminate
(see TABLE 1 below):
•
4 bars solid (Red, Yellow, 2 Green solid): 100% charge
•
Red solid, yellow solid, one green solid: 75% to 99% charge
•
Red solid, yellow solid, one green blinking: 50% to 74% charge
•
Red solid, yellow blinking: 25% to 49% charge
•
Red blinking: 0% to 24% charge
•
A full charge could take up to 6 hours, depending on the
charger’s output. Charge completely before using. To
maximize battery life, see MAINTENANCE section (other side).
•
To check the battery level, press and hold the power button
for 5 seconds. The battery level will illuminate without
changing the speed of the fan
1
2
FIG. A
FIG. B
3
4
5
6
7
9
8
1110
w ww . . co m
information@itm.com1.800.561.8187
 Loading...