EasyManua.ls Logo

KLOCK WERKS Flare User Manual

KLOCK WERKS Flare
2 pages
To Next Page IconTo Next Page
Page #1 background imageLoading...
Page #1 background image
5. Use a plastic putty knife
or similar non-abrasive
tool, gently lift the nose of
the fairing off of the four
grommets in the lower
fairing.
6. Carefully remove front fairing
and set aside.
7. Use an 8mm wrench to loosen
the windshield mounting
screws and remove the stock
windshield.
3. Place a rag underneath
the mounting bolts to help
prevent them from falling
into the fairing.
8. Install your new Flare™
Windshield with the hardware
removed in step 7 and
torque fasteners to factory
specifications.
1. Remove mirror boots from
outer fairing.
2. Gently fold the mirrors
forward to expose the 6mm
fairing mount bolts.
4. Using a 10mm wrench,
remove the two mounting
bolts.
Reference your service manual for
proper windshield torque specs.
Over-tightening may crack windshield
material.
SEE PAGE 2 FOR VENT REPLACEMENT
FLARE™ WINDSHIELD FOR HONDA F6B
CUSTOMER COPY
- 10mm box end wrench
- 8mm nut driver or 8mm socket and ratchet
- plastic putty knife
TOOLS NEEDED FOR INSTALLATION:
Klock Werks Flare™ Windshield uses all of the
stock mounting hardware. Instructions lead you
through removing the stock shield and hardware,
and re-installing the Flare™.
NOTE:
KLOCK WERKS // GETKLOCKED.COM
Klock Werks cannot be held responsible for any damage resulting from improper installation performed by any consumer or their dealer.
QUESTIONS?
CALL: (605) 996.3700
info@getklocked.com
EMAIL:
Question and Answer IconNeed help?

Do you have a question about the KLOCK WERKS Flare and is the answer not in the manual?

KLOCK WERKS Flare Specifications

General IconGeneral
BrandKLOCK WERKS
ModelFlare
CategoryMotorcycle Accessories
LanguageEnglish

Summary

Windshield Installation

Preparation and Removal

Remove mirror boots, fold mirrors forward, and place a rag under mounting bolts.

Fairing and Windshield Removal

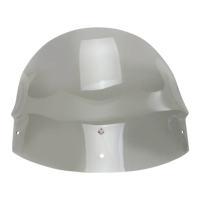
Remove the front fairing and then the stock windshield using specified tools.

New Windshield Installation

Install the new Flare™ Windshield with original hardware and torque fasteners.

Vent Replacement

Vent Disassembly and Removal

Remove fasteners and plastic tab to separate vent pieces from the windshield.

Vent Installation

Install the vent into the new Klock Werks windshield in reverse order.

Klock Werks Cleaning Products

Shine Werks

Recommended cleaner for Flare™ Windshield, cleans, shines, and protects surfaces.

Matte Werks

Cleans and protects matte and satin paint finishes without adding gloss.

Engine Werks

Water-based product to renew powder-coat finish on motors, deters dust and dirt.