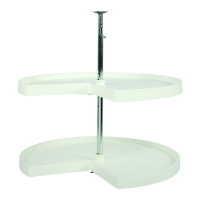
DOOR MOUNT POLYMER
LAZY SUSAN
Installation Instructions
KNAPE & VOGT MANUFACTURING COMPANY
P. O. Box 191, Muncie, IN 47308
0.899.6535 • 765.288.8730 • Fax 765.288.0851 • www.kv.com
RN-245EFS 04/03
Inspect all parts and read all instructions prior to beginning assembly and installation.
Parts Included
A. (2) Shelves F. (4) #10 x 1˝ Screws
B. Lower post G. (8) #8 x 1/2˝ Screws
C. Upper post H. (2) Bearing Hubs
D. Bottom Mounting I. (2) Bearing pins
Bracket
E. Clutch Mount
Assembly
Tools Required
• Phillips screwdriver with sharp #2 point
and 1/4˝ diameter shank. Note: a rounded
or broken point will make height
adjustment difficult or damage adjusting
screw.
• Drill with 1/8˝ and 1/16˝ diameter drill bits
• Pencil
Product Assemblies
PPN24 PPN28
Step 1 Hold Lower post (B) and locate height adjusting
screw in post raising assembly. To check that jack
base is properly located for future vertical
adjustment, loosen screw 1 turn. Leave the
screwdriver in the screw to use as a handle. Rotate
the jack base within the post to the right and to the
left. Stop the screw so that the jack base is in the
middle of the travel area and tighten 1 turn.
Step 2 Insert Bearing Hubs (H) into center area on the
underside of each of the Shelves (A). Note that the
key way on the side of the Bearing Hub must be
aligned with the key on the inside of the Shelf.
Step 3 Slide the Shelves onto the Lower post from the
bottom (post raising assembly end).
Step 4 Push one of the Bearing pins (I) into bottom slot in
pole and through the hole in post raising assembly,
then slide bottom shelf down over pin so that the
groove in the hub engages or captures the pin,
making sure the jack assembly remains inserted in
the lower post.
Step 5 Insert second Bearing pin (I) into one of the upper
holes in the Lower post to give desired shelf
separation. (Note: The second from the top pin hole
will give approximately 11 1/2˝ of clearance. This
should allow for enough room for items on Lower
Shelf). Slide Top Shelf down over the Bearing pin so
that the groove in the Bearing Hub engages or
captures the pin.
Step 6 Lay the cabinet door over a sawhorse or similar
workstand. Position shelves onto door as they
would be in the installed location. The bottom of
the face of lower shelf should be located 1-1/2˝
above the floor of the cabinet when the post raising
assembly is in the center of its range.
E
A
B
C
D
F
H
G
I
1
2
3
4 & 5