5.12
Section 5
Fuel System and Governor
5. Install the bowl gasket, fuel bowl, bowl retainer
gasket, and bowl screw/shut-off solenoid/power
screw, as equipped. Torque to: 5.1-6.2 N·m
(45-55 in. lb.).
High Altitude Operation
When operating the engine at altitudes of 1830 m
(6000 ft.) and above, the main fuel mixture tends to
get overrich. An overrich mixture can cause
conditions such as black, sooty exhaust smoke,
misfiring, loss of speed and power, poor fuel economy,
and poor or slow governor response.
To compensate for the effects of high altitude, a special
high altitude main fuel jet can be installed. High
altitude jets are sold in kits which include the jet and
necessary gaskets. Refer to the parts manual for the
engine being serviced for the correct kit number.
Fuel Shut-Off Solenoid
Some gasoline fueled engines are equipped with the
optional fuel shutoff solenoid which is installed in
place of the bowl retaining screw or main jet (power)
screw, to eliminate backfiring when the engine is shut
down. If backfiring occurs on engines equipped with
this solenoid, check the battery first to insure that it is
not discharged or faulty. A minimum of 7.3 volts D.C.
is required to activate the solenoid. Also check to see
that the ground lead from the carburetor body is
properly connected to the carburetor mounting stud
or the plated (silver) baffle screw. If these check out,
the solenoid should be removed for bench testing.
Remember to shut off fuel and catch any fuel spilling
from the carburetor as the solenoid is removed.
Below is a simple test made with the engine off that
can determine if the solenoid is functioning properly.
Use a separate switched 12 volt power supply to test.
1. Shut off the fuel and remove the solenoid from
the carburetor. When the solenoid is loosened and
removed, gas will leak out of the carburetor. Have
a container ready to catch the fuel.
2. Blow/clean off solenoid using clean, compressed
air.
CAUTION
Do this test away from any fuel/vapors to prevent an
accident.
3. Attach a jumper wire with alligator clips between
the solenoid black ground lead and the ground
lead/location of the switched 12 volt power
supply.
4. With the switched 12 volt power supply "off",
insert a 1/4 male spade terminal into the
terminal end of the red power lead. Connect the
exposed terminal to the positive (+) power
supply lead/connection.
5. Turn "on" the power supply. If the pin of the
solenoid retracts the solenoid is good. Perform
test (switch off-on), a minimum of 6 times to
verify operating performance.
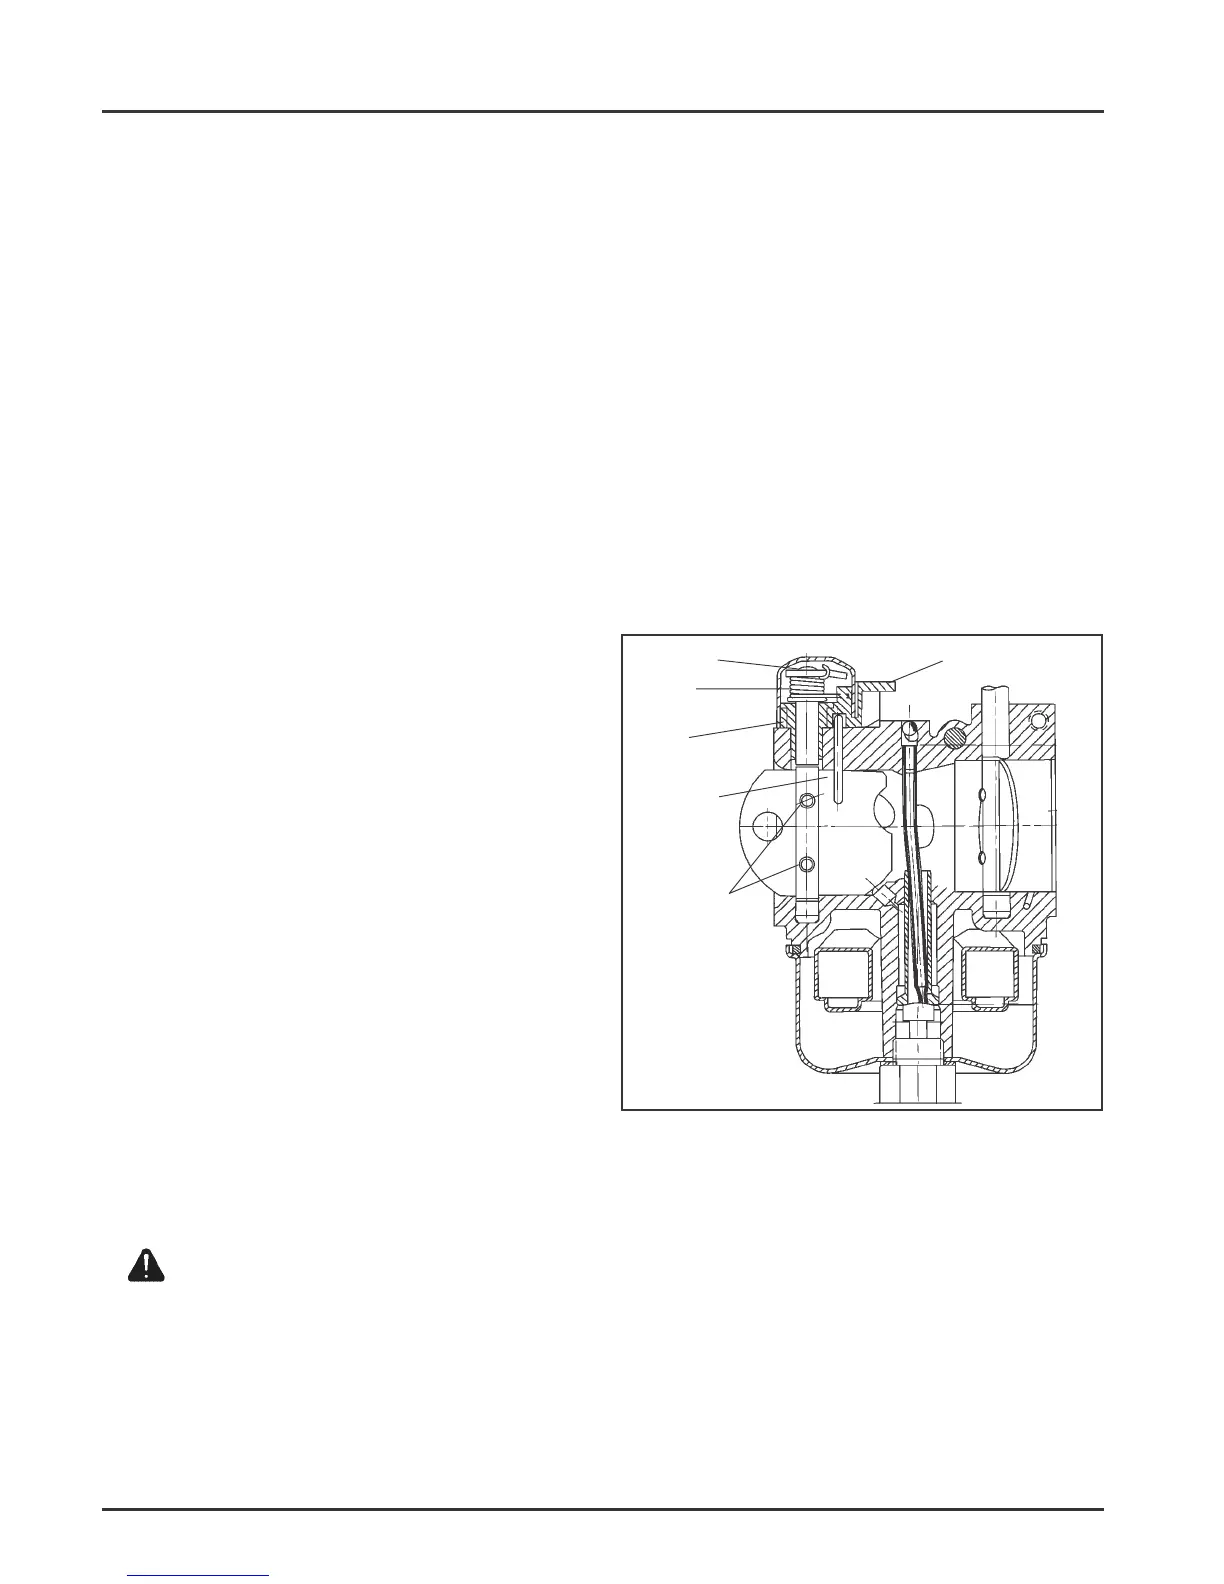
Self-Relieving Choke Service
On carburetors featuring the self-relieving choke, as
shown in cutaway of Figure 5-15, the choke plate is
secured to the choke shaft with two screws. On
carburetors without this feature, the choke plate fits
into a slot in the shaft. Use the following procedure to
replace the self-relieving choke components using
Choke Repair Kit No. 12 757 11 for gasoline
carburetors.
Figure 5-15. Cutaway View Showing Self-Relieving
Choke Carburetor.
Removing Old Parts
1. Remove the black dust cover. This cover snaps on
and off.
2. Remove and discard the two screws fastening
the choke plate to the choke shaft.
3. Remove and discard the choke plate and choke
shaft from the carburetor.
Choke Lever
Dust Cap
Spring
Brass
Bushing
Stop Pin
Choke Valve
Screw

 Loading...