46
Disassembly/Inspection and Service
KohlerEngines.com 14 690 12 Rev. --
Valve Seat Inserts
Hardened steel alloy intake and exhaust valve seat
inserts are press fi tted into cylinder head. Inserts are
not replaceable, but they can be reconditioned if not too
badly pitted or distorted. If seats are cracked or badly
warped, cylinder head should be replaced.
Recondition valve seat inserts following instructions
provided with valve seat cutter being used. Final cut
should be made with a 45° cutter as specifi ed for valve
seat angle. With proper 45° valve face angle, and valve
seat cut properly (44.5° as measured from center line
when cut 90°) this would result in desired 0.5° (1.0° full
cut) interference angle where maximum pressure occurs
on valve face and seat.
Lapping Valves
Reground or new valves must be lapped in, to provide
a good seal. Use a hand valve grinder with suction
cup for fi nal lapping. Lightly coat valve face with fi ne
grade of grinding compound, then rotate valve on seat
with grinder. Continue grinding until smooth surface is
obtained on seat and on valve face. Thoroughly clean
cylinder head in soap and hot water to remove all traces
of grinding compound. After drying cylinder head, apply
a light coating of engine oil to prevent rusting.
Intake Valve Stem Seal
Always use a new seal when valves are removed
from cylinder head. Seals should also be replaced if
deteriorated or damaged in any way. Never reuse an old
seal.
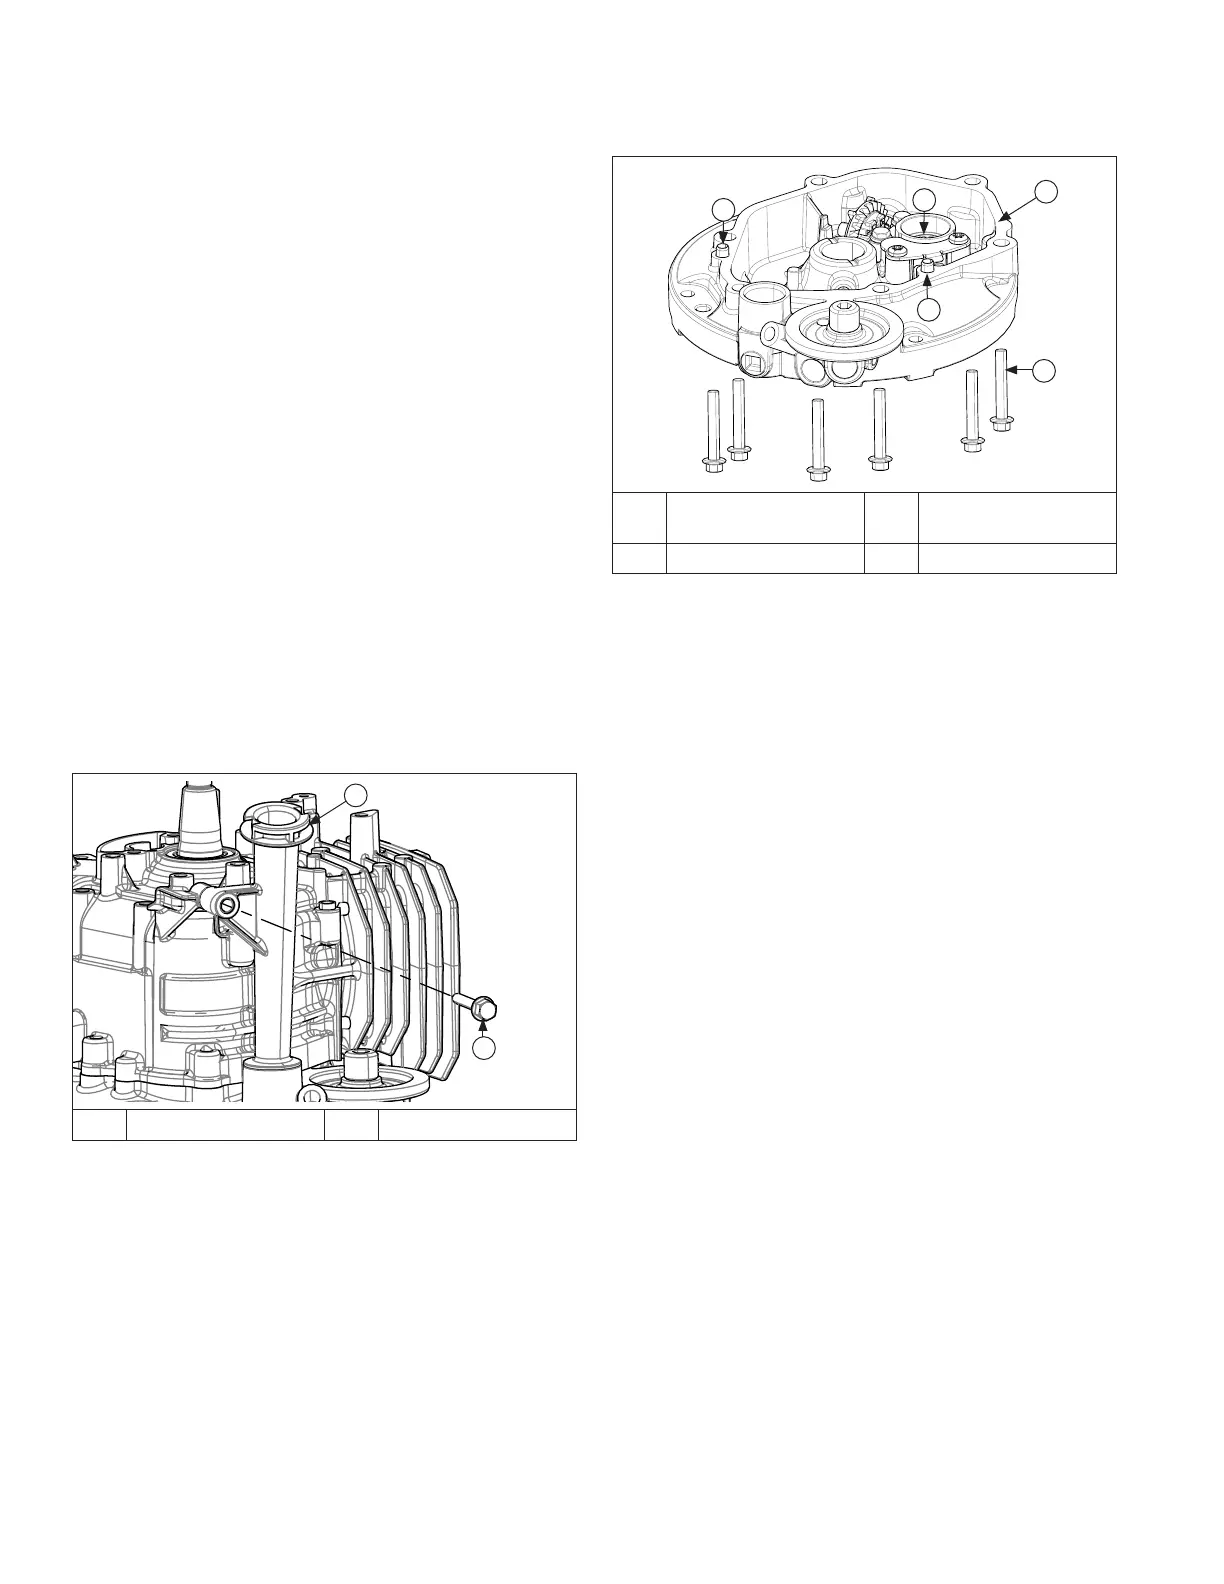
Remove Dipstick Tube
A
B
A Dipstick Tube B Screw
Remove screw securing dipstick tube to crankcase;
remove tube.
Remove Oil Pan Assembly
A
D
C
C
B
A Oil Pan Assembly B
Gerotor Oil Pump
Assembly
C Dowel Pin D Screw
NOTE: Oil pan is sealed to crankcase using RTV
silicone sealant. When removing oil pan, use
care to not damage sealing surface of
crankcase.
1. Remove screws securing oil pan to crankcase.
2. Using a fl at blade screwdriver as a wedge, carefully
separate oil pan from crankcase. Note location of
gerotor oil pump assembly is when oil pan is
removed. Because engine is inverted to remove pan,
gerotors may be on camshaft or in oil pan.
Inspection
Inspect oil seal in oil pan and remove it if it is worn
or damaged. Refer to Install Oil Pan Oil Seal in
Reassembly for new oil seal installation.
 Loading...